When an illustrator file gets very cluttered and I want to modify a single object I mark all (cmd+a) deselect the object I want to work with with shift+clicking it and then lock all the other items (cmd+2). When I’m done editing it I unlock everything with alt+cmd+2 and can continue working.
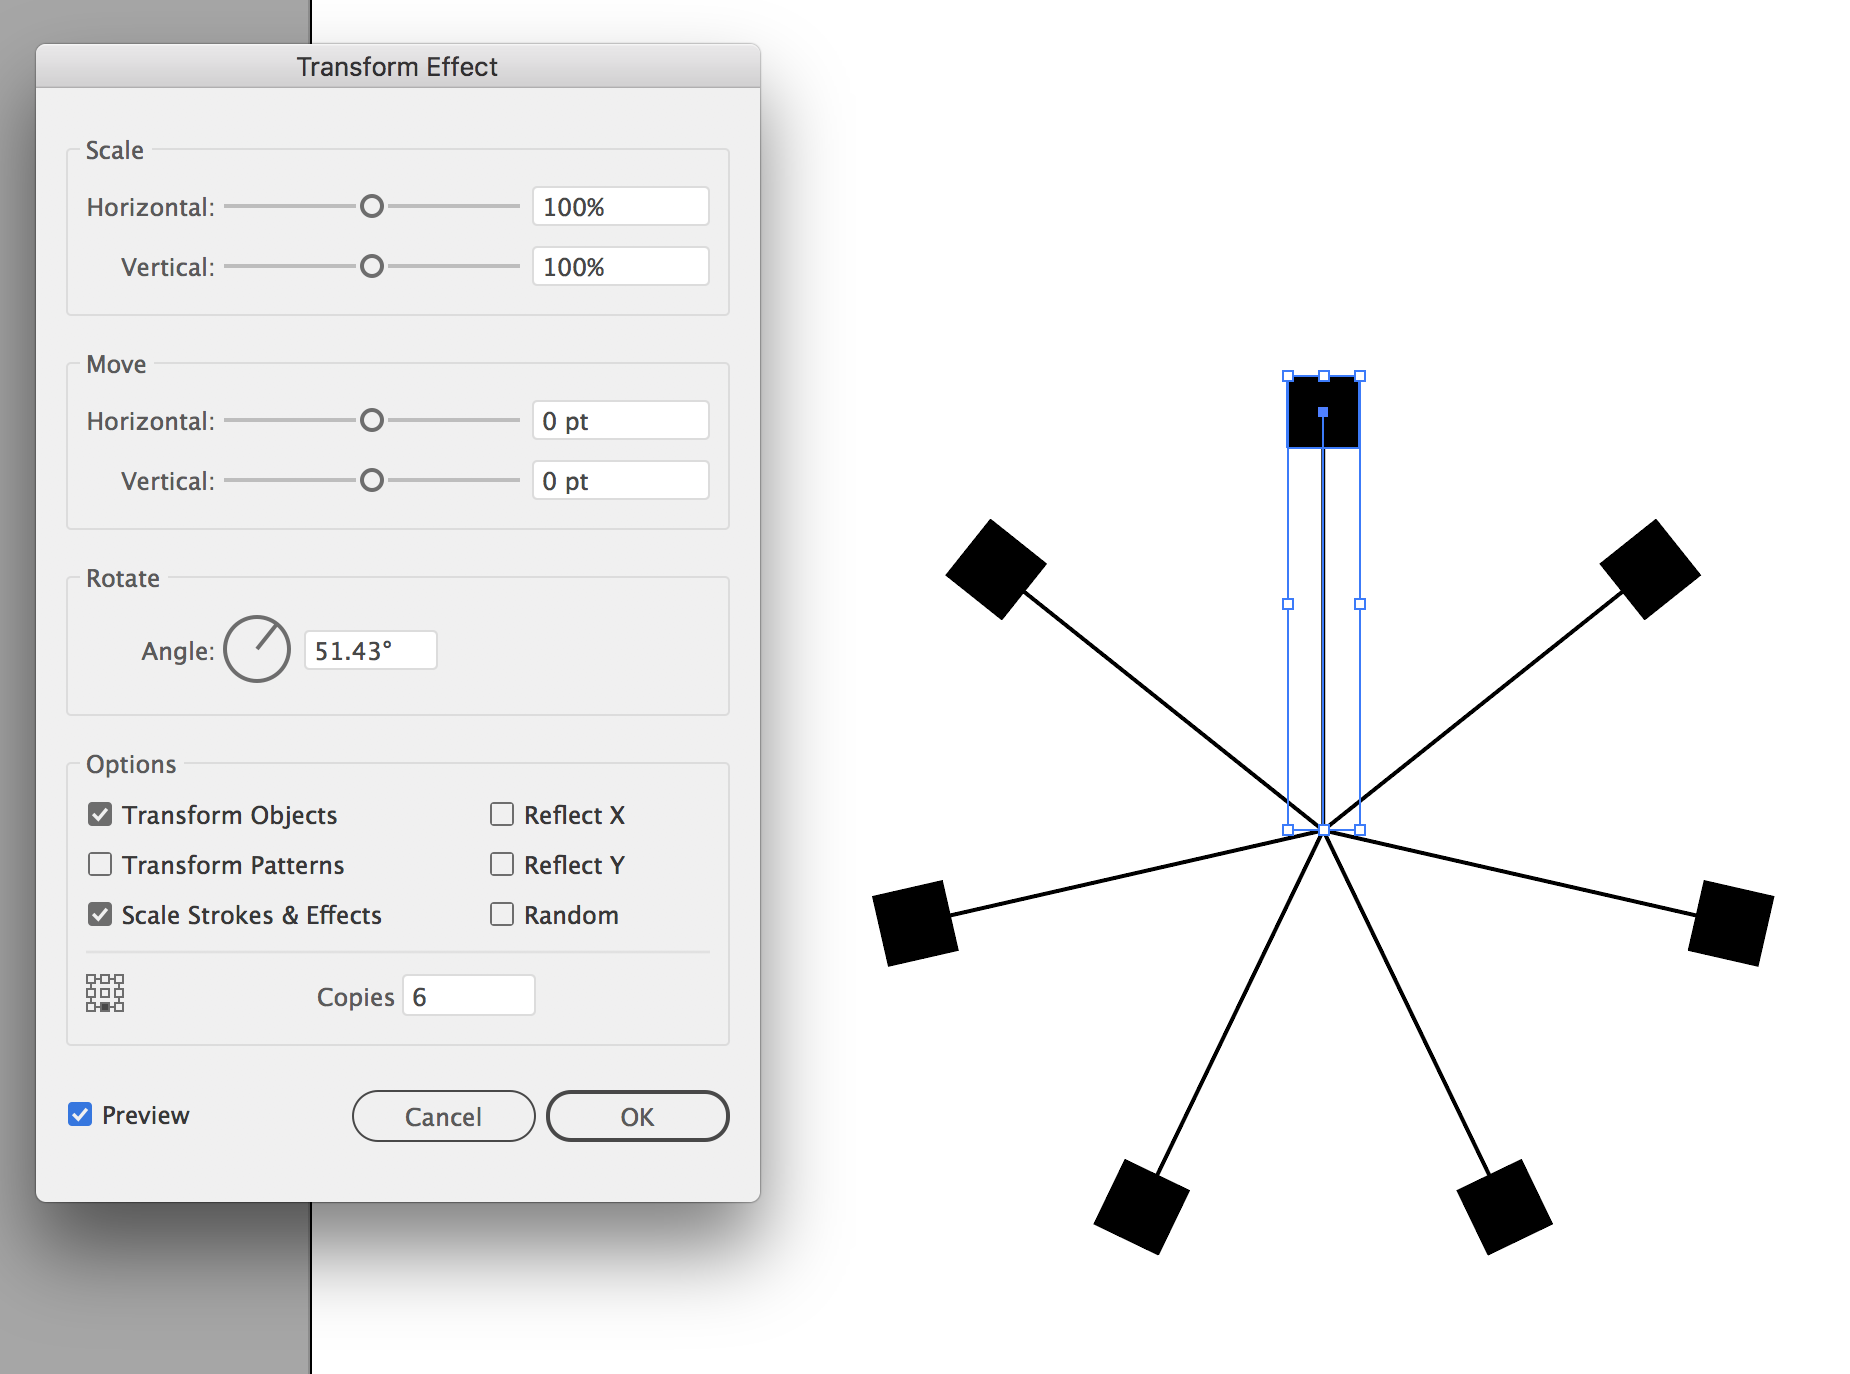
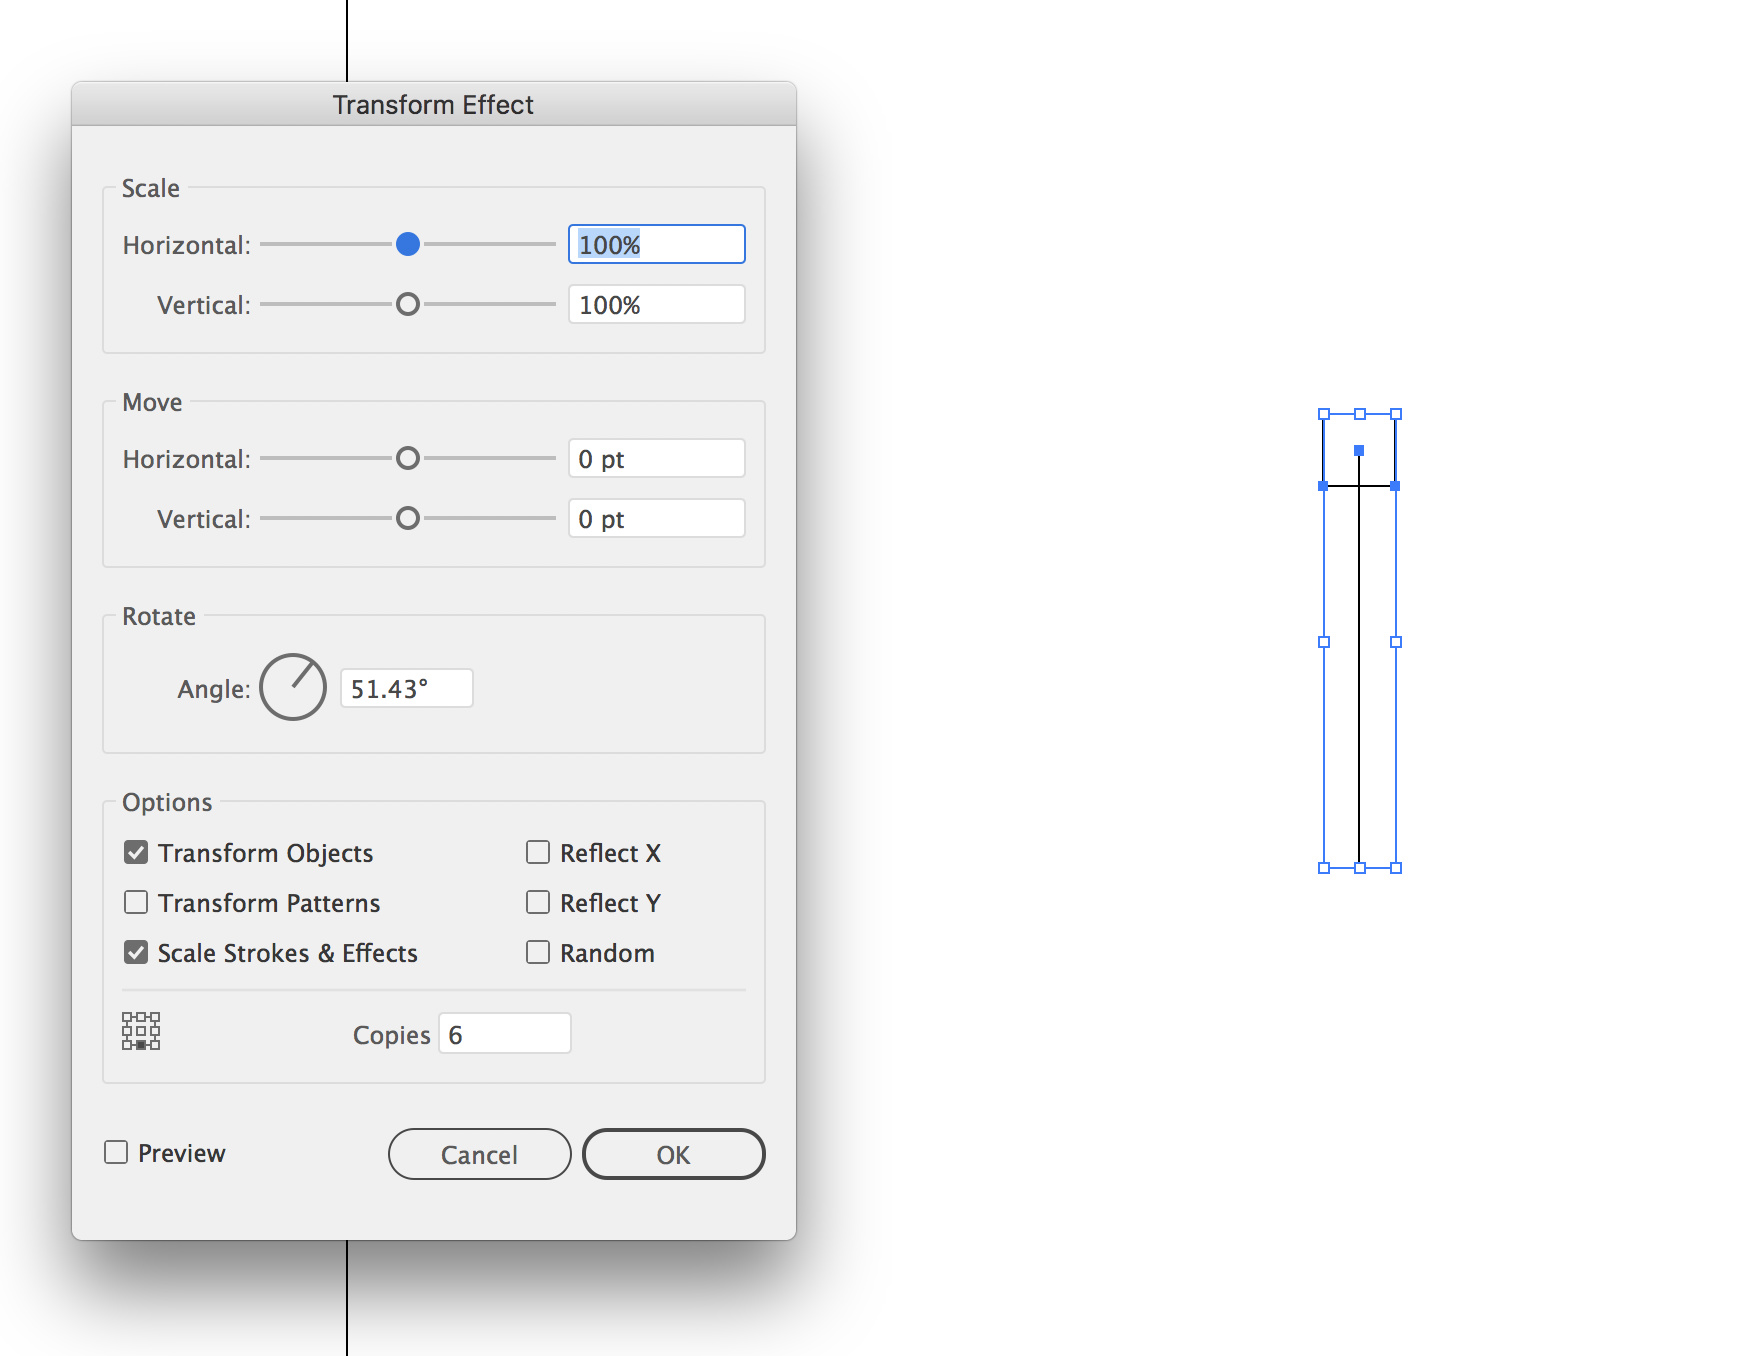
Another neat illustrator trick when I want to rotate objects around a centerpoint a number of times undividable by 4 is to make a star object with the desired number of corners and set one of the radi to 0. you can then use the center to place your rotation point and the resulting lines as guides.
you can also easily replicate that using the appearance palette by drawing one line and one box. Group them and in the appearance palette apply a distort and transform effect. That way if you change one “spoke” they all change.
no problem. To get the right angle, in this case to rotate it 7 times, I typed 360/7 in the angle field and let Illustrator do the math for me. Then the other “trick” is to remember if you need 7 “spokes”, you already have one, so the number of copies is one less than what your finished count it. Just remember to expand to finalize it, but keep an editable version around as well.
You cannot alter text in a flattened Photoshop file. At least not unless you are reeeeeally good with the clone tool and the image makes it easy to do.
If you anticipate changing text in an image, a layout program such as InDesign, or Illustrator may be in order. Place the photo in either of those and do the text over the photo. Remember though, Illustrator is NOT a multi-page layout tool. If you anticipate more than one front and one back, use Indesign.
I saw this on an old InDesign Secrets blog by Mike Rankin. Credit where it’s due, this is gold.
Customise Placeholder text - Lorem Ipsum is OK but can get old. Simply place a .txt file in your InDesign folder called ‘Placeholder.txt’. It can be anything you like. You don’t even need to restart InDesign.
When you need Lorem Ipsum back, just remove the file (or rename it) from the InDesign folder.
Each piece fo software in the Creative Suite serves a purpose. Yes, there can be some crossover, but overall you’re doing yourself a disservice trying to have one piece of software be a “do all, end all” for design.
Photoshop is great for working with photos or, perhaps, making basic online banner ads or working with illustrations.
However, it’s definitely not a general design tool that can substitute for other, more appropriate, applications, like InDesign or Illustrator. Most of us could probably list at least a dozen important reasons why that’s the case from output resolution to working with blocks of text, but it’s probably not worth the time listing them since I’m not even sure you’re serious.
The most common wave effect in pop art, the ai software is very quick and easy to make, you only need to draw a black and white gradient shape first, and then click [Effect]-[From this]-[Color in the menu bar Halftone], adjust the values of channels 1, 2, 3, 4 to be consistent, and you are done.
I’m not sure my workplace has ever been asked to design a book. My colleague has had to do quite a lot of research into the rules of book design.
It was neat to see how InDesign can index areas of the book no matter if the text shifts to another page.
There was of course, but in case some don’t know, constant merged text boxes to push text into the following
My colleague even accidentally found rouge text (probably hundreds of lines) pasted within the text box but almost entirely hidden. The easy solution was shift + ctrl + end (pc) which highlights all text from your marker to the end of all of the text. Then he clicked delete so his text box no longer showed hidden text.
My last cool thing is recently I learned InDesign can generate QR Codes! Basically if you know how to do a data merge then a lot of things are possible. We had almost 2,000 records in excel, gave them personalized ID codes, assigned the code to a url with the ID concatenated to it, saved it as a text field, and data merged the file into InDesign. Poof! Every record gets their own personalized QR Code because technically each url is different.
Just a note on setting columns and how you use them. In wide format we often have to add bleed, which means adjusting the size of the artboard, which means the columns shift, which means anything tied to those column settings shifts too. (yes I know how to ‘fix’ it, but not everyone is as diligent.)
Be darned sure you know your output requirements before you do that. Especially when working toward a medium with which you are unfamiliar.
That should go without saying, but these days, with the attitude “I made this look nice in whatever way I did it,” only makes me up my file prep fees.