Got it, thank you for your advice!
Read with interest so here’s my take
You’re right to be cautious here truck wraps are very much a “measure twice, cut once” situation. The safest starting point is always a proper template from the wrap company or a supplier, because no two box trucks are ever exactly alike. Even with flat panels, things like door seams, rivets, hinges, locks and handles can throw a design off if you don’t plan for them.
If a template isn’t available, get your client to provide exact make, model, year and body type, and then ask for photos from every angle. On top of that, have them measure all the panels and any hardware locations. A good trick is to mark up a photo with dimension lines so the client knows exactly what to measure.
In Illustrator, yes, you’ll usually set up a flat artboard for each panel. But don’t just design straight onto that. Create a hidden non-printing layer where you map out all the “nooks and crannies” door seams, handles, rivet lines, hinges etc. That way you have a permanent visual reference while you design, but it won’t interfere with the final print file. It also makes it much easier if the installer asks about placement later.
Always give generous bleed, 4–6 inches is typical on vehicle wraps, and avoid placing critical text or small details near edges, seams or moving parts. Wrap vinyl stretches and installers need wiggle room, so what looks precise on screen can shift in real life - especially designing at scale - if 1/10th the scale then half an inch out looks small but when scaled up is massive.
One more tip: over-communicate with the installer. They’ll know what tolerances they need and whether certain hardware should be wrapped, avoided or cut around. Think of it as a three-way collaboration between you, the client, and the wrap company. If you keep everything documented in that master template (with visible and hidden layers for guidance), you’ll be on much safer ground.
1 Like
Understood, thanks so much for your detail explanation. Really appreciate it!
Quick update: this is just for the box wrap design—no cab.
A question : What’s a typical, industry-standard set of deliverables I should prepare for the printer/wrap installer? I’m thinking AI (Adobe Illustrator) files plus PDFs with crop marks, one file for each side (e.g., rear_view.pdf, rear_view.ai, etc.).
I know I should’ve asked the installer, but I can’t contact them directly. I asked my client if the installer had specific requirements for file format, bleed, etc., but the only reply I got was: “The printer said they will adjust the design themselves. I guess we only need .psd and .ai files, along with PNGs.”
I’m not sure if that’s just his guess or if the printer actually told him to supply PSD and AI files (which seems unlikely—it’s usually one or the other).
For a box truck you’ll supply the printer with a file for each side: Driver side, Passenger side, Rear, and (front, if needed)…
The printer can add bleed on their end (RIP software will accomplish this).
They can use AI, PDF files for best results.
Make sure any fonts are outlined and images are embedded in the files.
It’s probably better to add six inches of bleed on all four sides rather than leaving to the printer.
2 Likes
Thank you Danny
1 Like
Thanks Just-B, yes I agree
Another question : When I tried exporting the pdf at actual size, Illustrator showed the message: “The dimension of this page is out of range.” I assume it’s common practice to scale large designs down.
How much should I scale it down, and should I note somewhere in the file (such as in the layer name or artboard name) that it’s a scaled version? Or should the client just inform the printer directly?
Also, I’m currently designing at actual size with 150 DPI. If I scale it down, should I increase it to 300 DPI or another resolution?
Always it is better to increase the designs to 300 DPI as the minimum (This is what I learned myself working with my own designs).
I usually scale down to 1/20th in Illustrator.
You should have been designing at scale to begin with, not scaling down after the design is finished. Absolutely, designing at scale is a must for large-format work.
Resolution is always relative to placement size. For example, if you have a 300 ppi image and scale it down to 20%, the effective resolution jumps to about 1500 ppi. Scale it back up to 100% and it goes back to the native 300 ppi.
But 300 ppi at full size for a truck wrap is way beyond what’s needed. For wraps and other large prints, you’re usually looking at 72–150 ppi at final size, which is more than enough because they’re viewed from several metres away.
1 Like
Yes, you’re correct; I should have started with a scaled-down version.
After some thought, I’ll scale it down to 1/10 to make decimal conversions easier. Now, if I scale it down, do I still need to include the 1/10 bleed guide (the red rectangle that appears when we set the bleed in the document to indicate the bleed area) in my Illustrator file? I mean, the bleed size in the scaled-down version will be different from the actual 6" bleed—will that be confusing for the printer? I suppose not, since they’re experienced, but I just want to make sure.
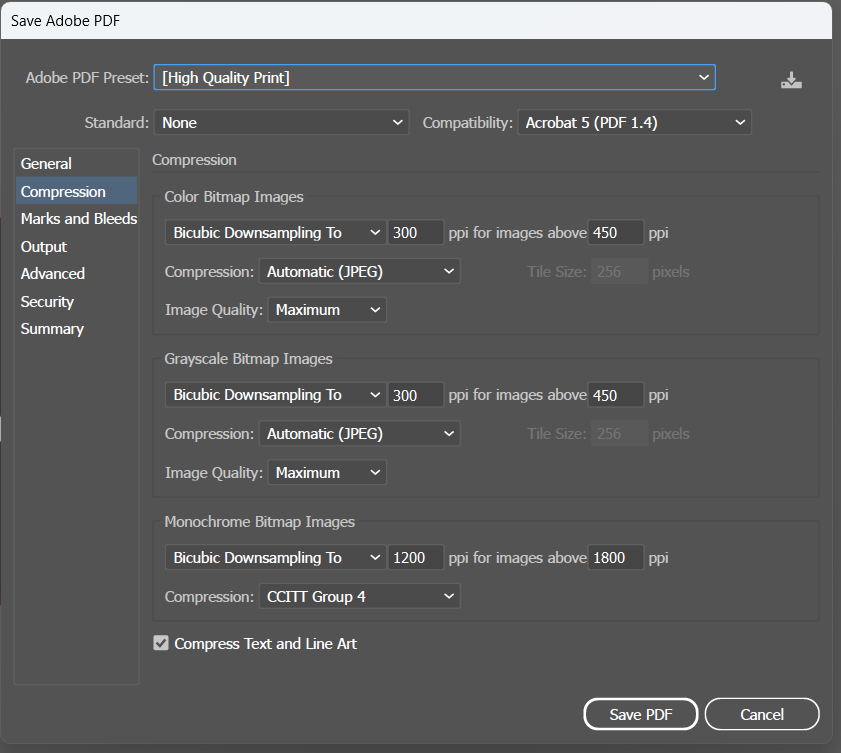
Another question: should I leave this setting as it is?
To my knowledge, those downsampling only affects images, right? If everything in my design is vector, will these settings have any effect? I suppose it won’t affect vectors at all, but I just want to make sure.
I wouldn’t compress anything - leave off the compression in my view.
Bleed - yes reduce it to the same scale as the rest - when it’s scaled up it will be the correct bleed.
You mean I should unchecked the ‘compress text and line art’ at the bottom, shouldn’t I? (I just noticed it’s checked by default lol).
Thanks for your help. I am going to prepare the final deliverables and send them over shortly
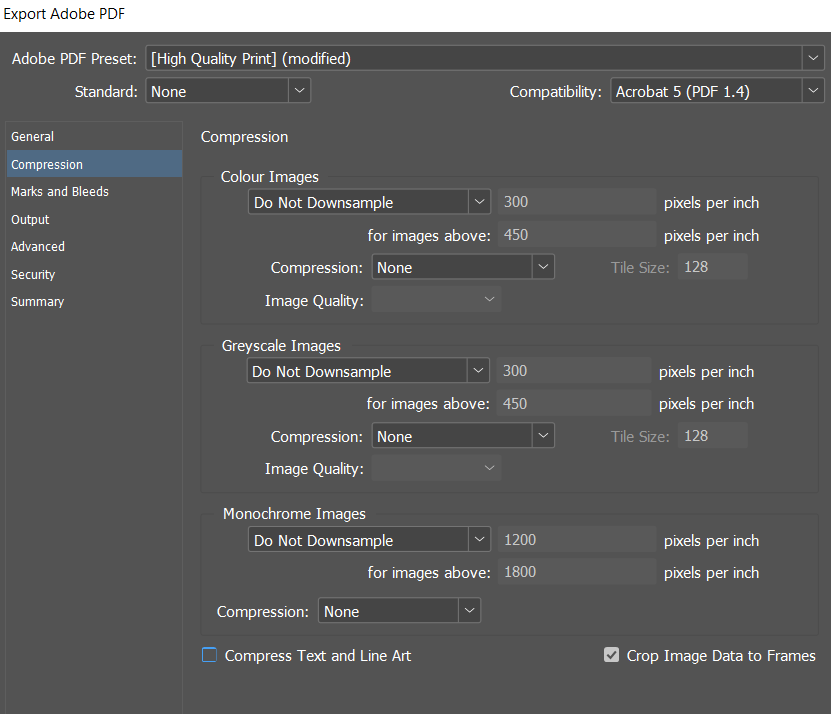
Oh, I rarely adjust this setting when exporting to PDF, so I forgot that we can choose ‘Do Not Downsample’
Thanks again
Well that’s what I usually do.
Think about it - it’s only going to downsample images over 450 down to 300.
Technically you might want to do this - so that setting should be
images above 301
downsample to 300
But if you’re at 10% then when it’s scaled up it’s going to be 30ppi.
And that would be all for your images that are 450 or above.
but if you don’t downsample and one of your images at 10% is 600 ppi
Then it will be 60ppi at print.
Yes, I typically worked on smaller-size prints that didn’t exceed 300 ppi, so I rarely adjusted this compression setting. Anyway, I’m not entirely sure, but I think that downsampling only applies to raster images and not to vectors.
I’ve sent the files to my client without any downsampling. Hopefully, everything goes well.