The industry changed so much even in the few years I was learning. We went from using a manual process camera to a film setter, then to a plate setter, and before we knew it, digital processes started replacing analogue ones. What I learned in four years was already becoming obsolete by the time I finished the course. The industry moves fast.
My Inner Dialogue—Enjoy:
When I started, I was told straight up if I didn’t know how to do everything by year two, I wouldn’t be kept on at the print company. The government-backed apprenticeship programme was officially four years, like all apprenticeships in my country at the time, but in reality, the learning curve was steep, and expectations were high.
I worked while going to college, and the curriculum wasn’t just about design. It covered everything plate making, drum scanning, illustration, photography, and using process cameras. Prepress was hands-on, and understanding the technical side was just as important as design theory.
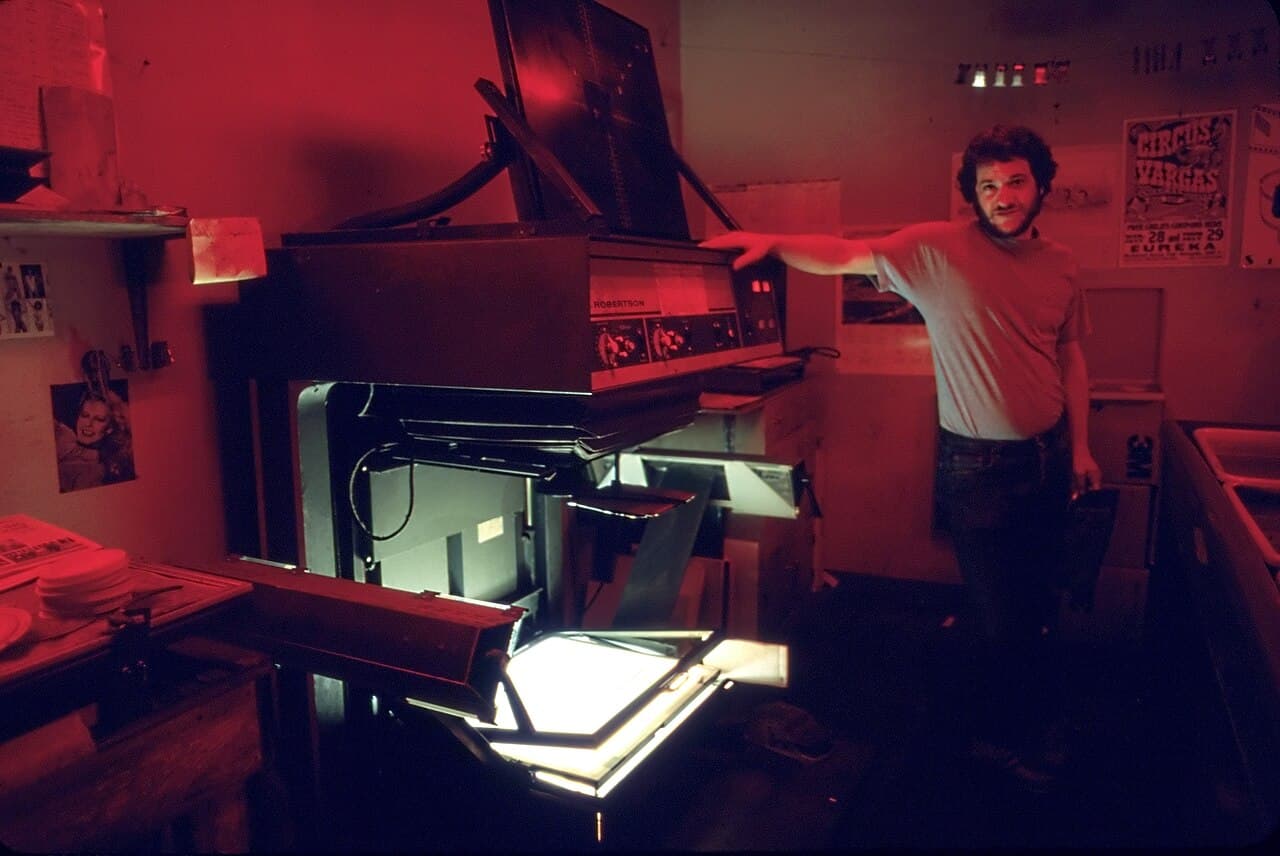
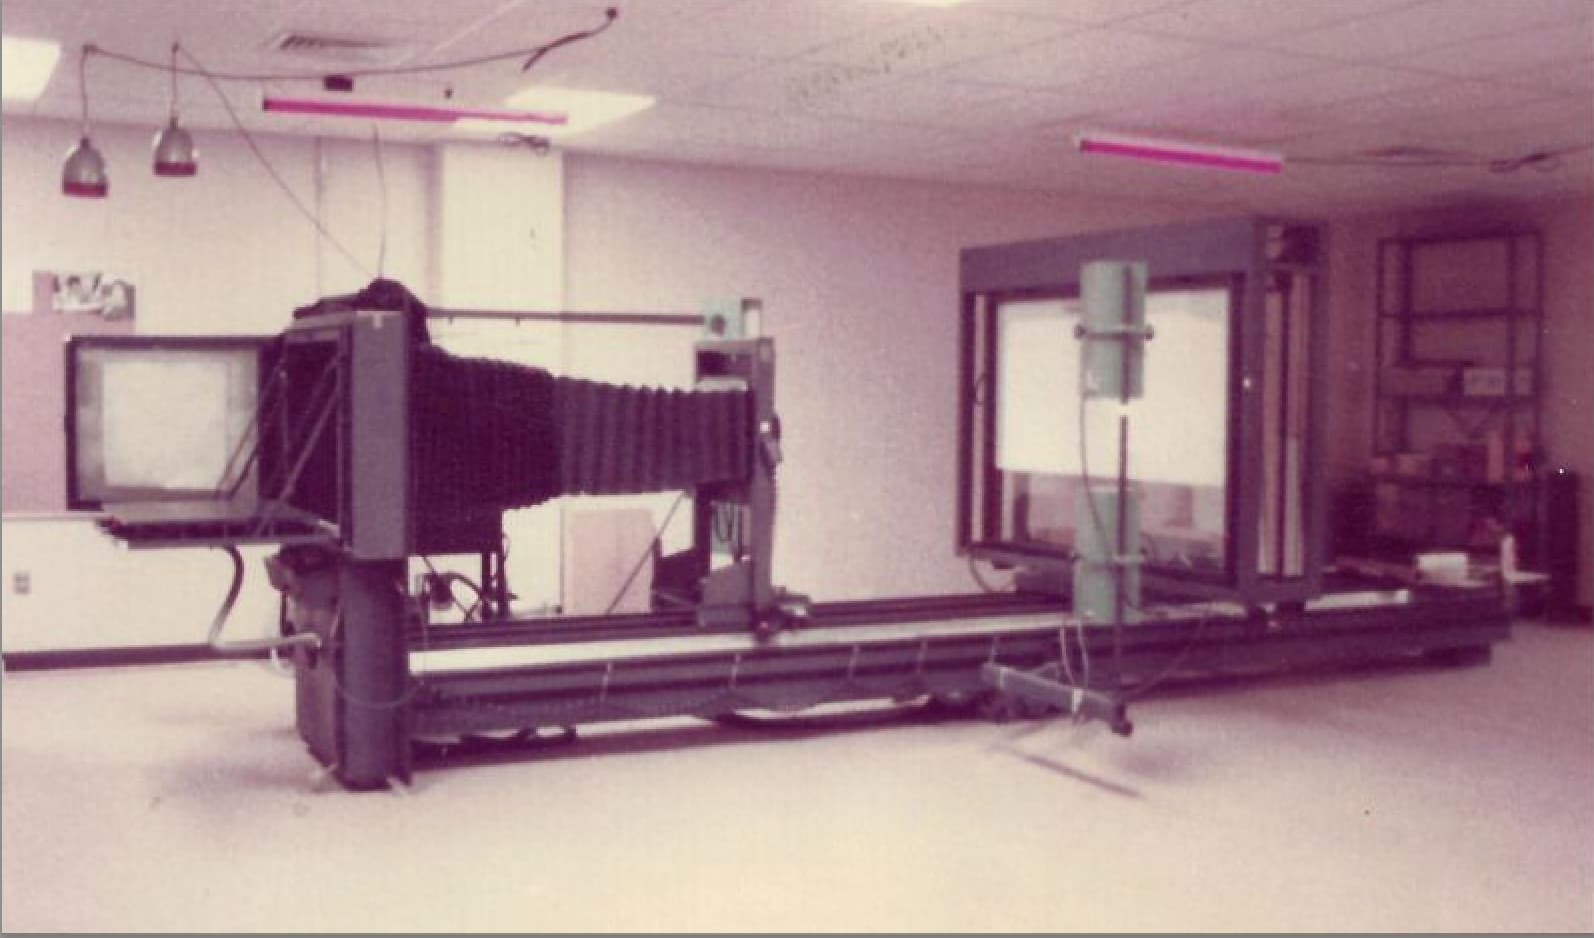
This is a process camera in a darkroom every prepress department had one back then (not me in the photo).
Back then, learning prepress wasn’t just about clicking around in software. It was a full-on dive into the entire printing process. You had to understand how everything worked, from halftone dots and plate making to colour separations and the chemistry of developing film.
For example, we had to learn halftone theory, how tiny dots arranged in patterns could simulate different tones in an image. You had to know about dot gain (how much those dots would spread when printed), screen angles, line screen frequencies, all things that could make or break a print job.
Oh, and when I started (IMAGINE THIS) the internet wasn’t even a thing. Well, it existed, but we didn’t have it at work. I started my apprenticeship in 2000, and by 2004, only the estimators and sales team had email access. There was no learning about digital design, web, apps, or UX/UI. Back then, if you were learning design, you were learning it for print.
And that’s where prepress came in. Designers could make something look great on screen, but that didn’t mean it would work in print. We were the ones who stripped artwork apart and rebuilt it properly so it would print the way it was supposed to.
Courses and apprenticeships back then covered a ridiculous amount of ground. It wasn’t just about making things look good you had to know the technical side and how to physically produce a job.
We used process cameras in darkrooms to make large negatives or positives for printing plates. Operating those cameras meant knowing how to handle light, exposure times, and the chemical developing process.
Then there were drum scanners for scanning images at high resolutions, film processors to develop the negatives, and RIPs (Raster Image Processors) to convert artwork into something a plate setter could understand.
For example, we had an art gallery want to make a catalogue. They had to get a photographer to take a picture and make photographic transparency - also known as a reversal film or positive film - and the industry called them ‘trannys’ (not sure they could still call them that these days YIKES!
I’d take those ‘trannys’ and mount them on the drum scanner, and they had to be meticulously scanned and colour corrected, this meant the Art Gallery had to bring the Art to the printing company in a specially controlled room for light conditions, so that the image could be colour corrected - and let me tell you, security was HIGH that day.
But these days there would be no need for any of this - a digital photographer would go into the galery, create their own light conditions, photograph and colour correct on the laptop there and then. Process got easier, no need for drum scanners or anything I mentioned.
Platemaking which is now done CTP (computer to plate) no human interaction required (mostly) - and more recently CTD (computer to drum) - directly to the printing press - so even less human intervention. And of course digital printing negates platemaking altogether.
Platemaking was a step-by-step process:
Prepare the metal or polyester plate
Coat it with a light-sensitive emulsion
Expose it to UV light through a film negative or positive
Develop the plate to reveal the image areas
Apply gum arabic to protect the non-image areas
Rinse and dry the plate
Punch the plate for grip on the printing machine
Mount it onto the press for printing
It was all very manual, and you had to know what you were doing.
As digital took over, the workflow became less about film, plates, and darkrooms, and more about computers, PDFs, and colour management software. But even though the tools changed, the need for technical knowledge hasn’t gone away.
Today, prepress is all about digital file prep, colour management, and automation. Designers focus on digital publishing and creating for multiple formats, print, web, mobile, social media. It’s more about file formats, resolutions, and ensuring designs look good across screens and printed materials.
But here’s the thing while software has automated a lot of the old-school processes, it hasn’t replaced understanding them. A bad design file is still a bad design file, and if you don’t know how print works, your work is going to cause problems.
Back then, you had to understand halftone dots, dot gain, trapping, overprinting, and how inks physically behaved on press. You worked with film and chemicals, stripping artwork by hand.
Now, it’s more about ensuring digital files are correct resolution, colour modes, bleeds, and file formats. A lot of the hands-on, tactile learning is gone, but the core principle remains you need to know how to make something work.
The industry has changed, but prepress is still the bridge between design and print. The tools are different, but the goal is the same, get the best possible result on press.
So I guess with all the mechanical guff basically gone - you can learn it more quickly.