Hello, I try to create 2 gears - one big and one smaller and the purpose is (after laser cutting) when one of the gears rotates, to move/rotate the other. So, in my opinion the teeth of the two gears have to be the same shape and the same size. The bigger gear will have more teeth than the smaller gear but the shape and size of the teeth of both gears in my opinion have to be the same.
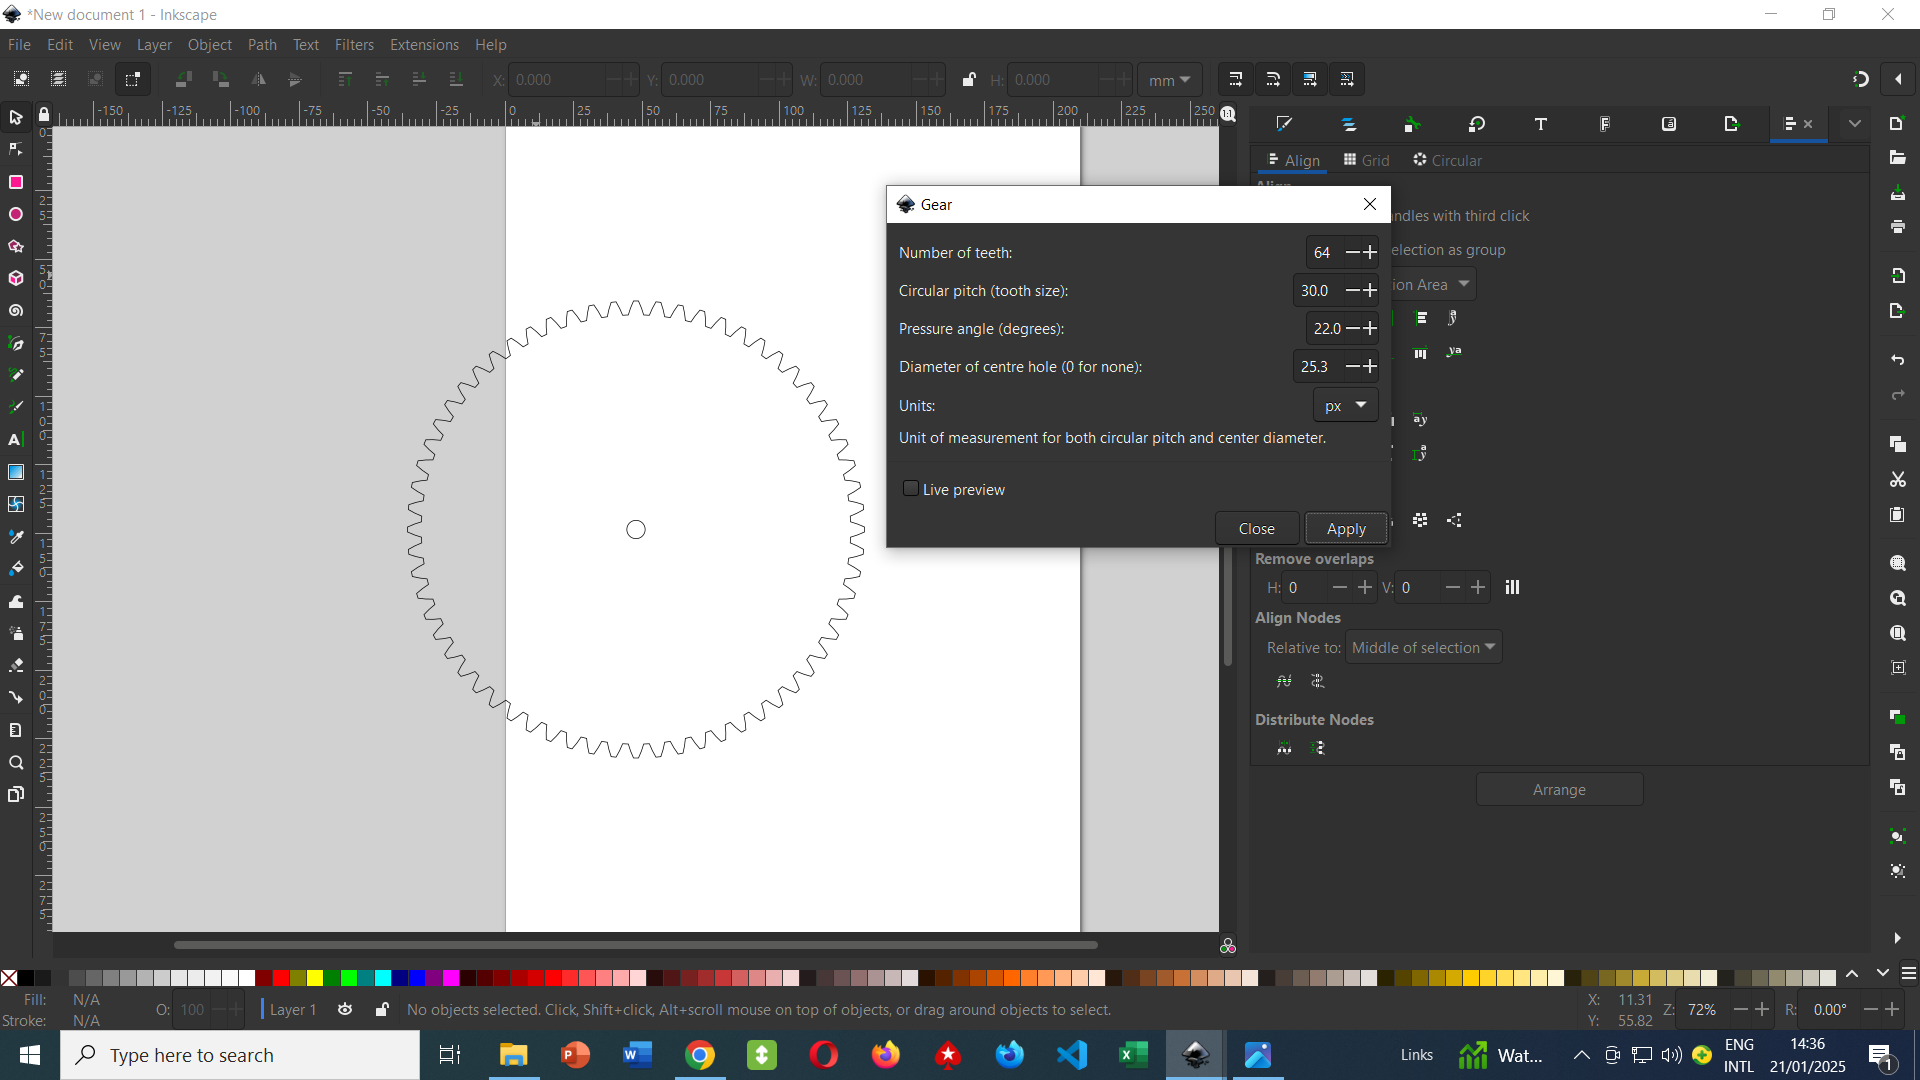
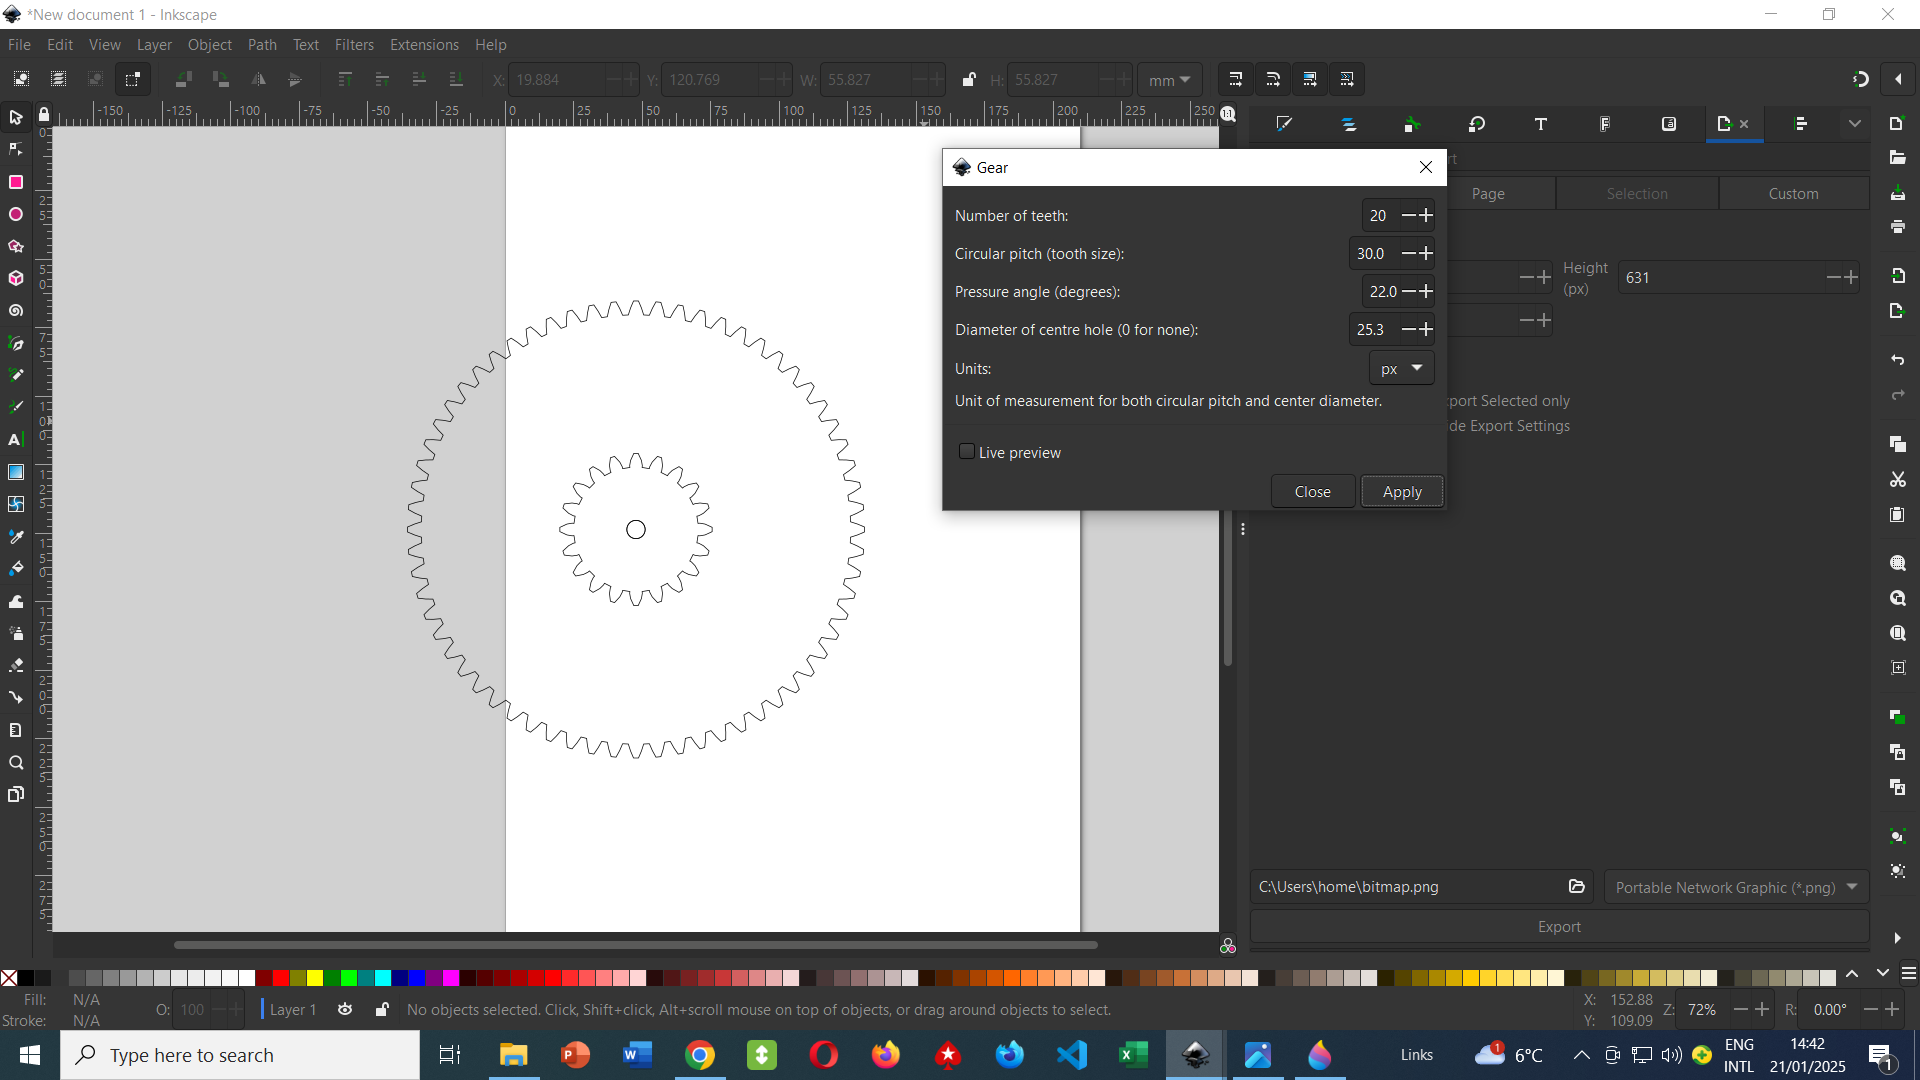
I tried this: Extensions → Render → Gear ->Gear… . And I entered the values shown in the screenshot 1.png. Then I only changed the number of teeth to 20, this is 2.png (the inner gear) and you can see that the teeth of the smaller gear are not exactly the same as the teeth of the bigger one. I then made exactly the same but the number of teeth is set to 12, this is 3.png. You can see that the shape of teeth is considerably different compared to the biggest gear. I am not sure that if I laser cut this shapes (and the gears are real objects made from wood or plastic ,etc) , rotating the smallest gear will be able to rotate the biggest gear because of not exact coincidence of the teeth. Also, I tried a lot more changes and combinations in values in the dialog box and wasn’t able to create what I want.
Can you please tell me some way for making gears of different sizes but with the very same teeth shape?
How perfectly do you want these gears to mesh together? Is roughly fitting together good enough? Do you need the kind of movement perfection of a fine-tuned machine? Or will something in between work?
The shape and size don’t necessarily need to be the same. Instead, the objective is for the teeth to mesh together in a way that enables them to roll off each other with the least amount of friction.
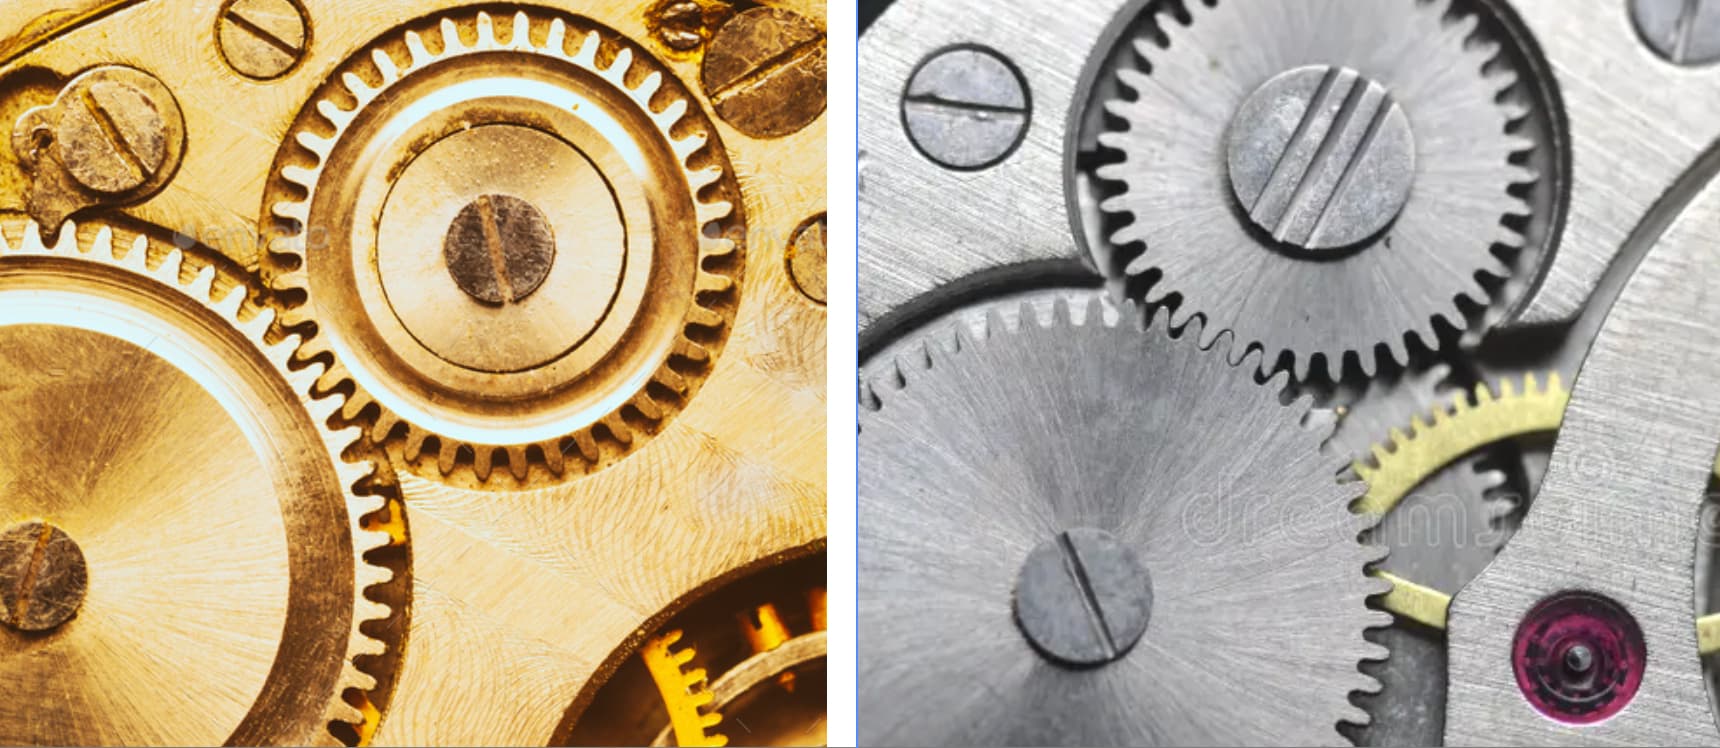
For example, the example below shows spur gears in a watch. Notice how the teeth aren’t exactly the same shape.
Designing gears involves some engineering and mathematics. If you’re making something simply as a demonstration or to accomplish a simple task where precision isn’t needed, arithmetic will work (and perhaps a bit of basic geometry), which I’m assuming the plugin extension you found will do. However, it doesn’t appear that the plugin is rounding the teeth in ways that minimize friction.
If you’re making some replacement gears for a piece of machinery, you can rely on the existing gears to determine the size and shape of the wheels and the teeth without resorting to math.
However, the math gets much more complicated if determining and optimizing gear ratios are involved. If you’re designing something that demands a degree of perfection and integrates the pinion and annular gears into moving parts of a precision machine, like a watch or motorcycle chain, the math gets even more difficult and can involve differential calculus, which I assume your plugin doesn’t do..
Yes, I don’t need the perfection of watch. Something in between , as you have called it.
I wondered if I can get the values/parameters of two or three gears of different sizes that are known to be compatible and just enter them in Inkscape (Extensions → Render → Gear ->Gear…) .I mean , in my pictures above the gears look compatible but I can not be completely sure before they are cut on the laser cutting machine and I really try them and if there were gear parameters/values for number of teeth, pressure angle,etc that someone have already tried to work fine, why not just enter them in Inkscape. But I couldn’t find such ready/given parameters in internet… What do you think looking at the three gears in my pictures above, will they work in compatible and accurate enough way?
I don’t know Inkscape, but if it’s similar enough to Illustrator, you can import SVG and even .dxf files.
You may have to close the shapes though if you are going to laser them (ie connect the splines)
It seems like there are some helpful tips shared already for creating gears in Inkscape! To add a bit more to this, one method I’ve found really effective for creating precise gears in Inkscape is to use the built-in gear tool. It’s straightforward and allows for quick customization of teeth and other parameters.
Alternatively, if you want a bit more flexibility, you can draw a circle and duplicate it, then use the Path > Difference tool to create the teeth, adjusting each one as needed. This can take a little more time but gives you the chance to really tweak the design to your exact specifications.
Don’t forget about using the grid system in Inkscape for better alignment of your elements, especially when working with repetitive shapes like gear teeth!