I’m new here, so I’m sorry if I’m posting in the wrong topic, but I need a teensy bit of help. I’m designing some stickers for a friend. They want their Instagram handle in the cut line of the sticker (i.e., the white border on the edge of die cut stickers). When I simply put text on the outside of the design, most printers want to cut around the text, creating a strange outline shape. I want this text printed in the border and for the printer to not consider this text part of the design (technically). Example:
I have already tried setting the cut line layer to a non-printable (template) layer, but this didn’t work for me. I also tried creating the cut line in Illustrator first before adding the text. This works, but some printing places do not honor cut lines and will assume that line is part of the design. (I do not know where they plan to have these stickers printed.) This kind of works if the line is white, but that means no one will be able to buy a transparent sticker (the white line will show up this way), and they should be able to if they want to, so I do not consider this a viable solution.
Has anyone created stickers like this, with text in the cut line? Does this only work with specific printers, or is there something I can do on my end to make sure the final product looks the way I want it to?
Any help is appreciated! I’m normally pretty good at doing my own research, so even if you just tell me what to Google, that would be helpful. (It’s possible I’m not even using the correct terminology, which is why I’m having trouble finding what I’m looking for. I’m still a student, and while I’m familiar with raster-based design tools, I’m new to vector tools and this aspect of sticker design.)
I’m posting this quite late at night, so I hope all this makes sense. Thanks in advance for any help!
It would help if you knew the company printing these and got specifications from them on how to prepare the artwork. A circular trim is pretty straightforward, but the company might be set up for specific diameters and have specific templates to use.
You’re building this in Illustrator, right? If so, and in the absence of more specific instructions from the printer, create a separate layer (not a template layer), and draw the die line with a spot color that’s impossible to miss. Then set that layer to non-printing. You might even name the layer “non-printing die-cut line” or something to that effect.
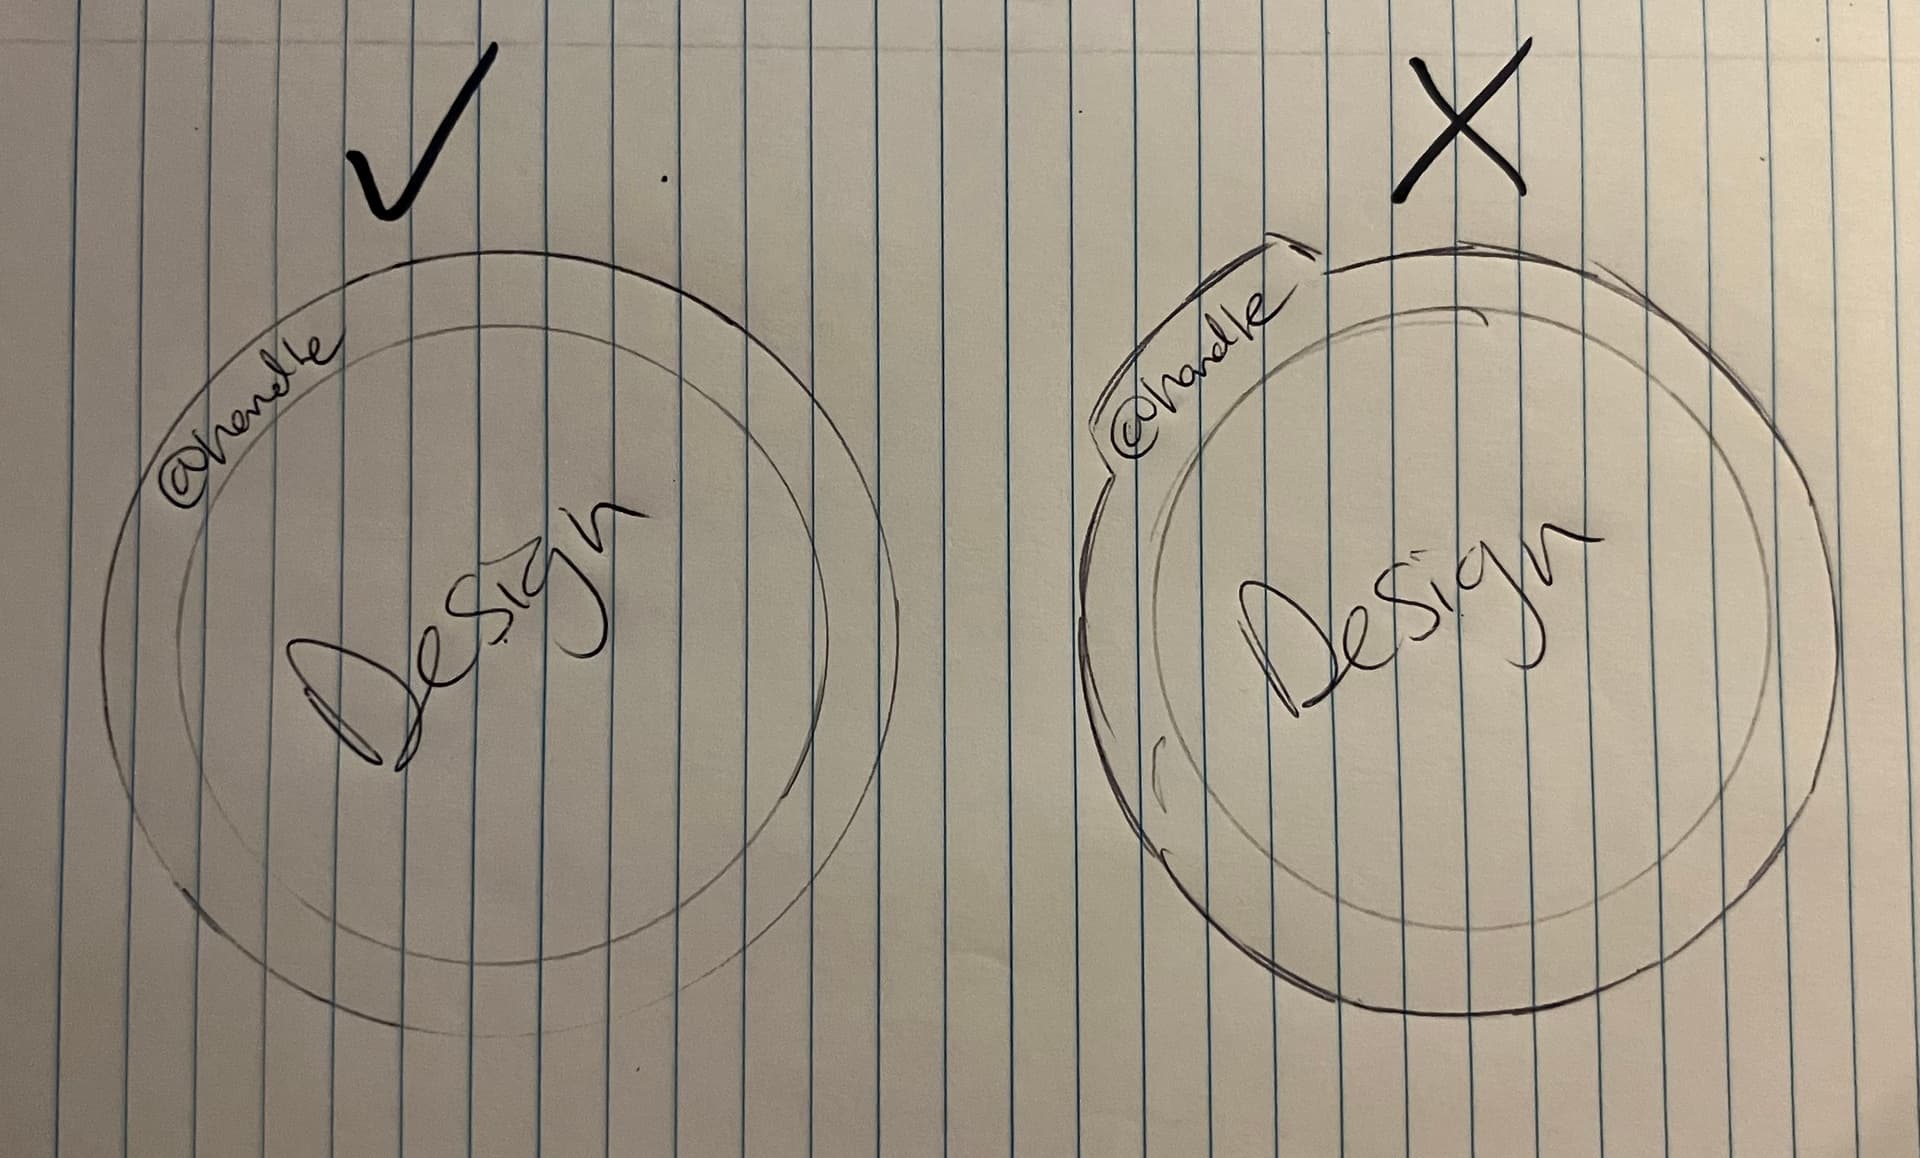
There’s a problem, though. That Instagram bit lies within the safety area. If the die cut shifts a little bit, that text might overlap the cut.
Thank you for your response! That’s a good note about the spot color, I will look into that. Also, I have been playing around with layer settings (both templates, and unchecking the “print” box to make layers non-printing). However, regardless, when I export as either a PNG or an SVG, that outline layer still shows up. This may be a misunderstanding of the term “non-printing” on my part, though, so I will look into this more, as well.
These stickers are going to be die-cut for the most part; I just used a circle to simplify my example. I am testing these designs in Printify, as they told me they will likely use either Printify or Printful. Printify only accepts JPGs, PNGs, or SVGs, so whether pieces of the design are on different layers doesn’t seem to matter.
I looked at Printify and Printful and they have their own way of doing things, which is confusing with no clear-cut instructions. It wasn’t obvious to me how to go about what you have in mind. If you use them, forget what I mentioned, since it doesn’t apply to their specs.
Apparently, they automatically add a white border around your artwork (PNG with a transparent background) instead of letting you determine what that border is. It might be possible to create a custom-cut shape by using a white background shape while leaving everything outside that white area as a transparent space in the PNG.
I appreciate you checking on that for me! I’m glad I’m not the only one who’s confused
I did consider the white background idea early on, but I was afraid it would make the border they add automatically too thick, so I forgot about it. At this point, though I think that could be my best option for this project. Thank you so much for your help!