I shared a video link there with the how to use scripts.
It’s quite easy.
It’s the only way I know.
Can you share your workflow and what you’re trying to achieve?
I still think you can just resize it to whatever size you need on output - there’s really no need to change the artboard and scale the objects.
Can you share your workflow and what you’re trying to achieve?
I am currently creating the mobile application UI Design in Adobe Illustrator. Now the issue is I have created I have created all the different screens of mobile application UI. Now I am changing the size of the art board to mobile screen actual size due to which I want to change the screen artboard size along with content. I know I should set the screen size before started working on the actual UI which I did not do it unfortunately. Anyway thanks for the assistance mate.
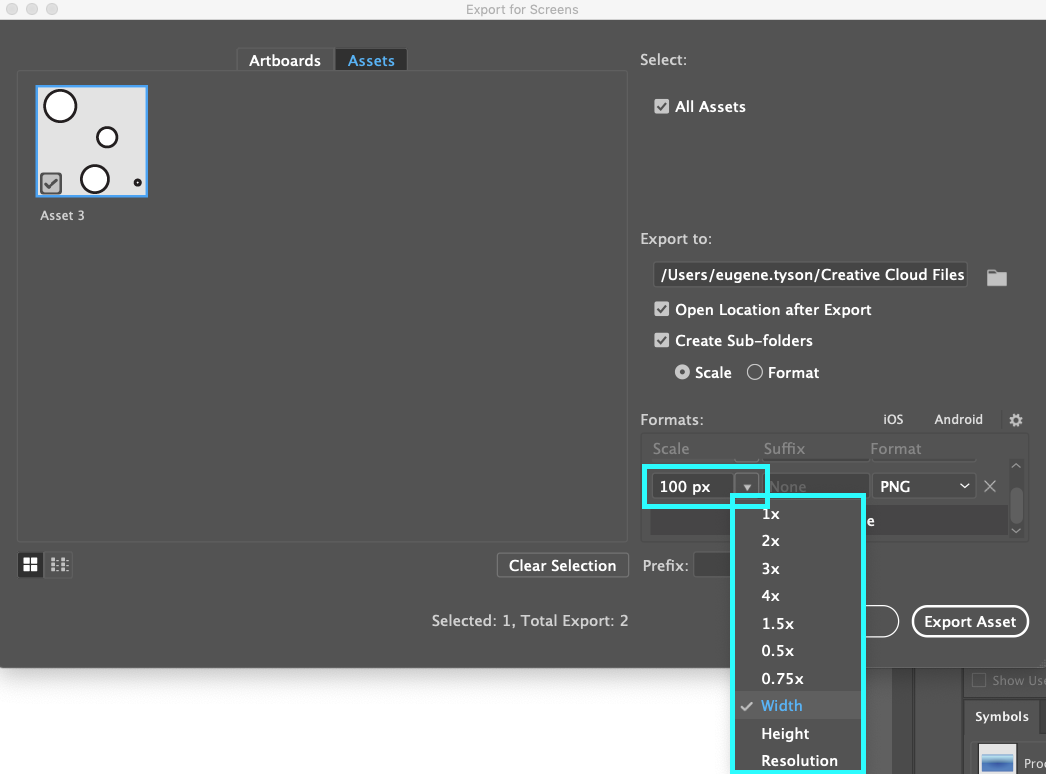
I don’t get it how can I export to any height or weight if the option of export any hieght and width is not present in export selection?
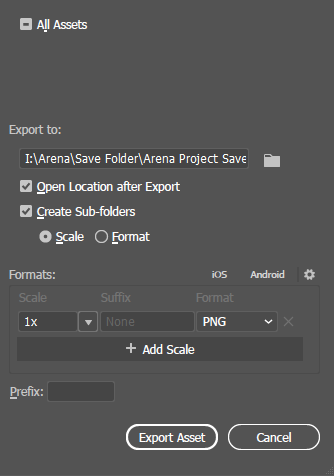
See. Just the scale option is present in here.
Yes I have tried it is not making the actual size which I am setting. I have set to make 1800 PX width and 900 PX height, but when I open that converted file in Adobe Illustrator to check the artboard size it is showing different. Below is the video link for clarification:
Why open the exported file back into Illustrator? Just open it in Photoshop, or just check the file info and see that the pixel information is correct.
I’d ask the same thing, and that’s just one of many questions I’d ask. Honestly, your workflow seems awfully convoluted, with mixed units of measure, rasterized body type, and conclusions based on a sequence of events that makes little sense.
Raster export from Illustrator is a minefield. If you need raster images of particular dimensions, set up a Photoshop canvas of that size (and suitable resolution), put your Illustrator content on it as a Smart Object, adjust the fit, and save.
Sticking with Asset Export from Illustrator should be fine. But there is no physical measurement for a pixel. So, using some website to try and figure out how millimeters convert to pixels is worthless.
If you really want to test in Illustrator, create a new web based artboard measured in pixels. But, that is still overkill … just right click on the file on your computer and “get info” (at least on a Mac) and it will show you the pixel size of any graphic. I know a PC displays the pixel info as well, I believe it is also accessible by right clicking, I’m sure a PC user can clarify.
This is the result which I get when I export the file from Adobe Illustrator To Png then imported to Photoshop. The size is the same which I have set for the png in Illustrator, but there is some empty space below in photoshop I don’t why it has not scaled all the object according to the artboard size which I have determined as showing some empty area at the bottom when importing png in photoshop. Below is the video link for clarification.
your workflow seems awfully convoluted, with mixed units of measure, rasterized body type, and conclusions based on a sequence of events that makes little sense.
I am willing to improve my workflow can you guide me in the direction of how can I improve my workflow? I know somewhat of how to use the software, but you are right I don’t have any proper workflow.
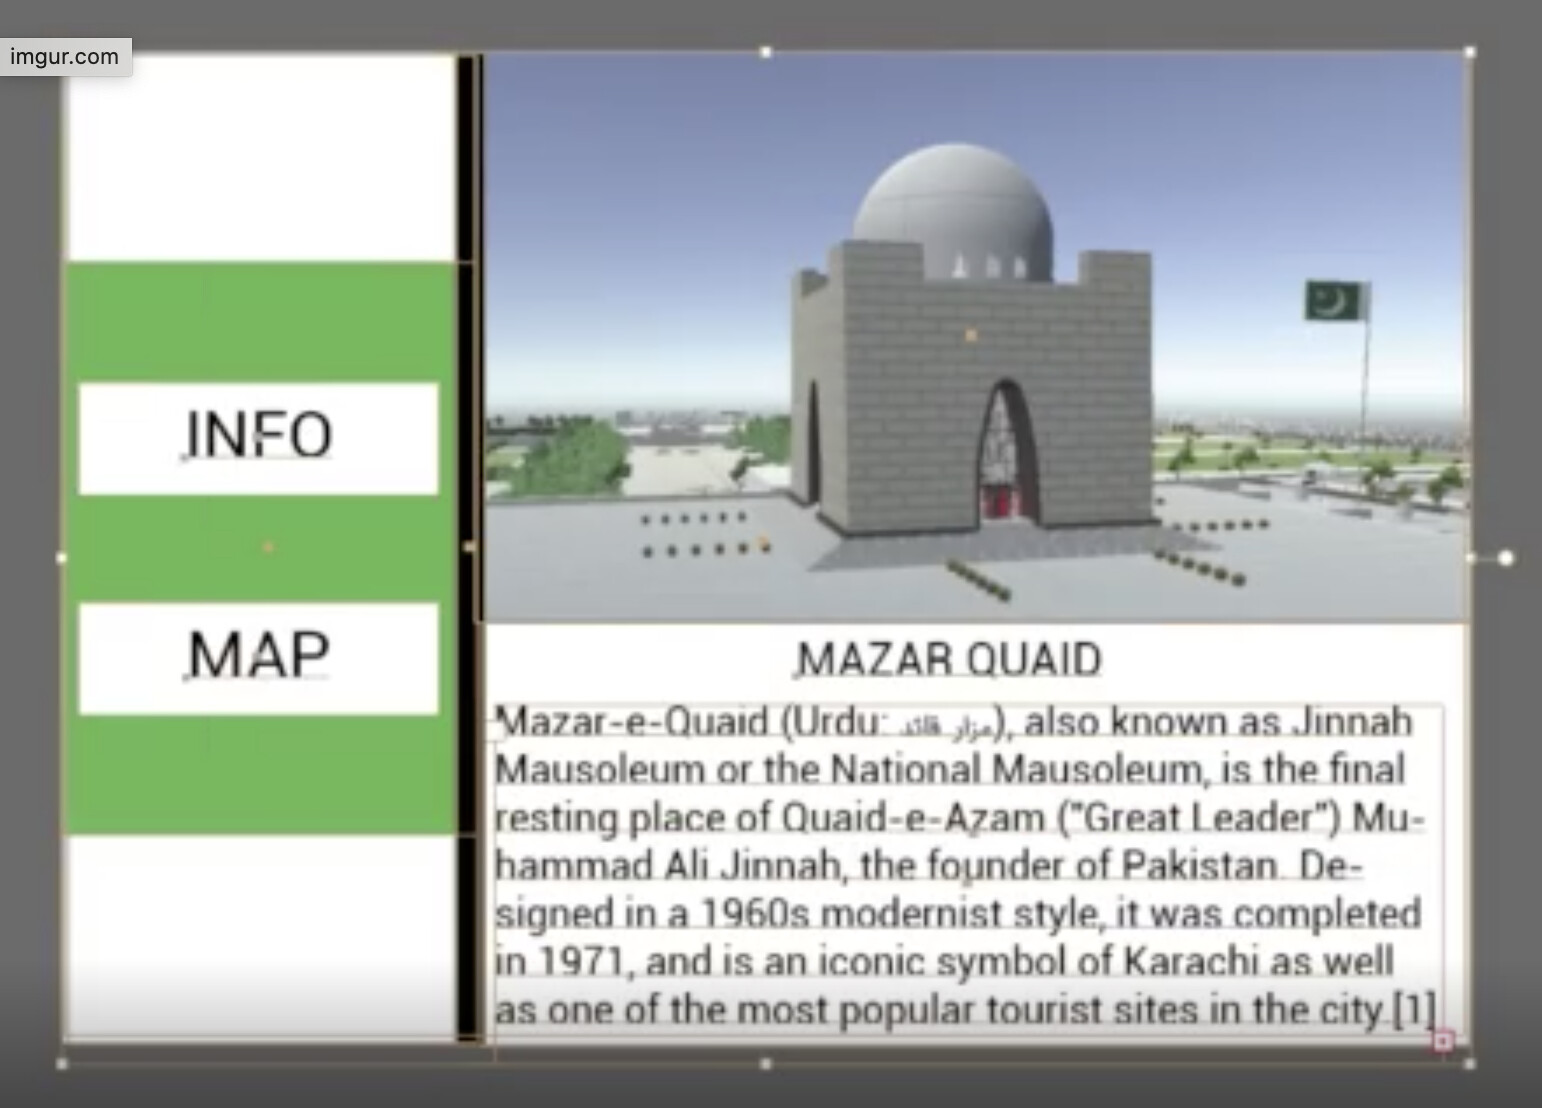
It’s because some of your artwork is “hanging” outside of the artboard. When you export the art, it is being exported based on the art itself, not the artboard. In this screen capture you can see that something (or several things) are extending past the bottom of your artboard.
In your export for screens, select artboards from the top tab instead of assets, and that should fix the issue. Exporting assets ignores the artboard.