Wondering if you experts can offer some advice. I’m looking to recreate a pattern in Illustrator and I have made some progress, however I’m stumped on how to create the inner lines of the current white fill centre objects. I tried with a pen tool but this just doesn’t seem like the correct approach. Is there a automated option that can better do this task? If anyone has alternative ideas of course I would love to hear them!
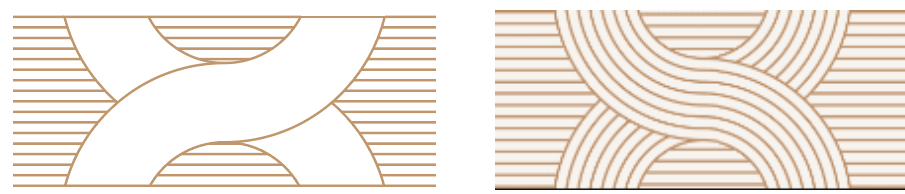
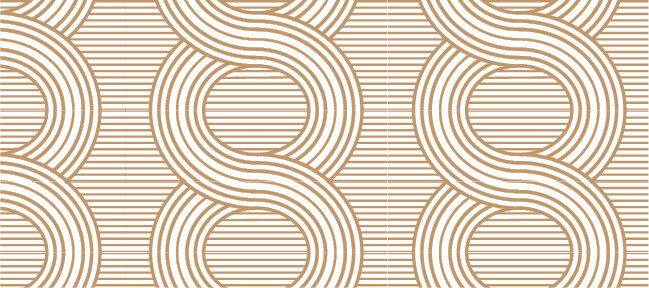
From the image, the left is my current progress and the right is the source image. My plan is then to repeat this pattern once set up correctly.
It’s not as complex as it looks. I would use circles of say 10mm, 14mm, 18mm etc depending on the scale, which I then crop to quarters and rejoin if necessary to give the ‘S’ shape.
Appearance Palette is your better friend. Non destructive and you can make future adjustment.s You can also save as a graphic style and apply to other shapes and lines.
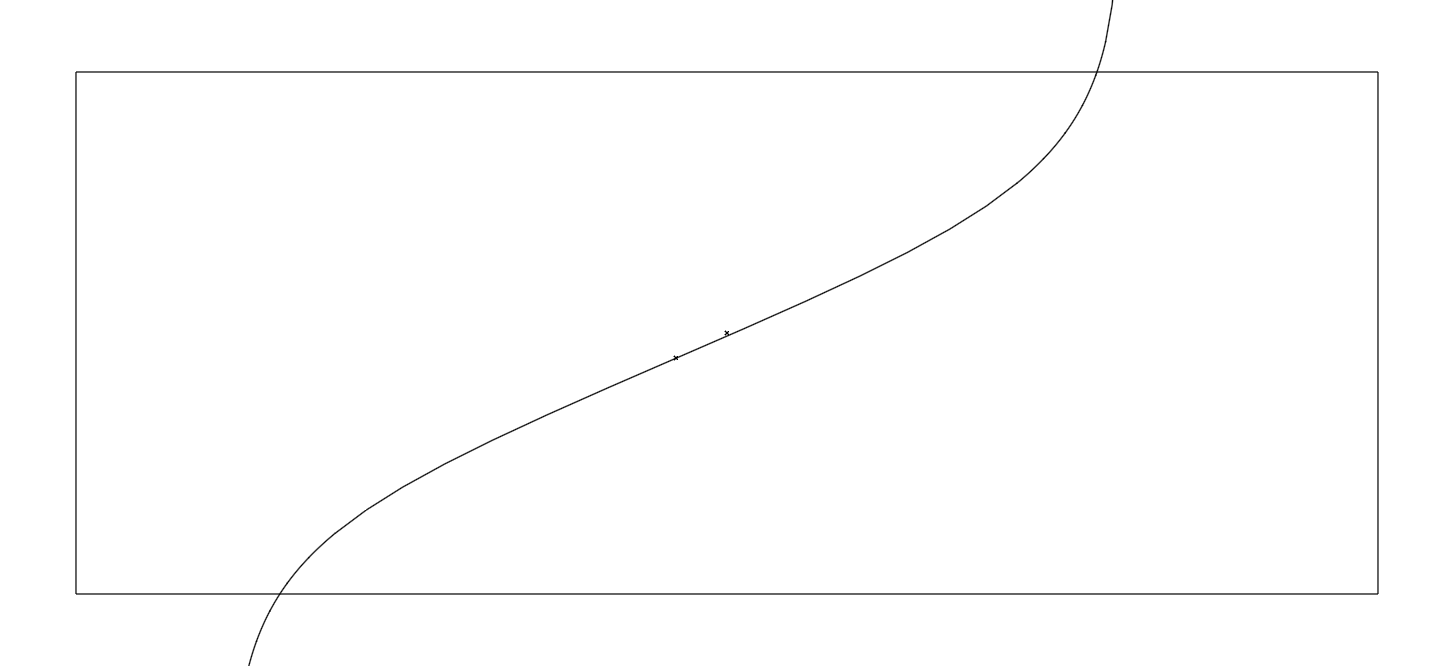
This is a quick example. Below is the line over a green background:
IMO. It is one of those tools that the more you “play with it” the more you see its potential and worth.
The above could also be done using the Appearance palette and applying an offset path effect to it (similar to @PrintDriver’s suggestion.) You could also do a multi lined calligraphic sort of effect using the transform effect in the palette and apply multiple copies and adjust the horizontal or vertical move or both.
Yes, especially when you learn that so many operations you accepted years ago as one-off, can be applied as live effects. All kinds of transformations that look like they’d involve layered mathematics are made so much easier via Appearance.
For some reason, it’s just not top of mind for me. My first thought would have been to draw one path and then do Object > Path > Offset Path. I should put a post-it note that reads “use the appearance palette, dummy” on the edge of my monitor.
@Steve_O Ha. Actually if you do Effect > Path > Offset Path instead you are actually using the appearance palette whether you know it or not. Because then the effect can be adjusted or changes in the appearance palette.
I’ve tried all the methods that have been mentioned to not much luck I’m afraid. All options get so far then I can’t seem to complete it fully. Offset path and applying multiple strokes via the appearance panel gets so far but then I can’t seem to manipulate the stroke enough to follow the curve. Multiple circles seems like the best option so I’ll try following that approach again this evening. Fingers crossed!
That should be fairly simple. Also as @StudioMonkey hinted at, it’s really just circles.
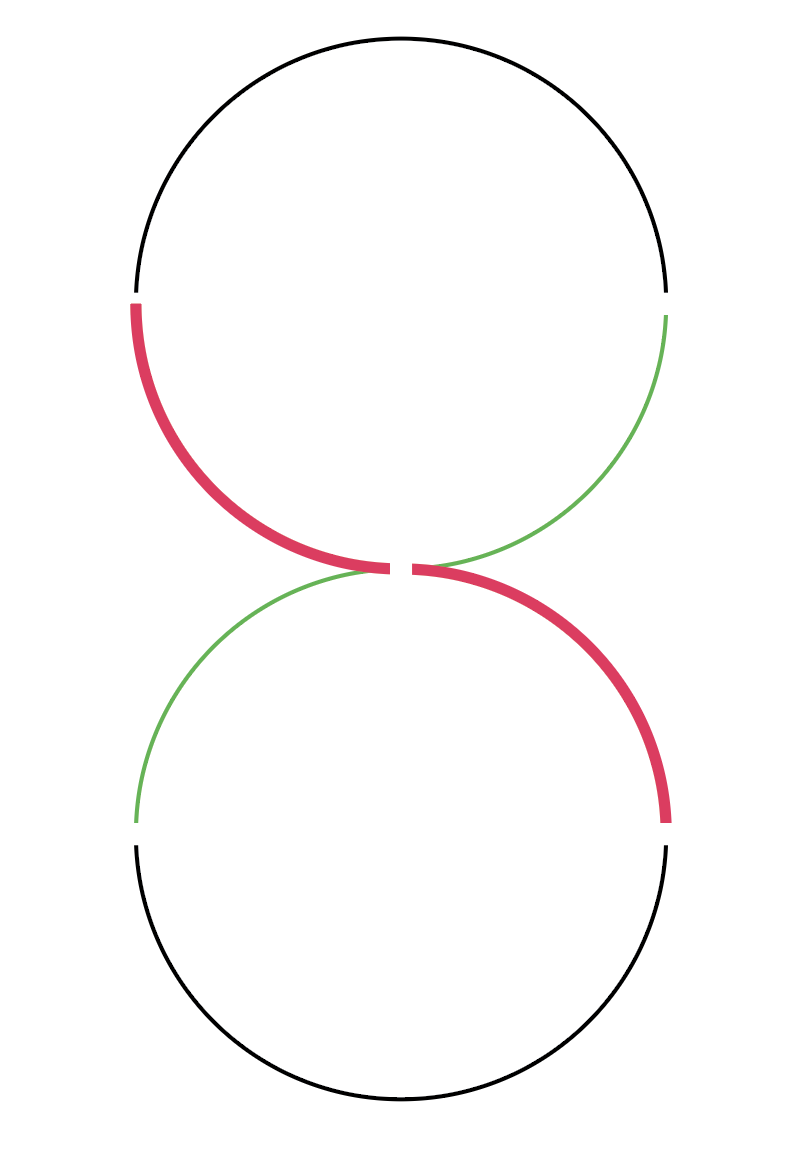
Draw two circles with the same diameter (or duplicate). Align the bottom edge of the top with the top edge of the one on bottom. Use the scissor tool to cut the circles as shown where the white gaps are below. Then join the two red segments and then join the two green segments Object > Path > Join
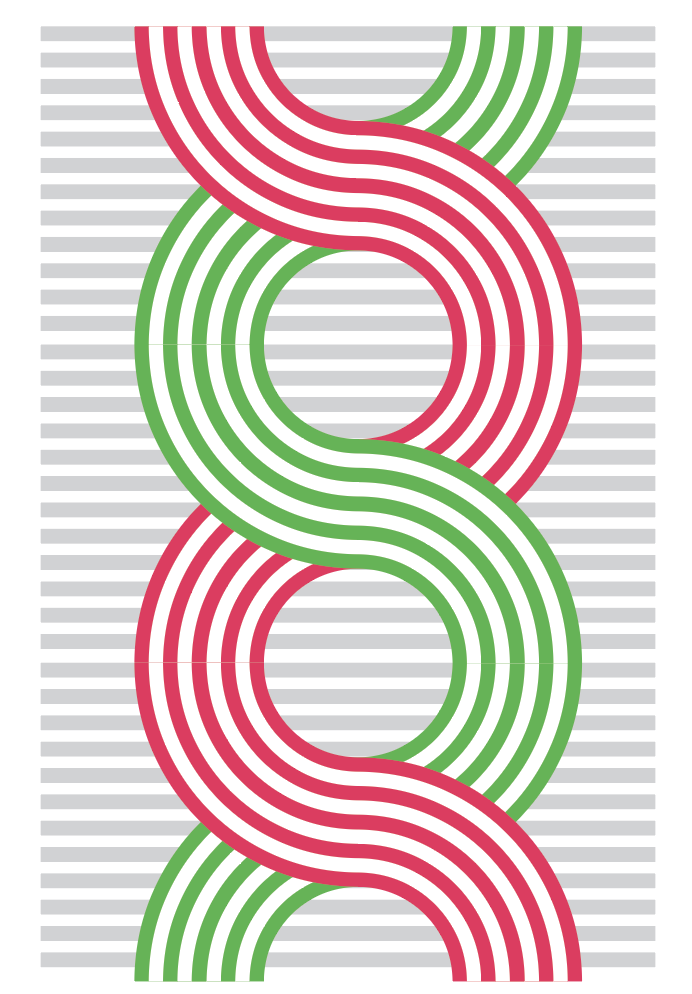
Then use the appearance palette or offset path as mentioned earlier.
The white gaps above are just to exaggeratedly show where to cut the shapes. There shouldn’t actually be a gap. Circles are defined by 4 points, you cut at the top, bottom, left or right point.
And here is a “finished” view. I left the original colors and added the background and duplicated a few times to show how it repeats. I also adjusted the circle size and line widths.
@tomw, the following isn’t really part of your question, but it’s related.
There’s always an optical illusion that occurs when a curve transitions into a straight line or a curve bending in the opposite direction. This optical illusion shows up as a shoulder or a flat spot.
In the example you provided, there’s the illusion of a flat spot. Mitigating these illusions requires smoothing things out a little so the transition happens more gradually. This makes it less geometrically perfect, but more optically correct.
All, Thank you so much for your help! @CraigB Especially for your walkthrough, really helpful thank you.
I had to do a few extra steps to have the pattern see through, yet not have the horizontal back lines seen through the ‘weave’, which included the shape builder and pathfinder tools. Following this I have created a pattern that I think is close enough to the original. It’s not quite perfect but it will do! Processing: Pattern.pdf…