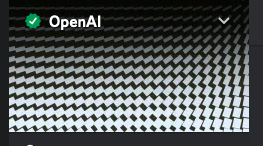
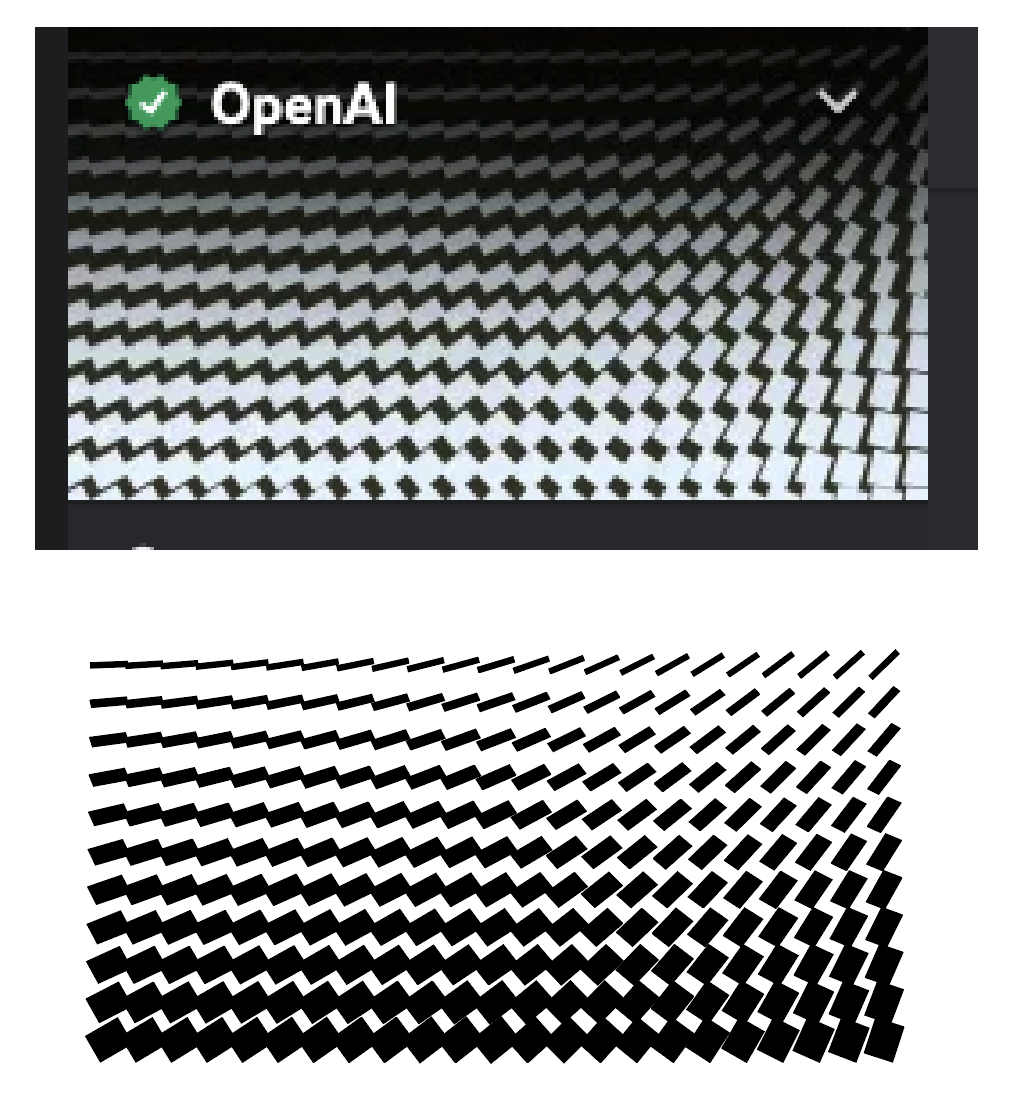
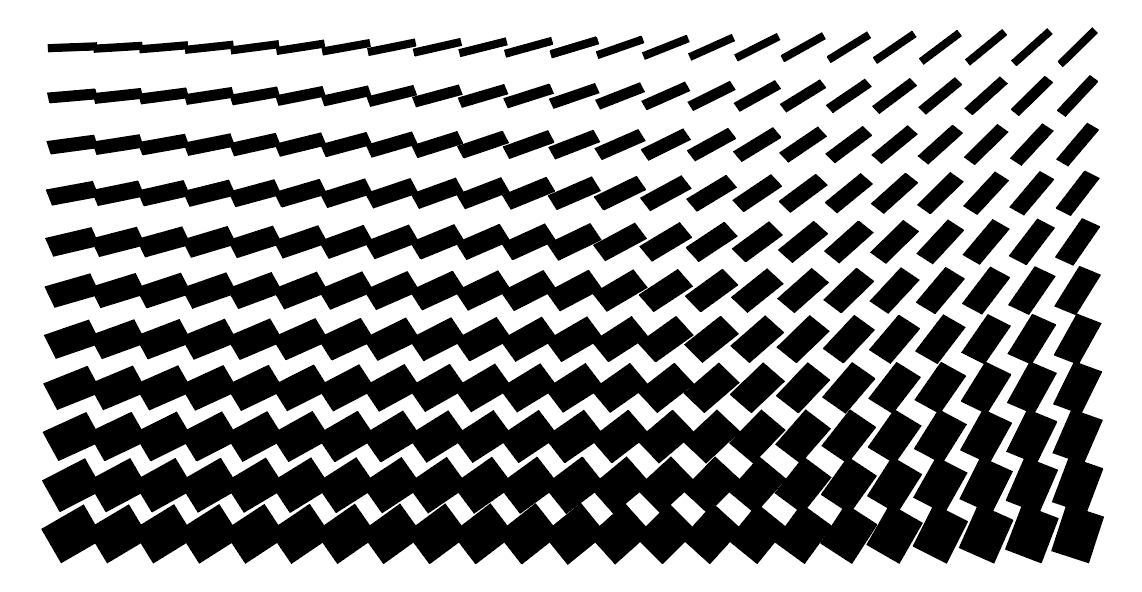
Hi, I want to know is there any particular tutorials which teach us of how to create this stuff below?
I’m looking to create designs with basic shape pattern with subtle changes on rotation that create kind of cinematic effect.
I’ve got a good idea of how it could be done in Illustrator, but another forum member, @Craig, excels at explaining this kind of thing.
1 Like
I’m swamped at work after a four day weekend. I did some preliminary tests, but I will see if I can come up with a workable solution.
1 Like
I have a meeting for work. The only frustrating thing is at the moment I can’t figure out an “easy” way to do the pattern using the Illustrator appearance palette. It may also be that I just don’t have much time to dedicate to it. In fact this pattern recreation is all done using multiple blends in the blend tool instead.
I will try and post my steps later to walk through how I recreated it, but someone else may find an easier way to do it.
1 Like
Without thinking (which happens far too often), I sort of volunteered you to solve the problem. I’m sorry about that. You are good at this kind of thing, though. ![]()
@Just-B no worries. I enjoy trying to problem solve things like this.
Once again, this is not as easy of a solution as I had hoped that you might have been able to pull off in the appearance palette. I still think it might be able to be done in the appearance palette but at the moment I’m unsure of how.
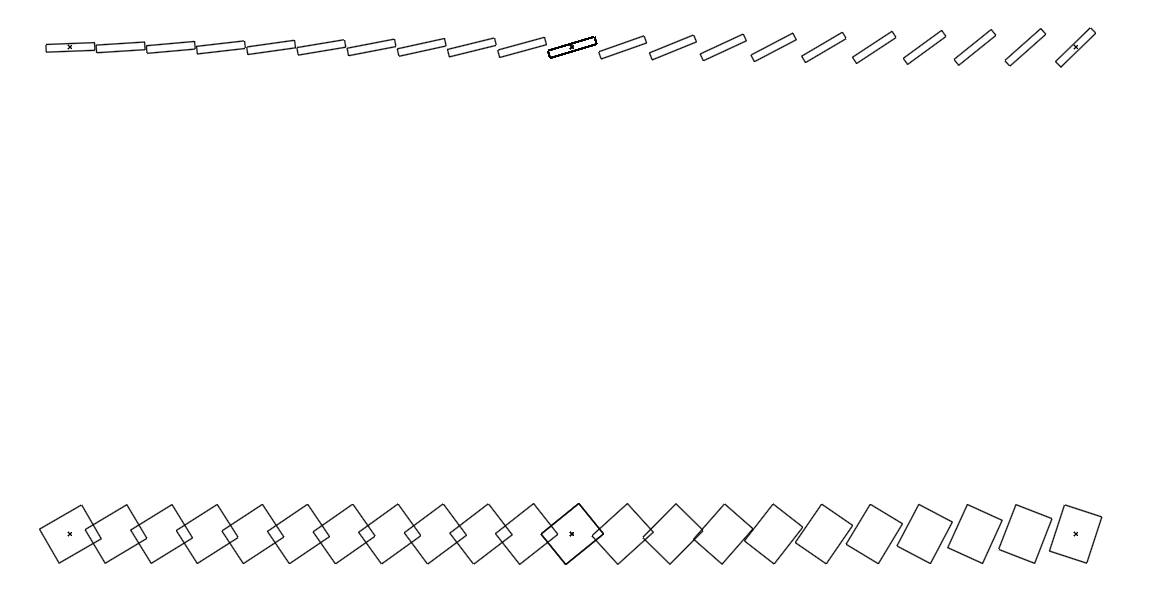
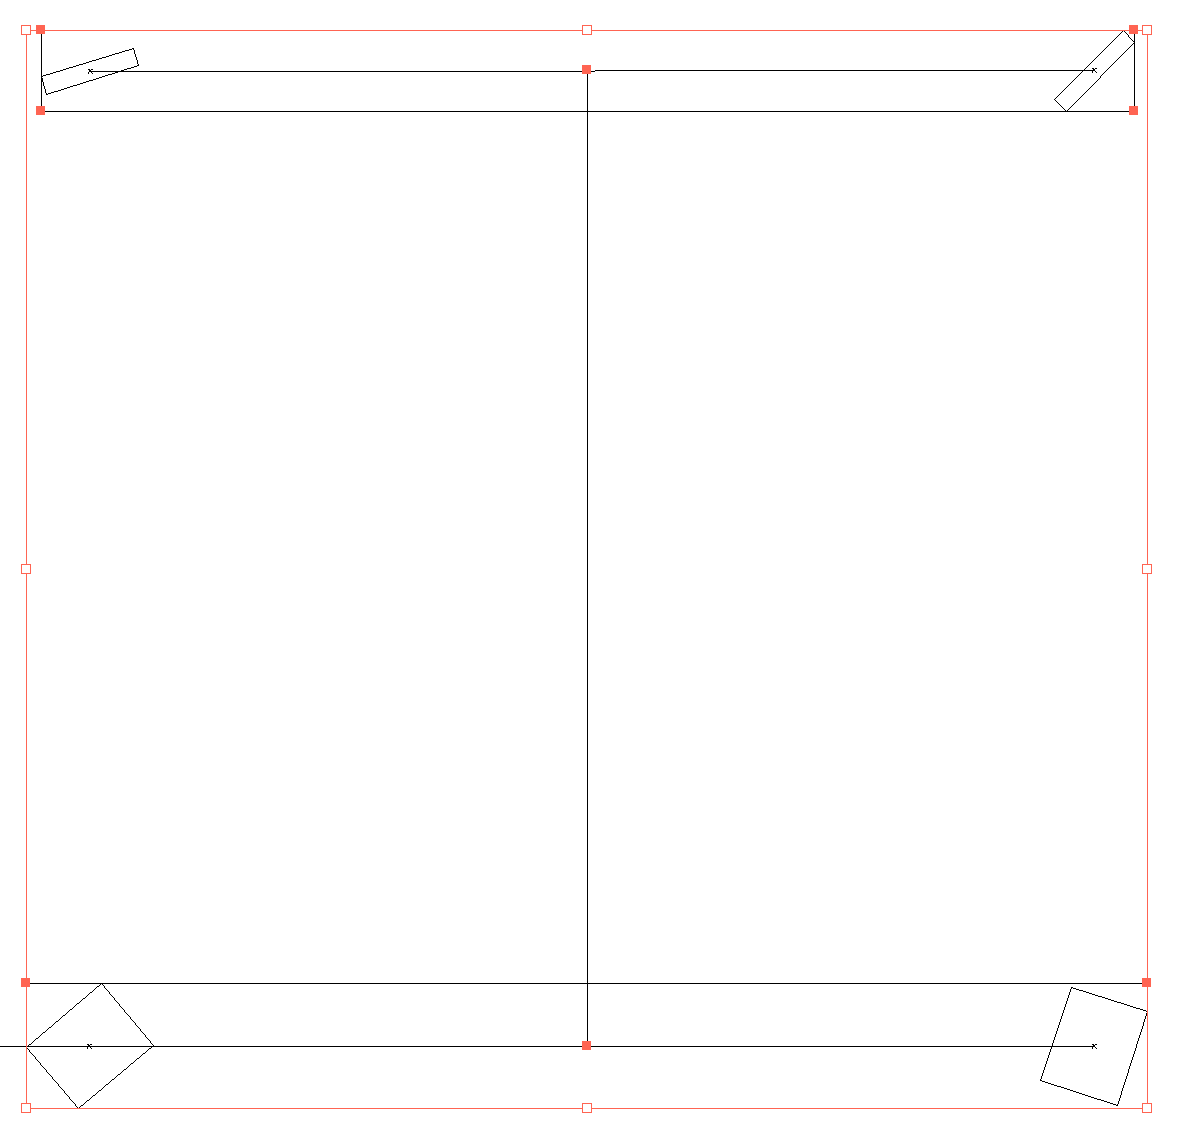
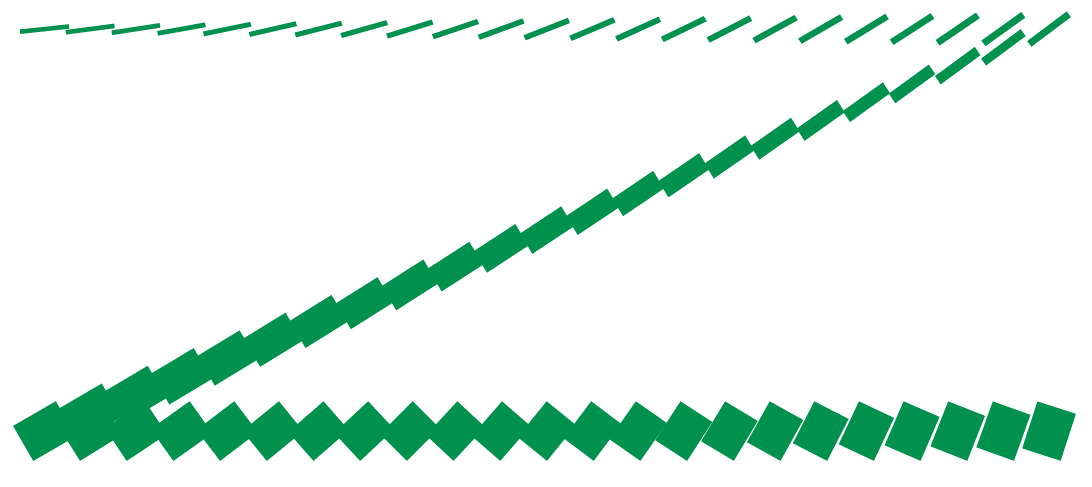
To start with I simply drew a rectangle and rotated it to match the left most rectangle in the bottom row. I then duplicated it, moved it and rotated it to match the right most rectangle in the bottom row. I tried blending those two, but since it was blending two rectangles, it wasn’t “rotating” the shape correctly. To “fix” that for this example I noticed there were 21 rectangles between them. So, I duplicated the rectangle one more time, moved the duplicate and rotated it to match the middle most rectangle in the bottom row.
Now I just had to blend the left to the middle and the middle to the right. But to do so I needed two “middles”. So I created two layers. One for the left to middle section and one for the middle to right section.
That created this:

which in outline mode you can see the two blends (each with a specified number of steps, in this case 10):

I then did the same thing with the top row. Drawing of course a skinnier rectangle, duplicating it, moving it and rotating it to have two blends from left to middle and middle to right again. Once again on two separate layers. Shown below in regular and outline mode to show the blends.


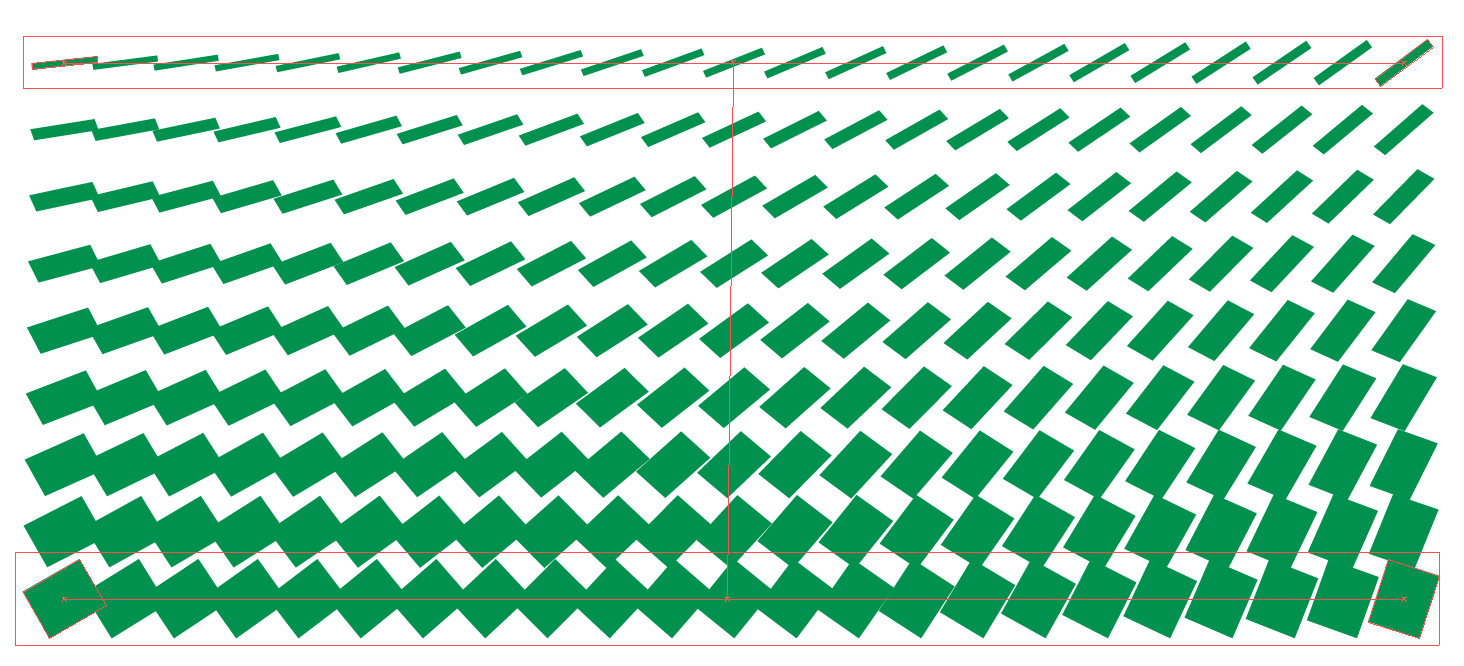
Then I expanded the blends (using Object/Blend/Expand) resulting in this (shown in outline mode)
Once the blends were expanded they are grouped, so I had to ungroup the blends. Once everything was ungrouped, I was able to create individual blends from the top skinny rectangles to the bottom larger rectangles. One blend at a time from left to right using specified steps of 9.
Seen here in outline view:
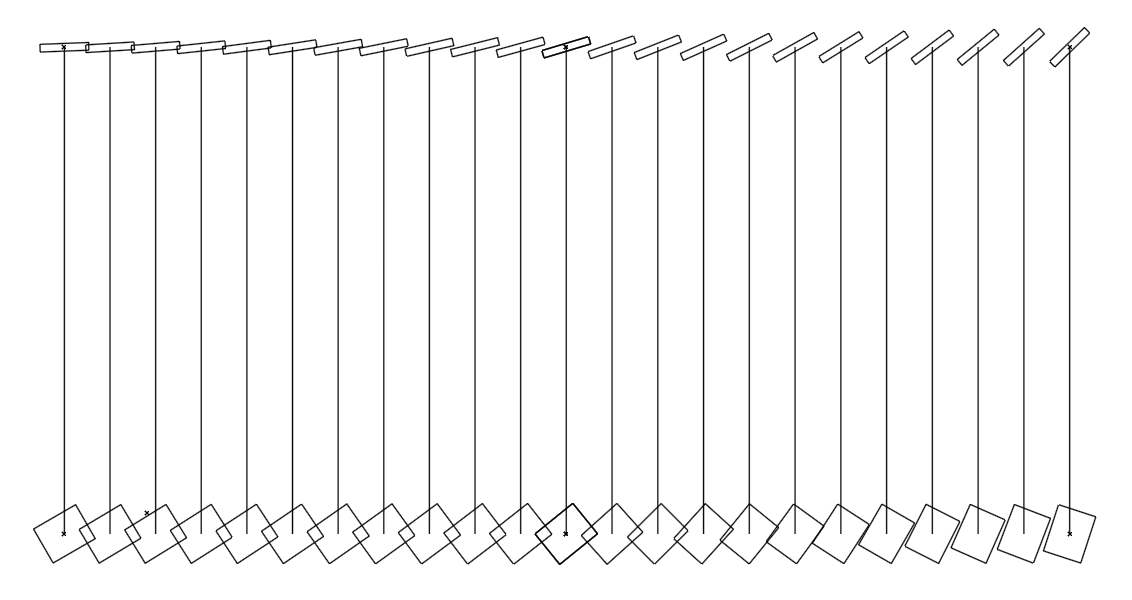
And in the default preview mode:
So, once again, not ideal. If I can think of a better way using the appearance palette I will.
3 Likes
Alternatively (sort of) instead of expanding the blends, you can blend two blends, if they’re inside clipping masks:

It does get a little wonky sometimes though. Sometimes the blend settings don’t want to update correctly.
This also doesn’t work at all if you have a 3rd object in the original blends (3-object blends)
It squeezes the middle together because it’s trying to blend everything into that middle object of both lines, or something:
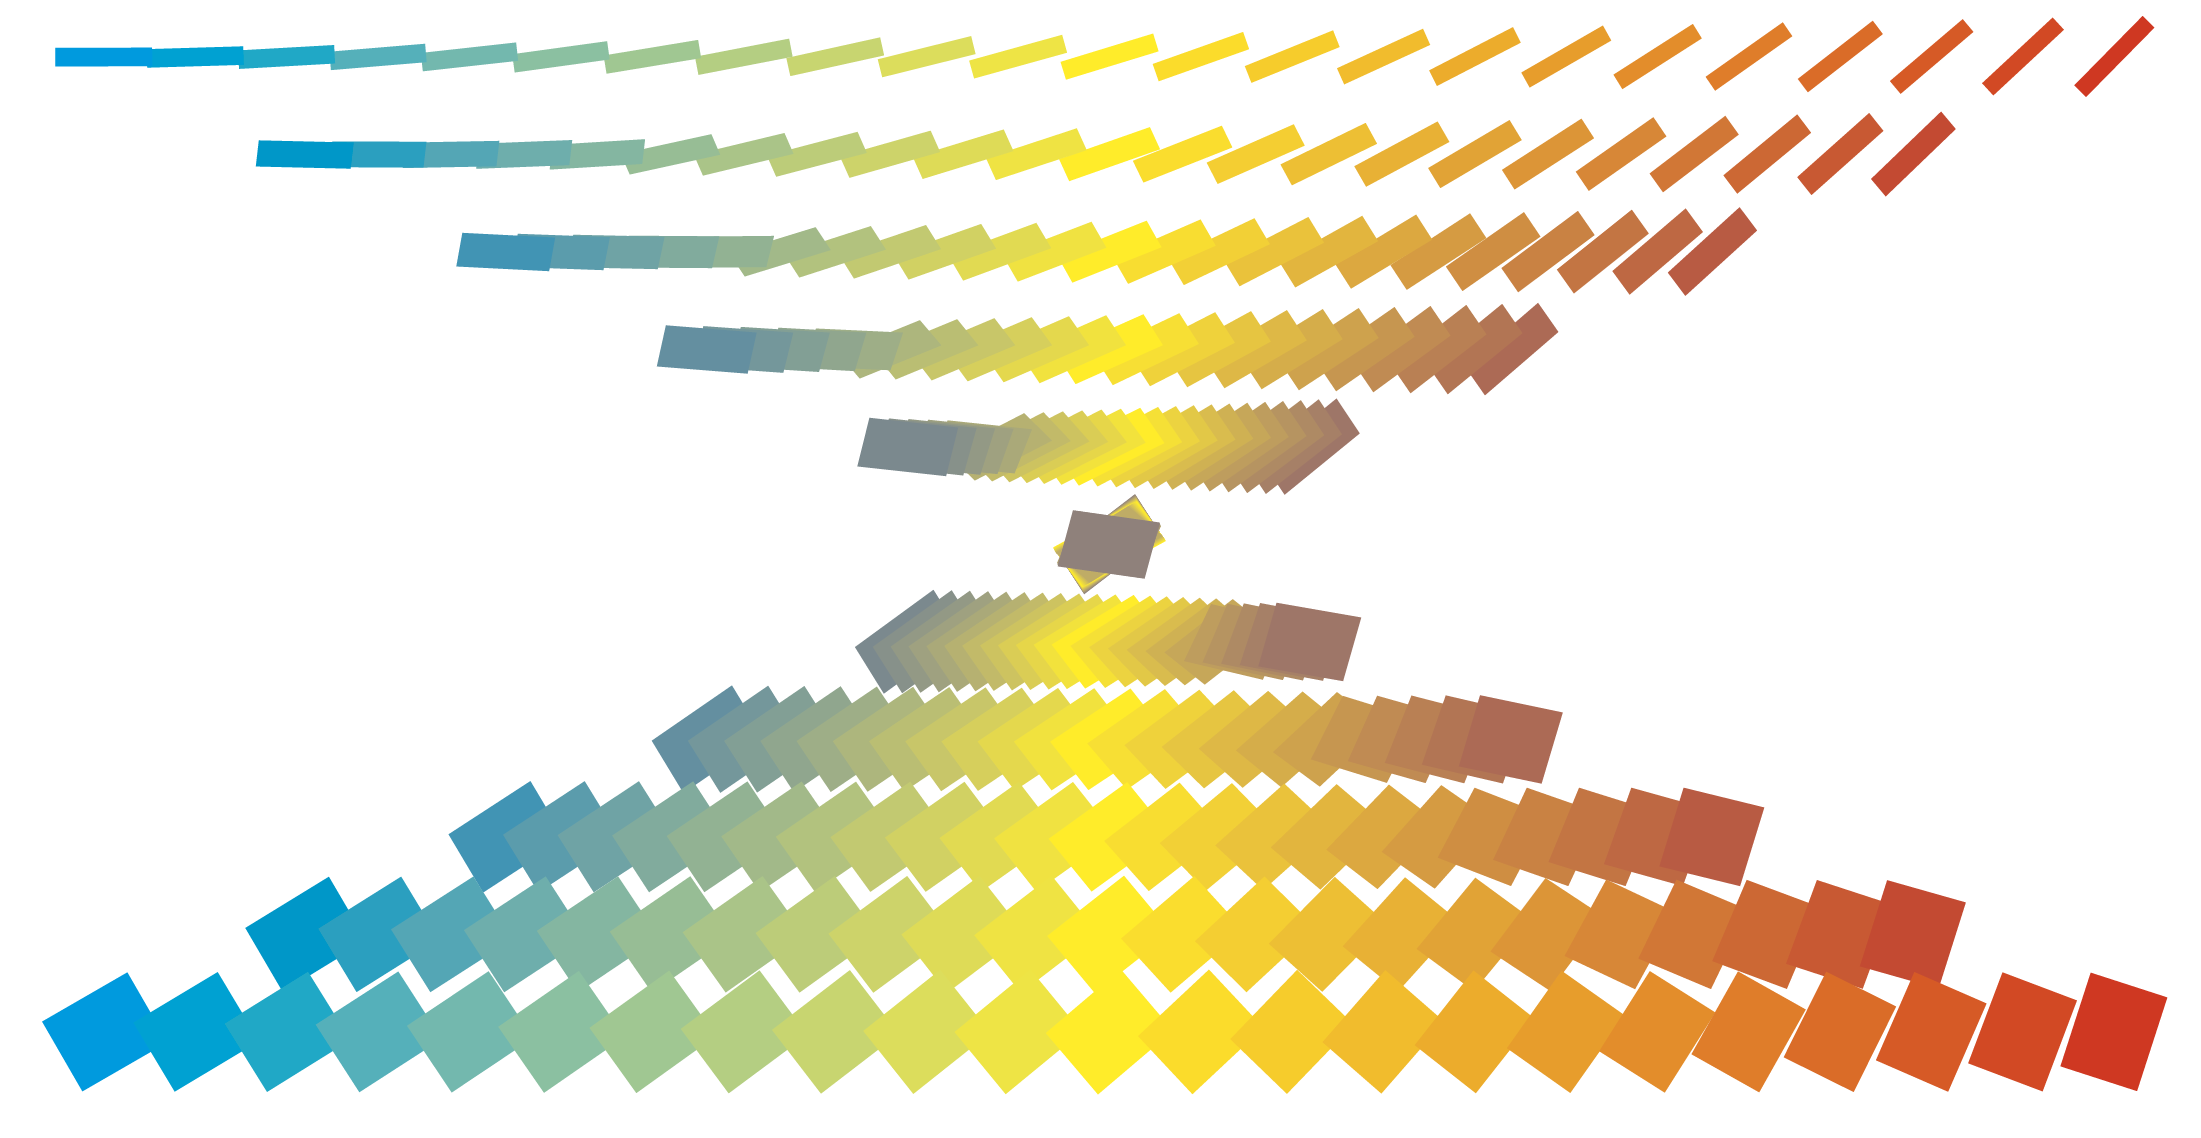
Here’s the ‘wrong’ blend (2-object) that doesn’t match the posted image exactly but does work by blending the two clipped original blends:
3 Likes
I didn’t even think to nest one blend in another. But it only works if it is in a clipping mask? Odd.
yeah, if you don’t blend the clip objects, it just ‘strings’ the blends together, making a nice Z-shaped blend:

I couldn’t find a way around this.
We used to use this method of blend > clip > blend the clip obj’s to generate large bunches of color blocks for customer to choose from. Just change the color of each ‘corner’ block to adjust the range.
We do all that in-RIP now.
On a side note, the straight path that the blend is “on” can be manipulated like any other path. You can add points and modify it to be a bezier curve if you want for some potentially useful results.
1 Like
We used to do that, then changed to a program called swatchmaker, an old InDesign plug-in where you could just as easily type in the cmyk values and the number of steps and it would generate labelled color blocks. No need any more.
1 Like
This topic was automatically closed 365 days after the last reply. New replies are no longer allowed.