It takes some extra work, if you’re expecting it to be perfect out of the box then no.
But if the OG is red, why are you trying to change it from purple?
1 Like
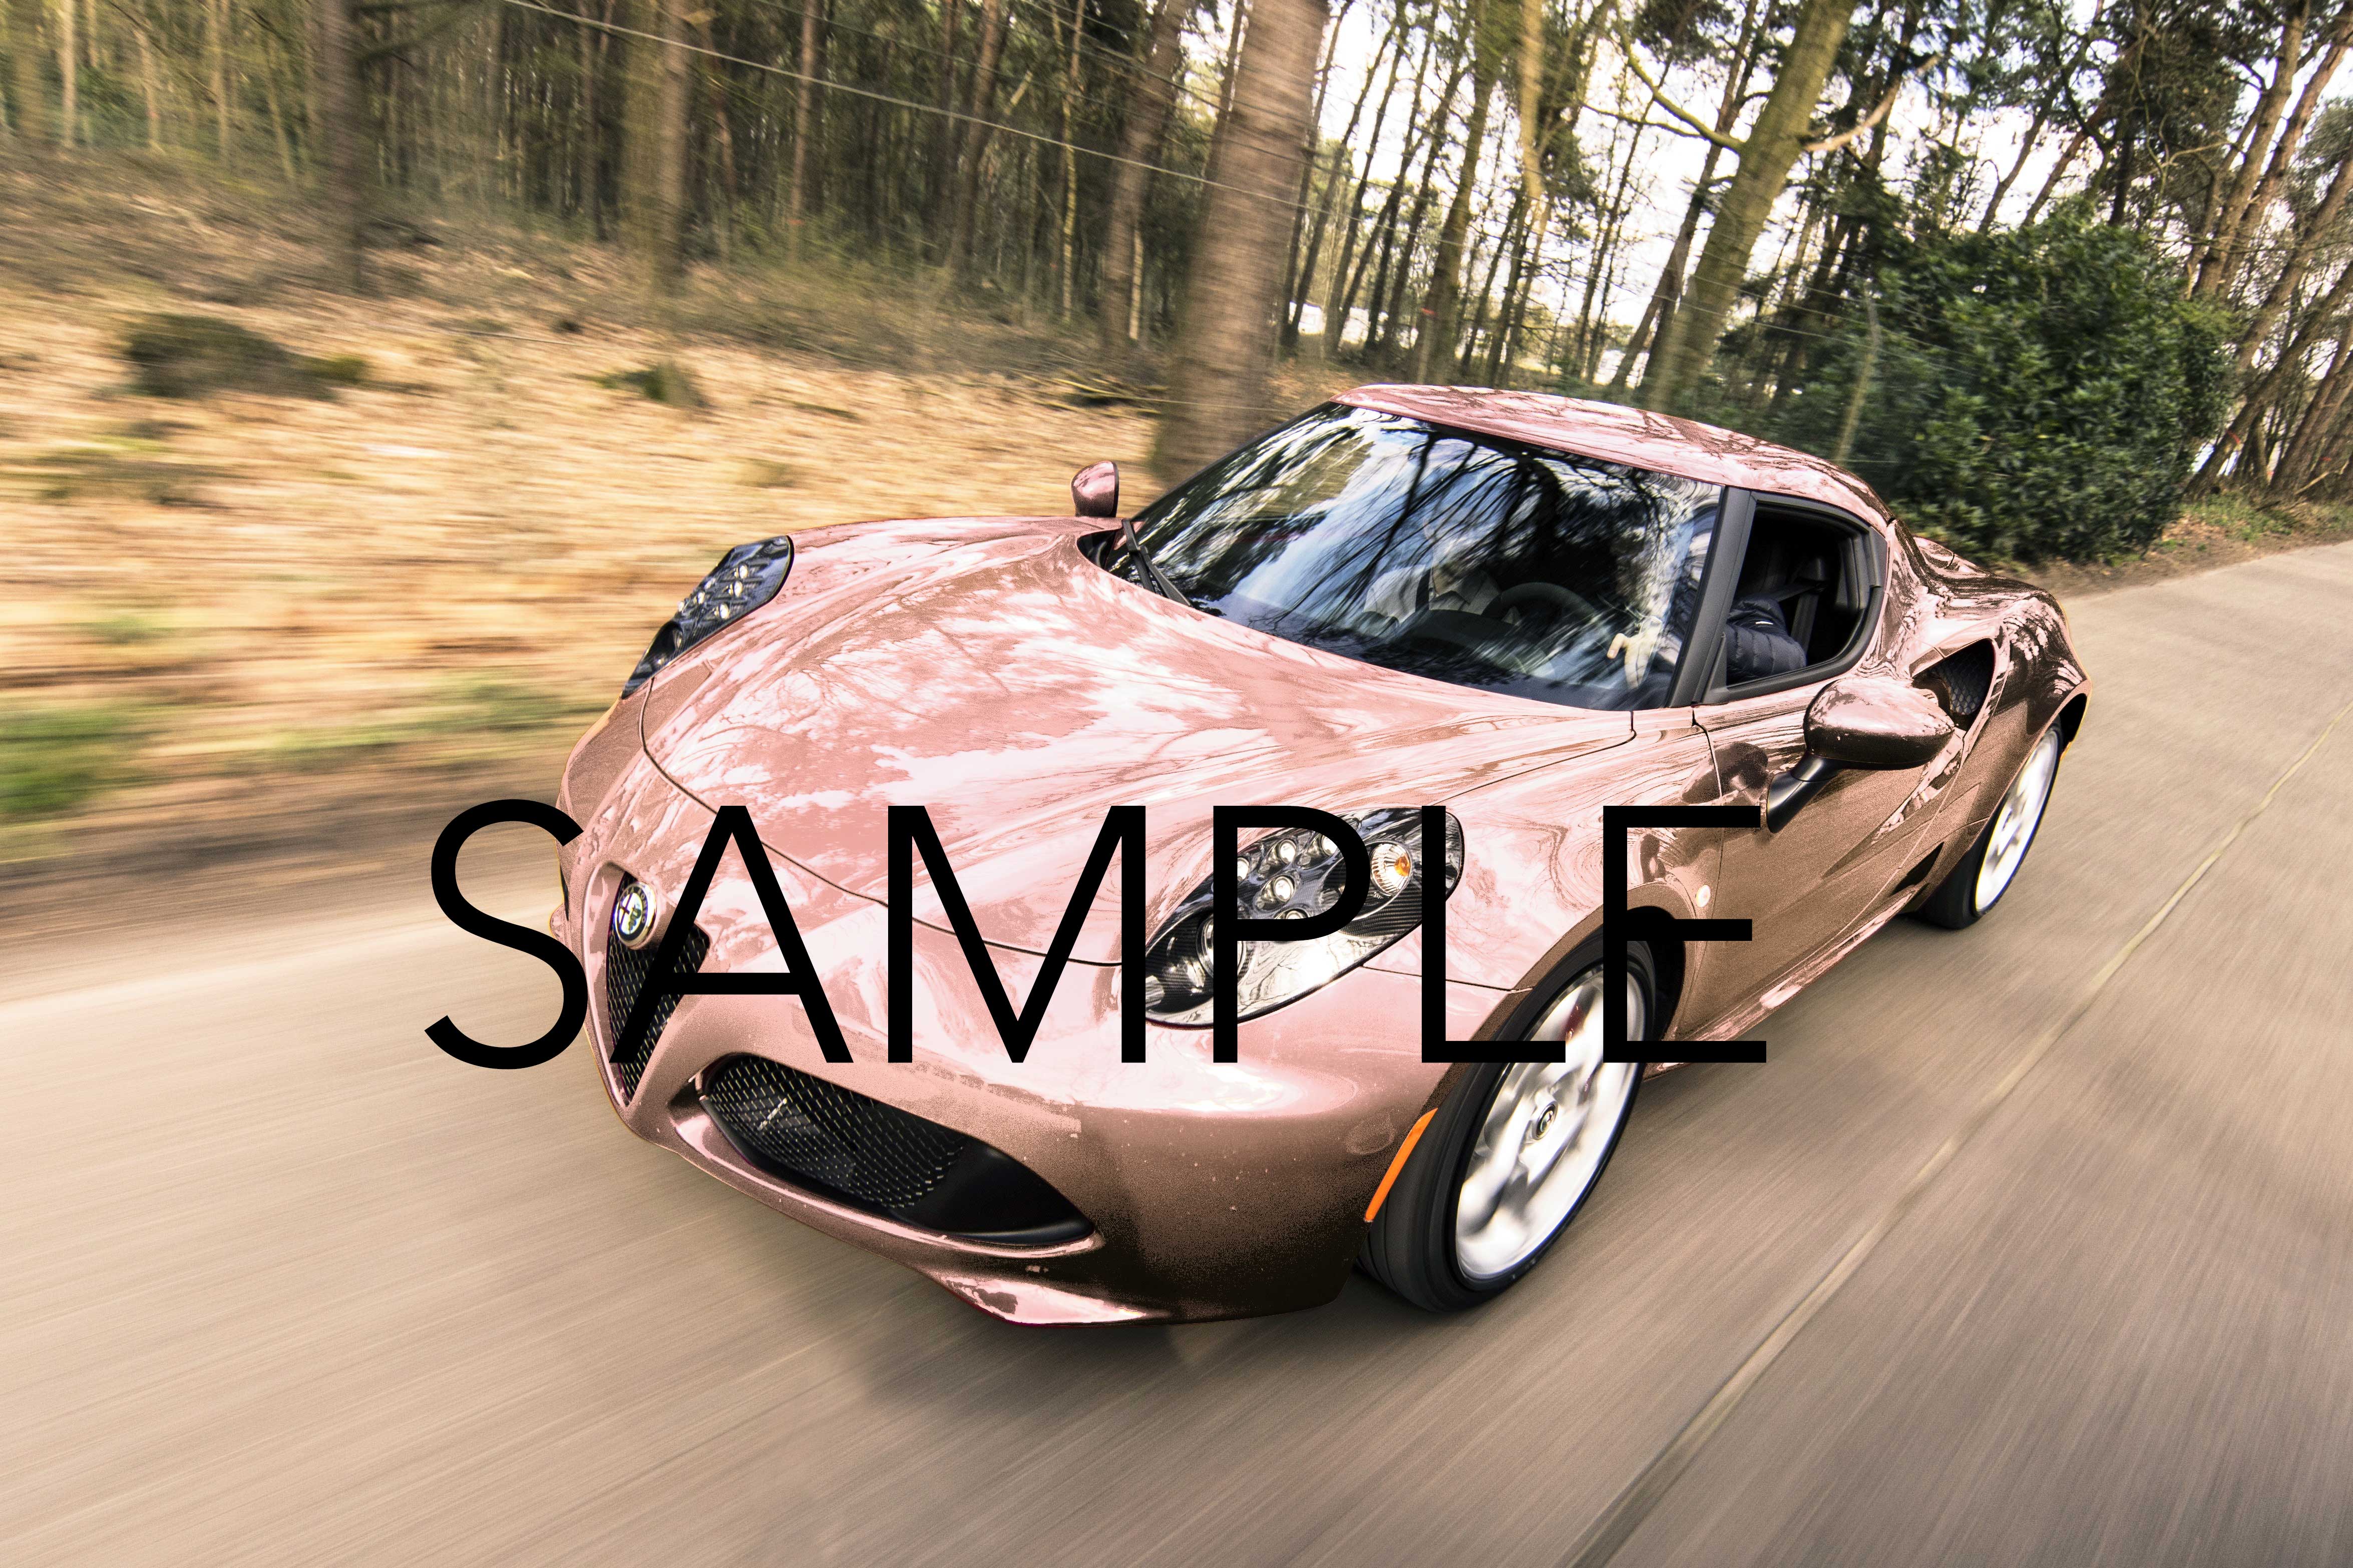
One of my clients told me to change the purple color object to that specific color. And I could not do the work. So I keep trying but nothing worked perfectly. So I searched for “Best graphics design forum” and I got into this forum. Thanks, @Billyjeanplxiv, @HotButton, and other forum members who try to fix this problem. I appreciate your help.
Try using different blend modes. Layer them

Thanks for showing the result. You help me most with this issue. The car color changed but it’s not looking 100% accurate. It’s looking a little bit flat.
Yes, it would be rare for a single, simple treatment to produce 100% convincing realism. There’s always more refinement to do. Plus, the destination color in this case (your ‘#e3bbb3’) simply doesn’t lend itself well to taking on material properties. Shadows, highlights, and reflections betray its limitations, and then a shortage of them betrays it too. There are many colors like this that just won’t look “right” spread over an object, no matter how skillfully.
Aside from subtly shifting colors, Hue/Saturation is mostly trash.
What’s really happening under the hood is it’s selecting colors that meet a minimum brightness level and then it cycles the values of all color channels in unison. The problem is not all color values are equal, so a unison shift won’t reach the target color without destroying dynamics (eg. colors look high contrast, blown out, lack depth, pixelated vignettes, etc).
The Fix: Boost pixels to the target brightness level with Curves, then manually cycle each color channel independently with Channel Mixer.
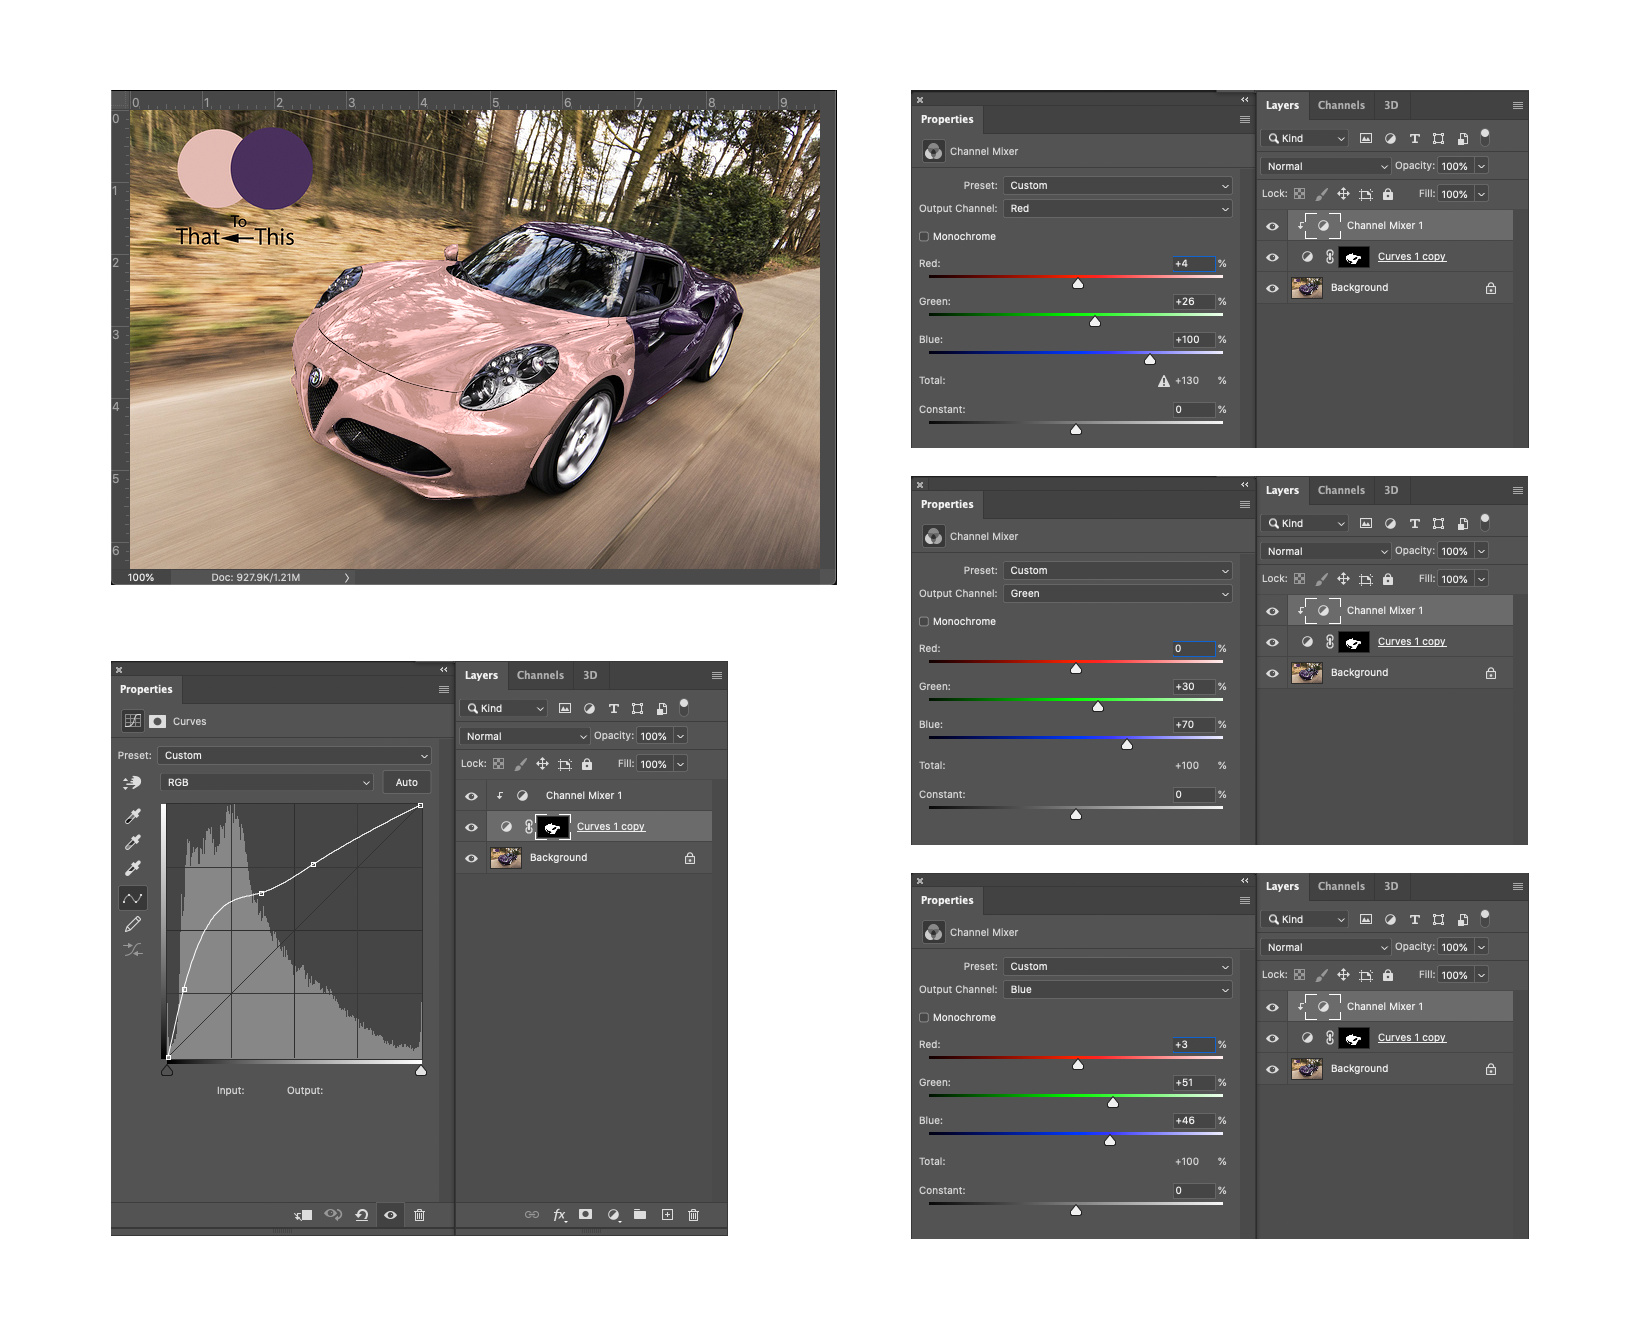
Channel Mixer is like Hue/Saturation on steroids, but it’s not the easiest to work with. It’s been my goto tool for drastic color shifts for 10+ years, but to this day its still about 50% guess work for me. Lots of number juggling, trial and error, but it will produce drastically better results than Hue / Saturation.
Couple helpful guidelines for using channel mixer:
• Try to keep each channel’s total value at 100, going under could change your images white point and going over could blow out your brights.
• Never use the contrast slider for this type of color change, only add or subtract colors from each channel.
4 Likes
Thanks for your amazing comment. This is what I was looking for. There is always someone who can match the expectation. I am really grateful that you also attached the screenshots. The color, shadow matched perfectly. You are a pro. I will definitely try to master the Channel mixer.
Thanks again for taking the time to resolve this issue.
1 Like
Here are the steps to follow to change the color in photoshop:
- Select the car body make it layer mask
- Click on layer mask
- Press Ctrl+u (for window) or (Command + u for Mac)
- Play with hue, saturation & brightness and it will convert into color what you want.
That could be a bit if a ‘hammer to crack a nut’ approach. Every colour then changes. You need to watch shadows, reflections and highlight areas. You may change the colour of the car’s paint, but you will also change the colour of, say, reflected trees. Sometimes this can work, but it often takes a more subtle approach. Unfortunately, there is no silver bullet. I would approach each job like this differently, depending on the content.
You are right on one thing though, the mask is your best friend – though, yet another thing in photoshop where there are a number of different ways to approach it, depending on what you want to do.
1 Like
Thank you for your suggestions and time you spent on creating this informative post.
1 Like