What is sometimes sad about that kind of Illustrator art is that in order to get it to print the way it looks on the monitor, it has to be converted to a high resolution photo.
The extrusion tool in particular can lend some nasty artifacts if you happen to flatten the art. So keep that in its unexpanded shape.
Blends also can cause unintended issues. At large sizes, you will see the steps on the curves. It can often be worse than gradient banding.
I dread getting multiple blends, especially if they cut across a metal gradient. So much fail can happen. it’s almost unfair for Adobe to say “AI does this” because that really means your printer has to fix it.
I have no problem with skillshare
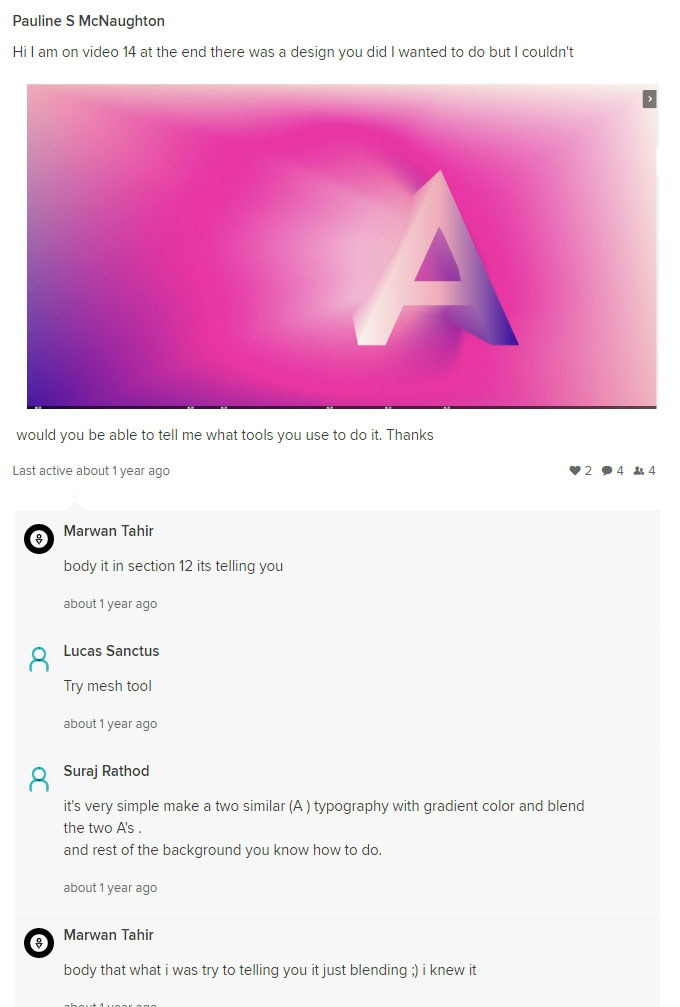
I have all of that tutorial , but as I said she does not explain how it can be done.
even someone ask this question in comments of tutorial , but no one can answer right way.
Gonna say it again. Blends are jaggy.
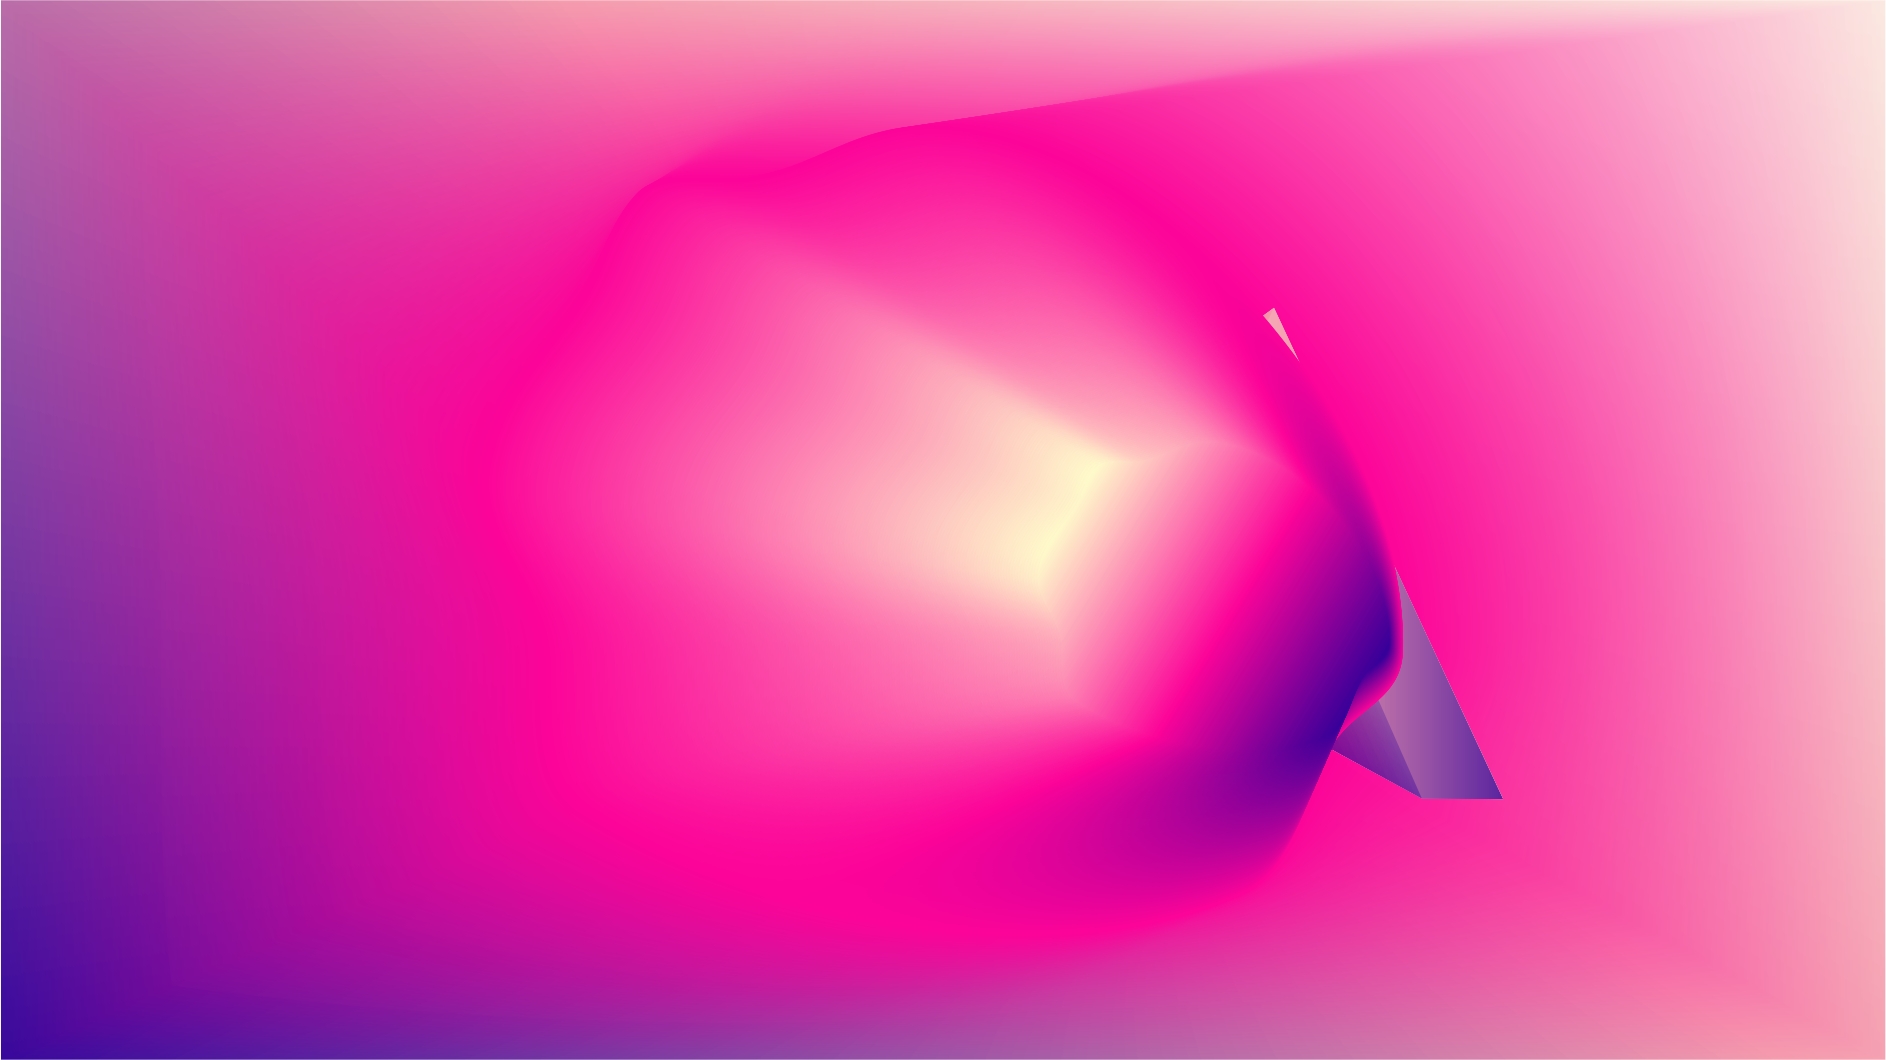
Attached is the highly magnified bottom left corner of a 3" letter A blended using the algorithm’s max 1000 steps over a 1" horizontal difference (if you change the horizontal distance, the steps get further apart and more noticeable.)
If you are working on a large billboard sized banner at 1:10 scale that 1000 steps turns into 100 per inch of distance at output (10x). For a banner that large it probably wont matter at viewing distance - unless you use less than the 1000 max to speed up your draw time.
Just pointing this out so that if you see such a thing, you know it’s all you, and not the printer’s fault.
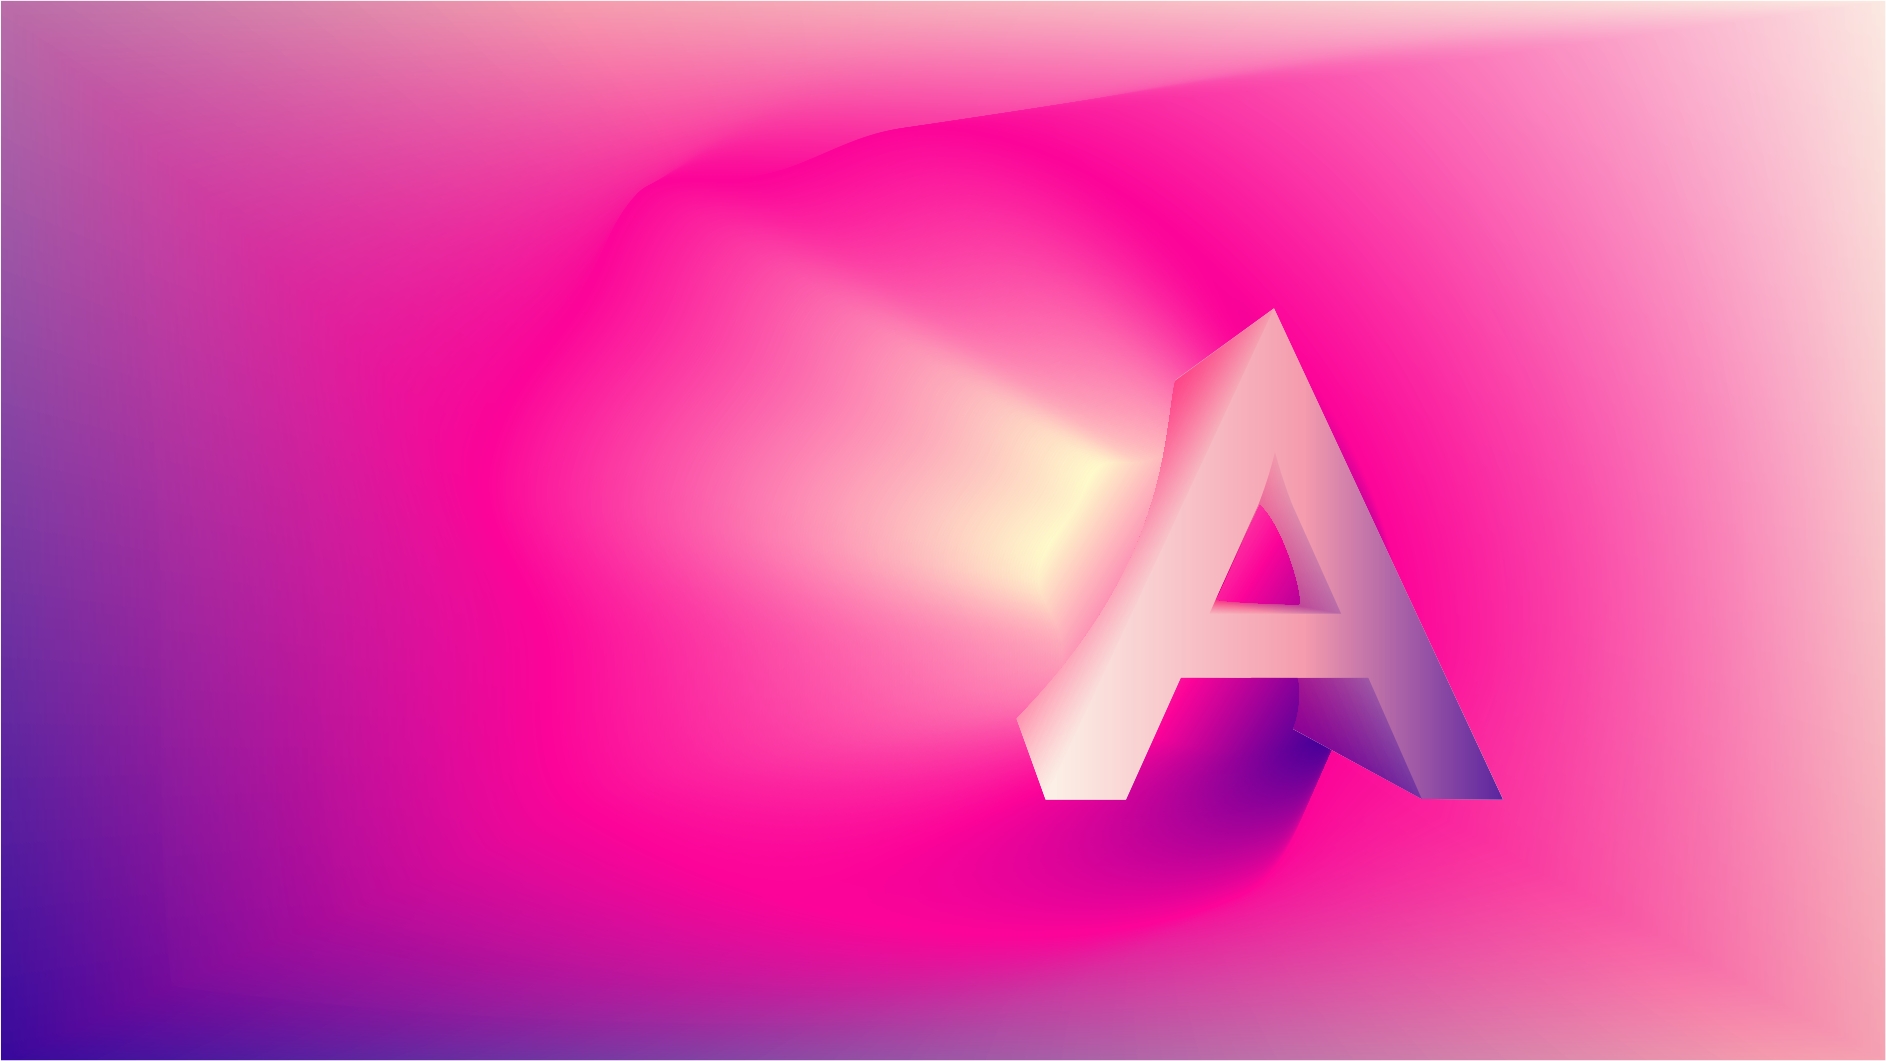
And here is a magnified view of the algorithm artifacts you get with the 3D effect tool if your object has a gradient applied (you will get a warning in the dialog box if you select a gradient object.) Those print, and those scale. In fact, if gradients are rasterized in this way, they will become an embedded image on flattening, and if you don’t have your Raster Effects Settings set correctly for scaling of your output beforehand, your resolution on the embedded rasterized gradient will be 1/10 of your RES setting (again assuming standard 1:10 scale.)
This is why I say don’t flatten. But there is only so much that can be done with this. My suggestion on the 3D tool is to turn off the color and the lights, extrude, flatten, clean up the overlap shapes, then colorize the planes by hand. More work. Far better result.
Printdriver is a Wide Format print dude,
who learns every day a new designer trick for screwing up large output using software whose developers think prints are never larger than a full spread 11" x 17".
If you stick to conventional sized print, you can ignore all that math.
I can’t answer your question in a straight-forward way, but I can provide a relevant opinion that you weren’t looking for.
Illustrator just isn’t a good tool for this kind of thing. PrintDriver listed some practical considerations that centered around output and rasterization issues, but the problems are even more extensive that. Yeah, I’ve seen some pretty amazing stuff done with blends, extrusions, gradients, etc. Sometimes it’s easy, sometimes it’s hard, but it’s almost always a hit-and-miss thing.
Adobe is, of course, promoting Illustrator as a tool for all kinds of purposes. They have to justify their monthly fees by adding new features — even when they’re ill-conceived. It’s similar to how Microsoft includes and promotes the terrible layout features in Word.
When it comes right down to it, Illustrator (and 2d vector processes, in general) are great ways to create simple, straight-forward illustrations, graphics and layouts. Since graphic design depends heavily on simple, straight-forward graphics, vector-based apps are mainstays in our toolboxes.
The creation of more painterly graphics just doesn’t lend itself easily to anchor points, lines and bézier curves. It just gets too complicated, too processor intensive and convoluted. If you really want to do this kind of geometric modeling right, the next step up involves 3D applications, which tackles the inherent problems head-on by accepting the need for additional complexity, steeper learning curves, different topology-related algorithms, and extra horsepower as part of the process. Trying to do it in Illustrator is, like I mentioned, the equivalent of designing layouts in MS Word — doable to some extent, but not the right tool for the job. Even Photoshop is better at this kind of thing than Illustrator.
Gaussian? In Illustrator? To a stepped blend?
Depending on offset angle of the objects and how far apart they are, that’s gonna be one hefty blur. Kinda defeats the vector sharp purpose?
My fix?
First determine if it is legible at viewing distance.
Then advise the designer to either add more steps if able, or not to use blends.
I wouldn’t fix it.
Adobe has program traps everywhere.
It’s all about knowing the tools of the trade and the output format you are using.
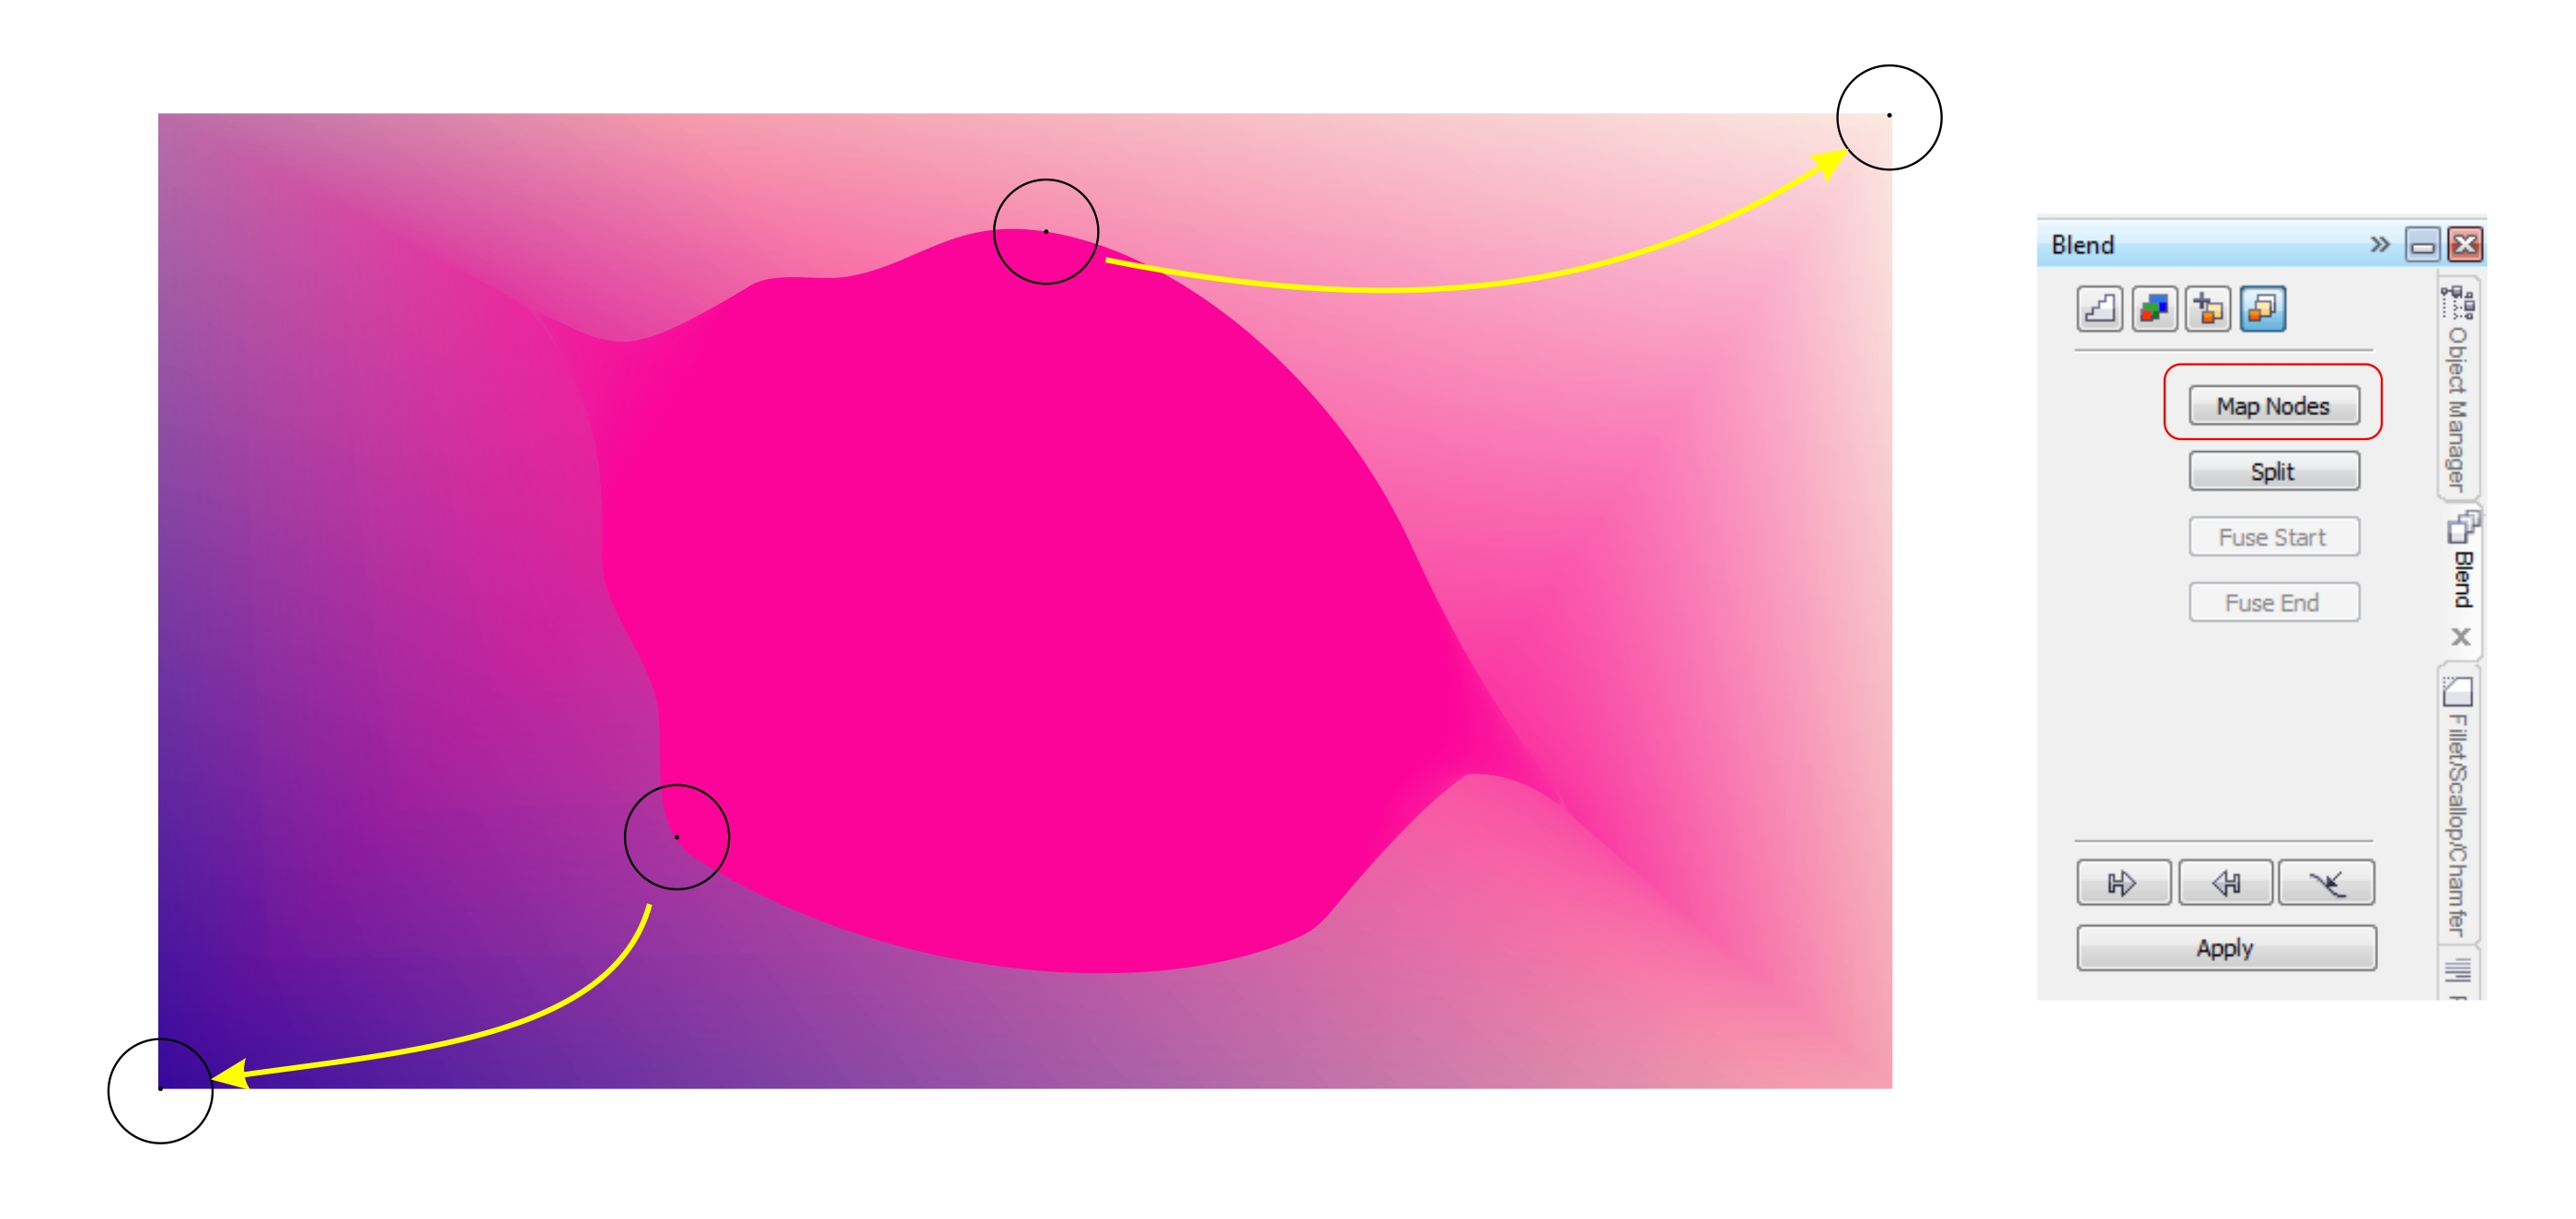
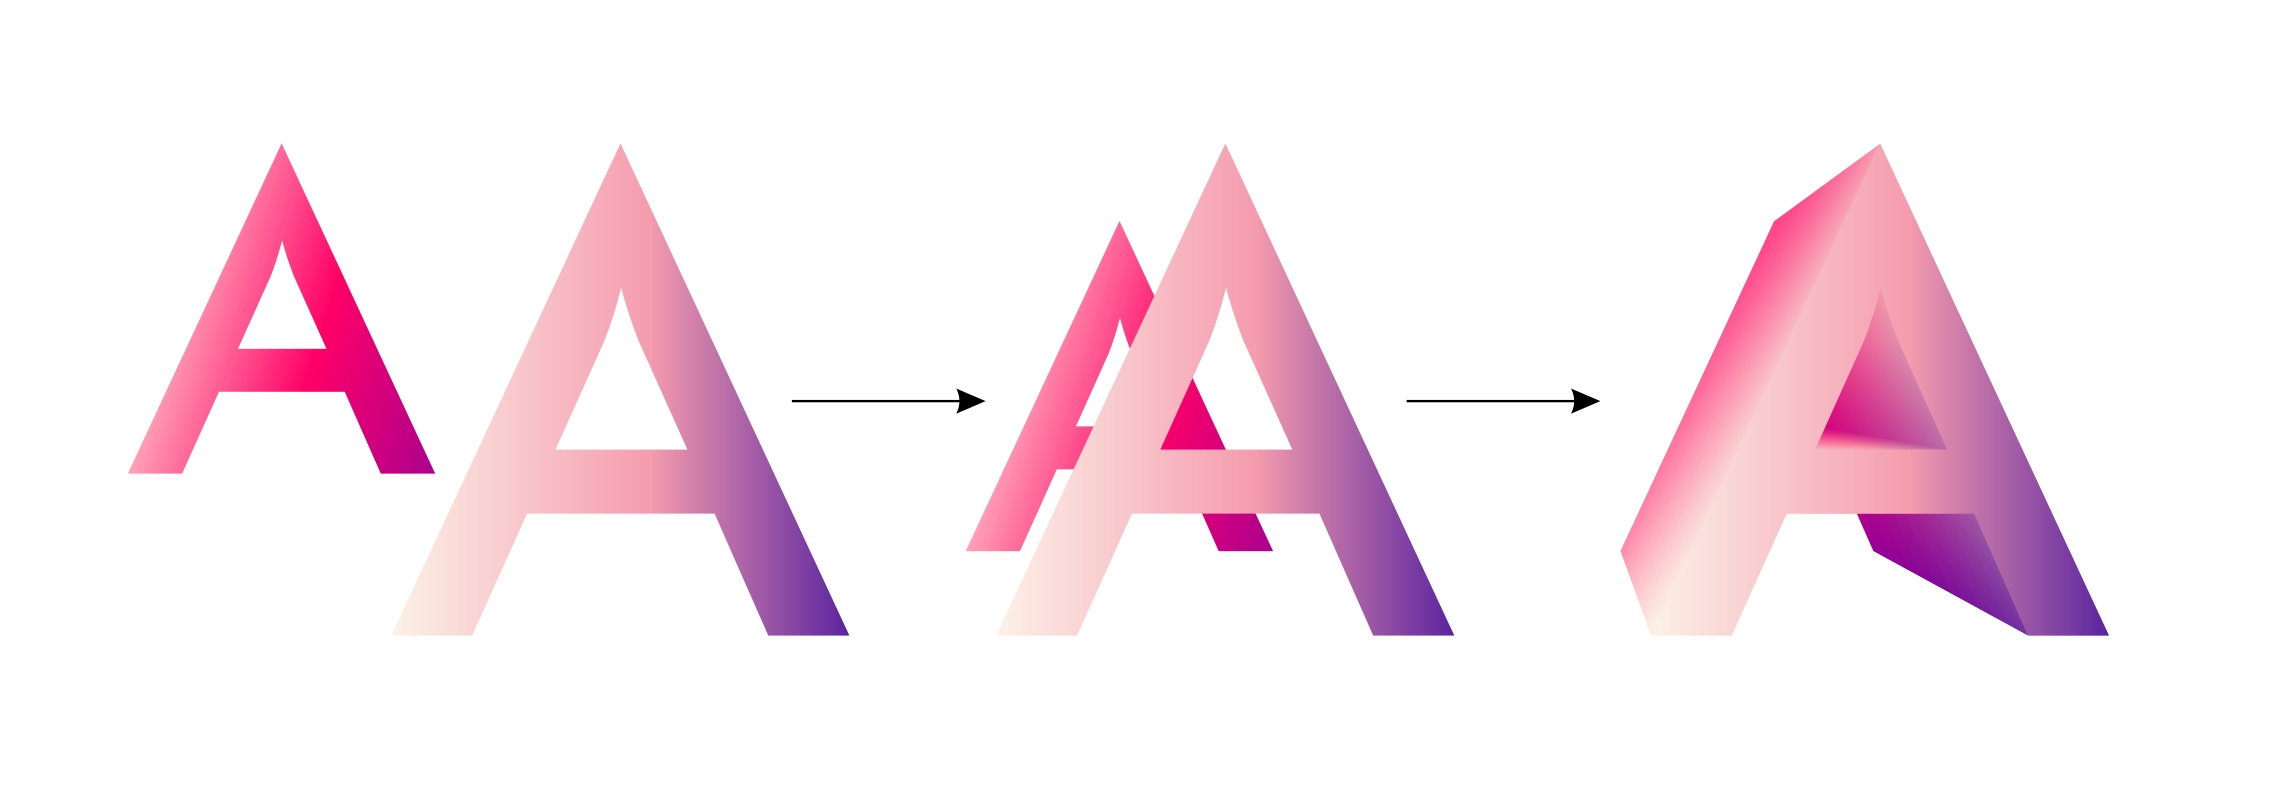
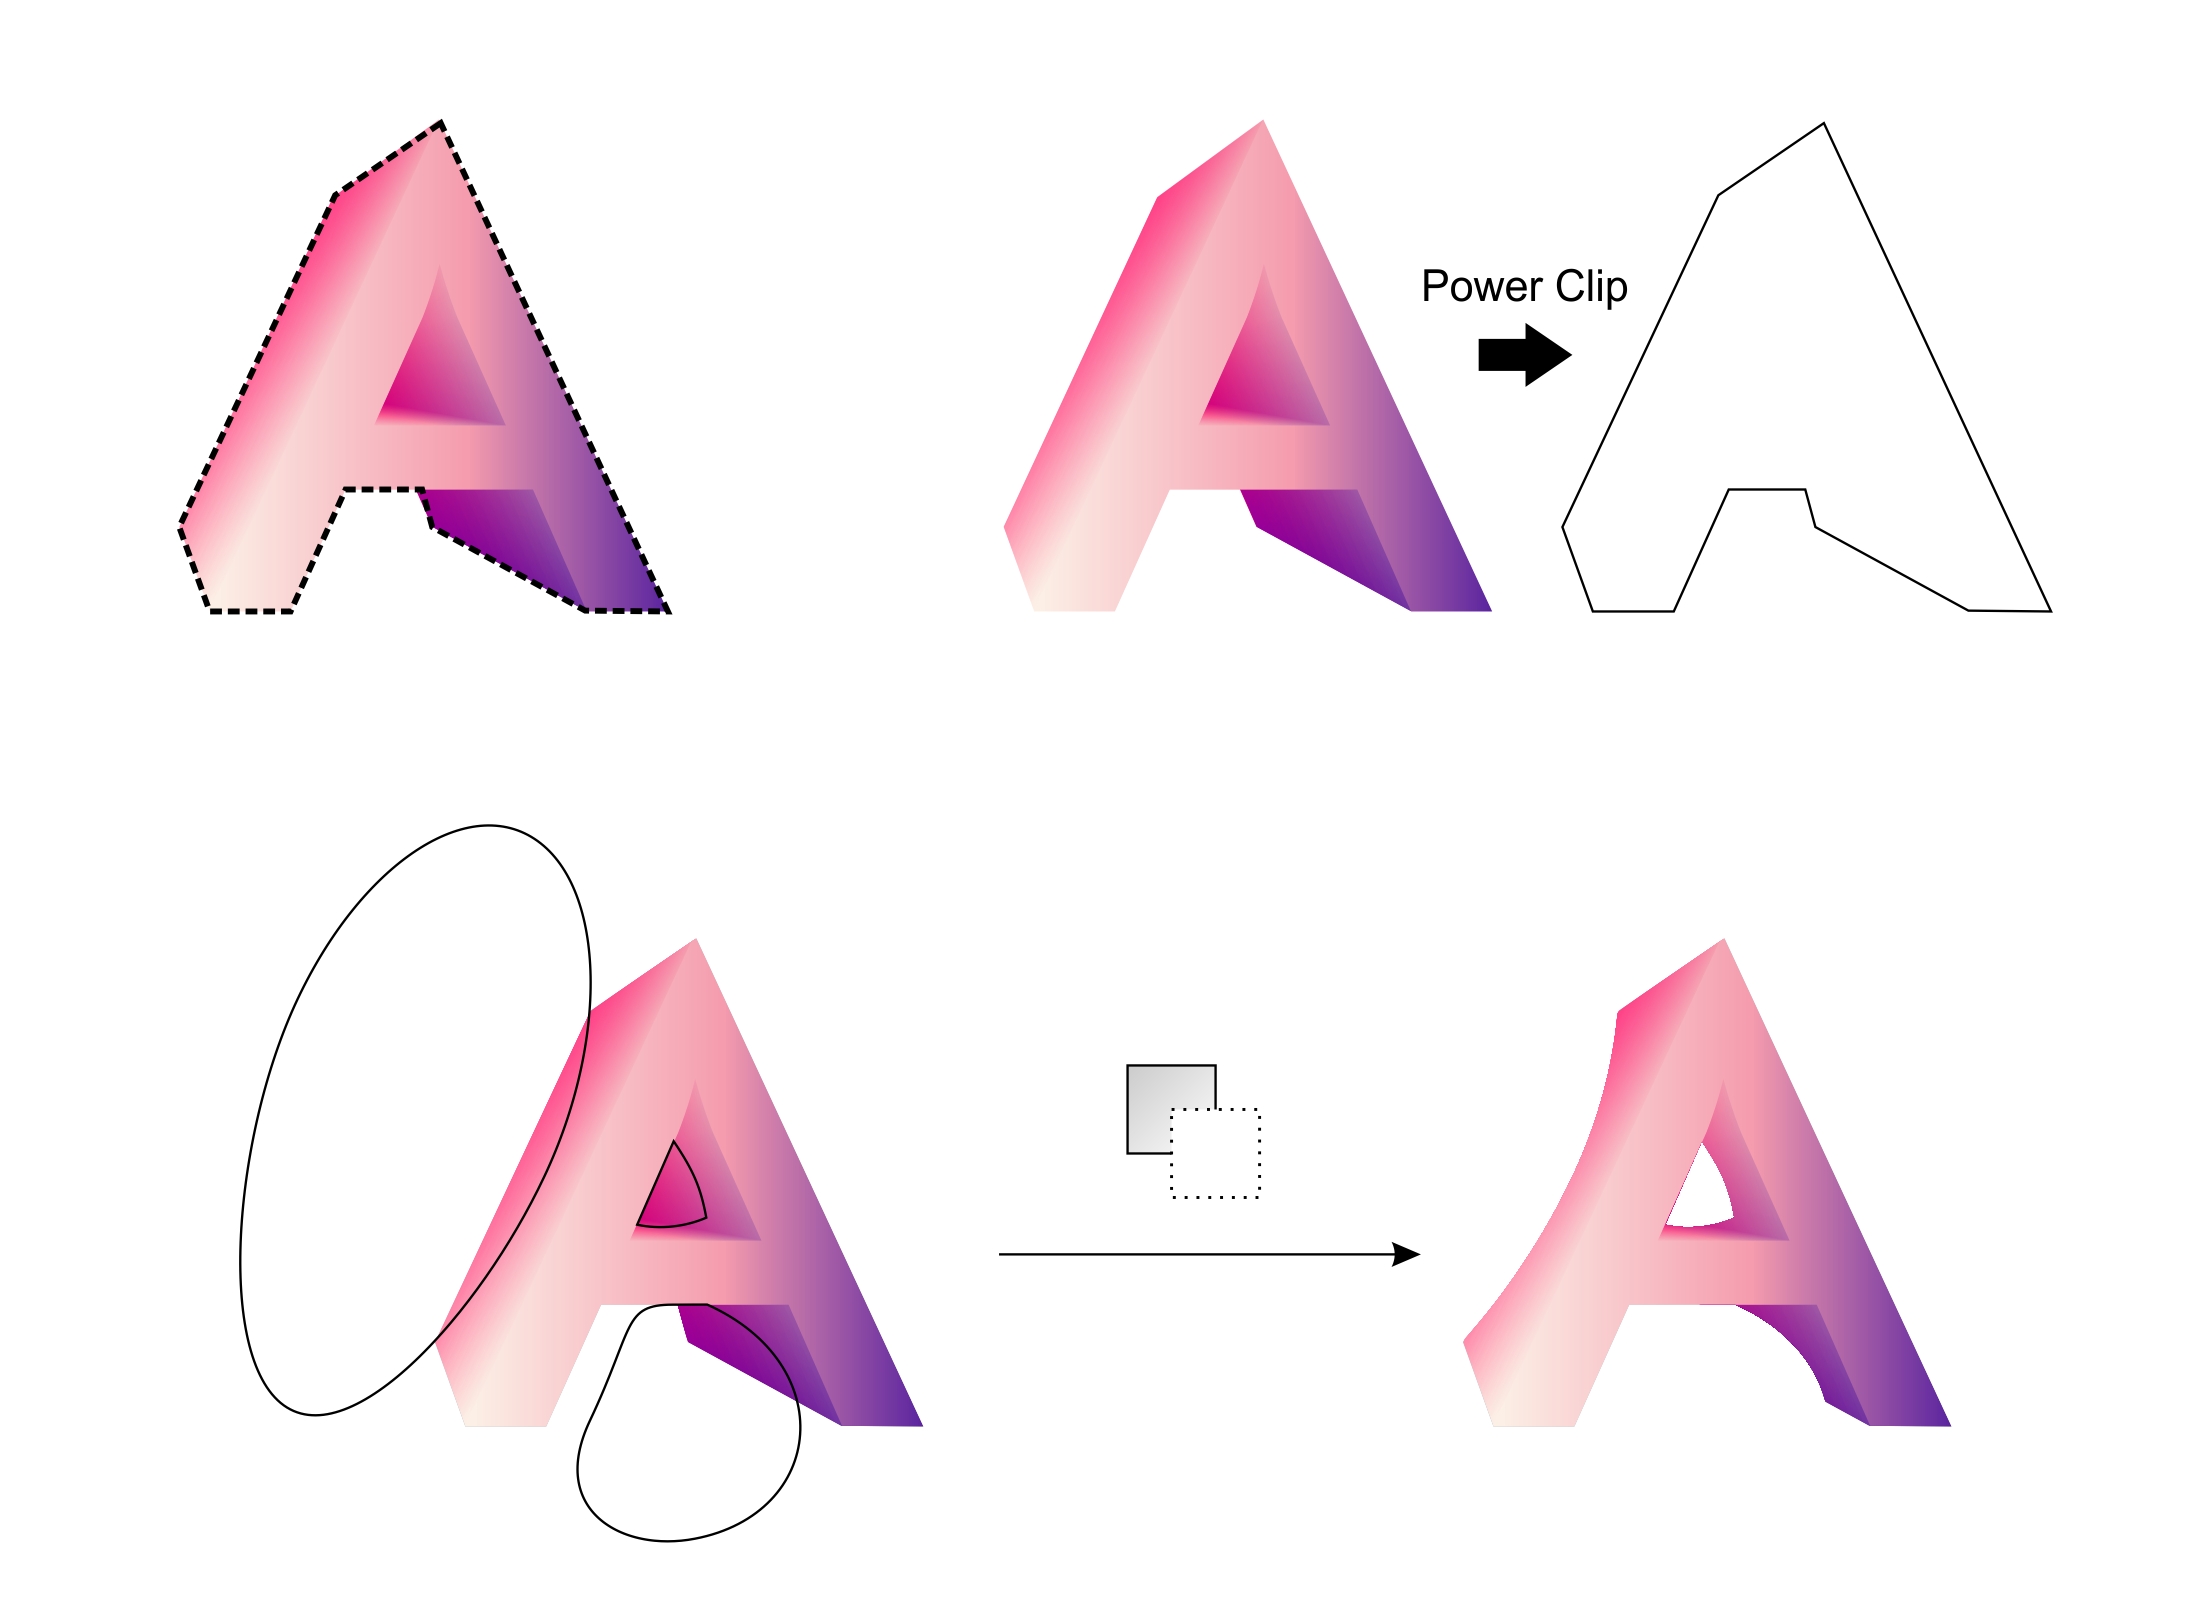
finally i found the solution
I’m master in coreldraw and create this picture in it
In the same way it can be create in illustrator
i will teach you by pictures
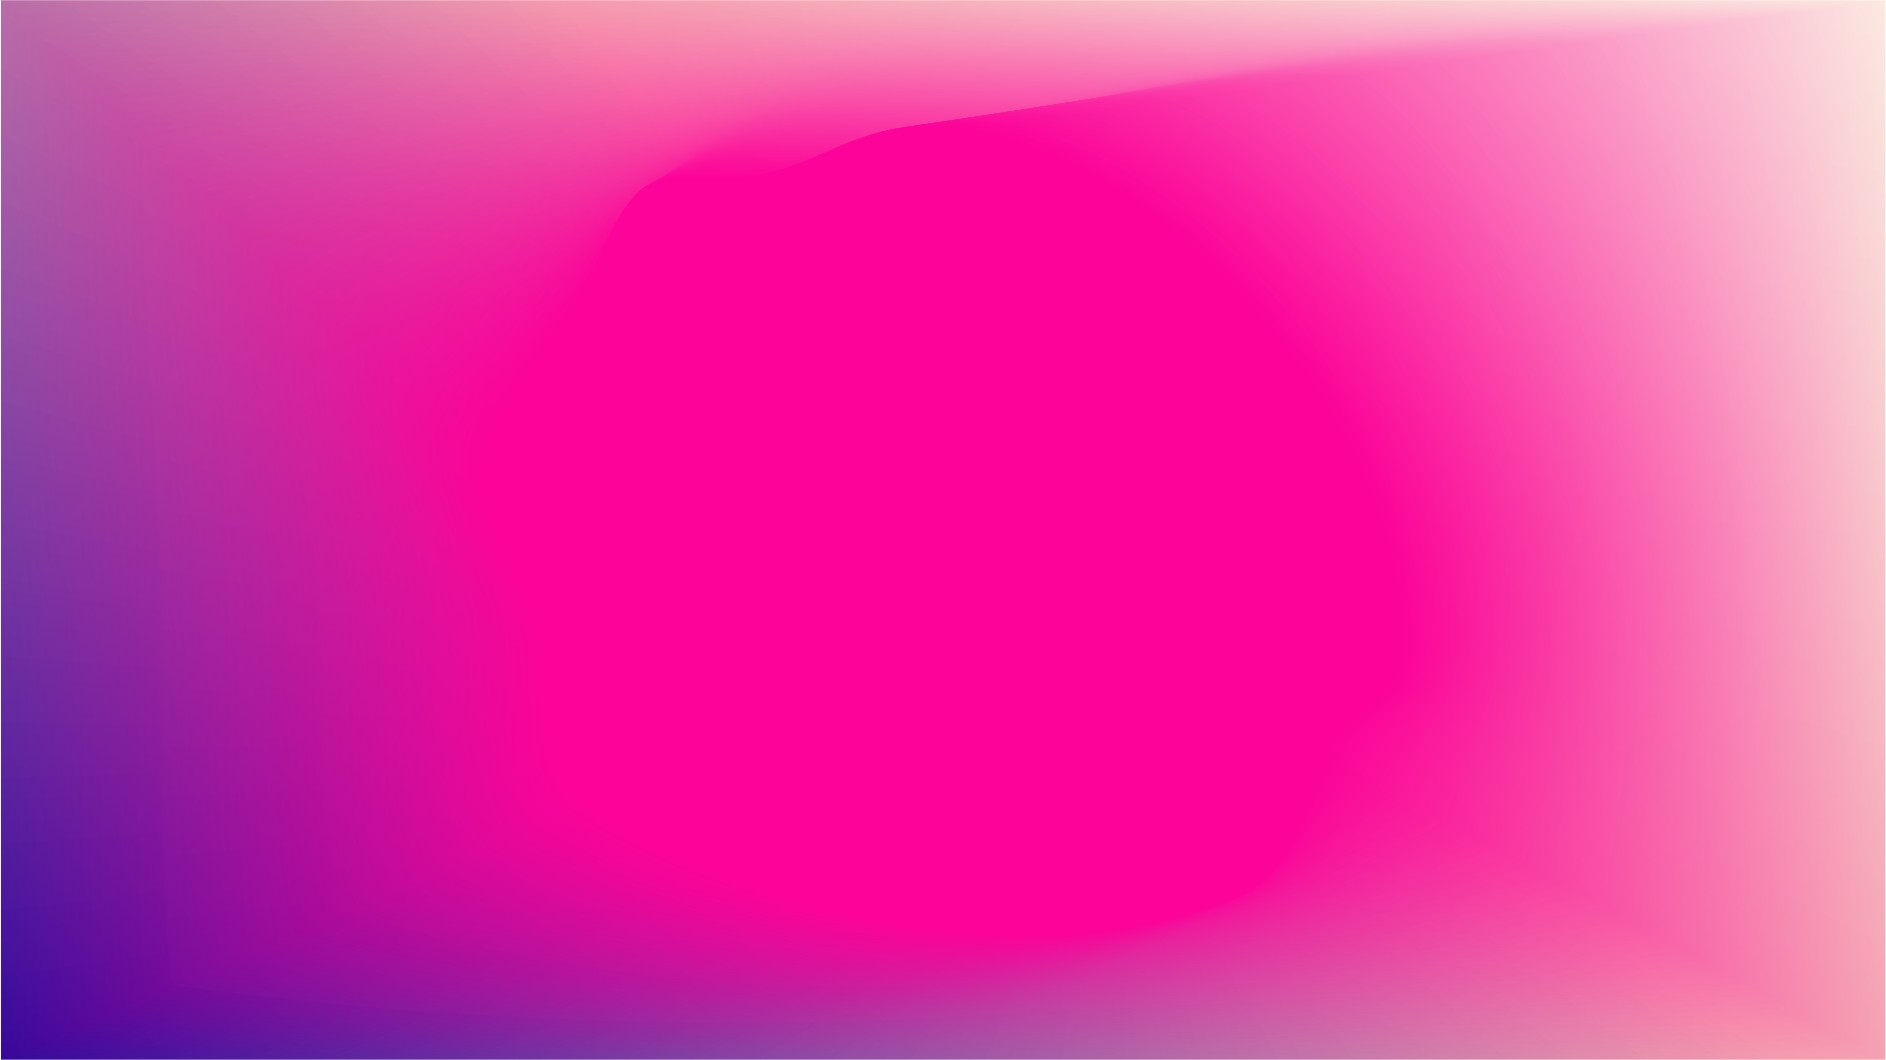
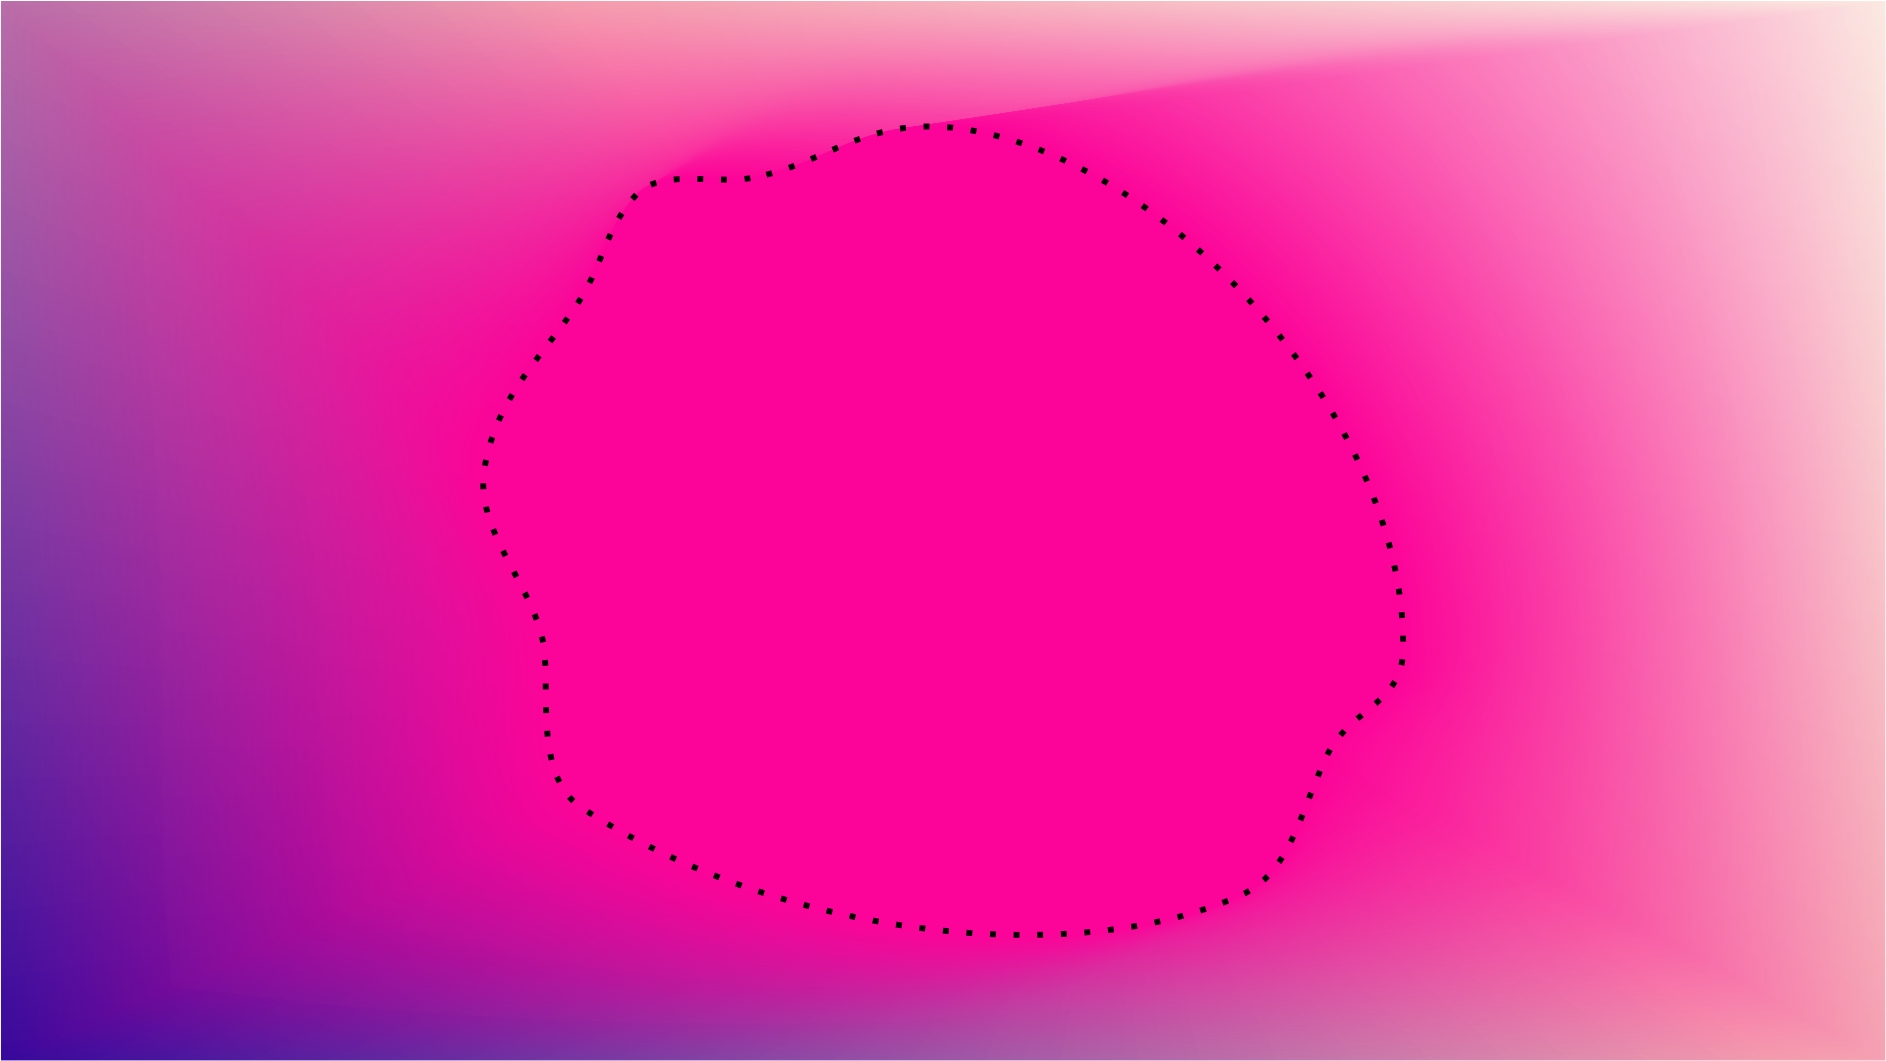
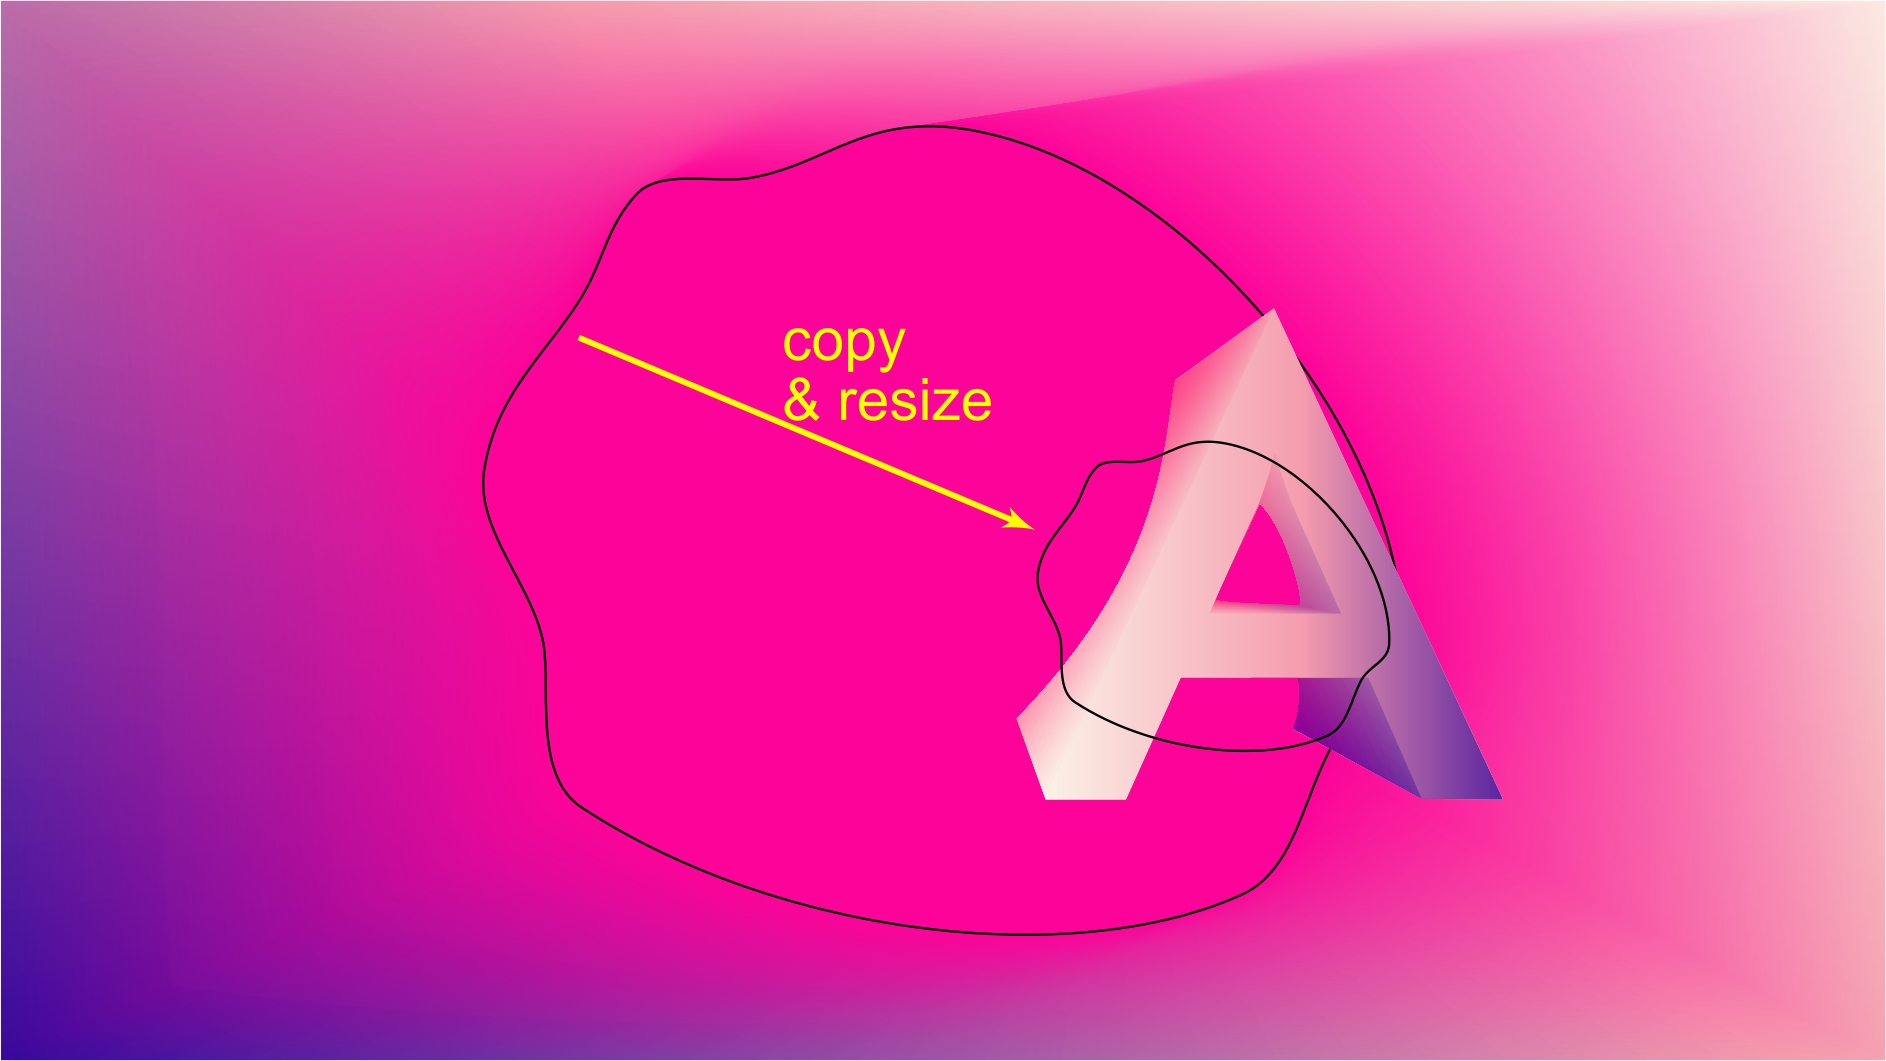
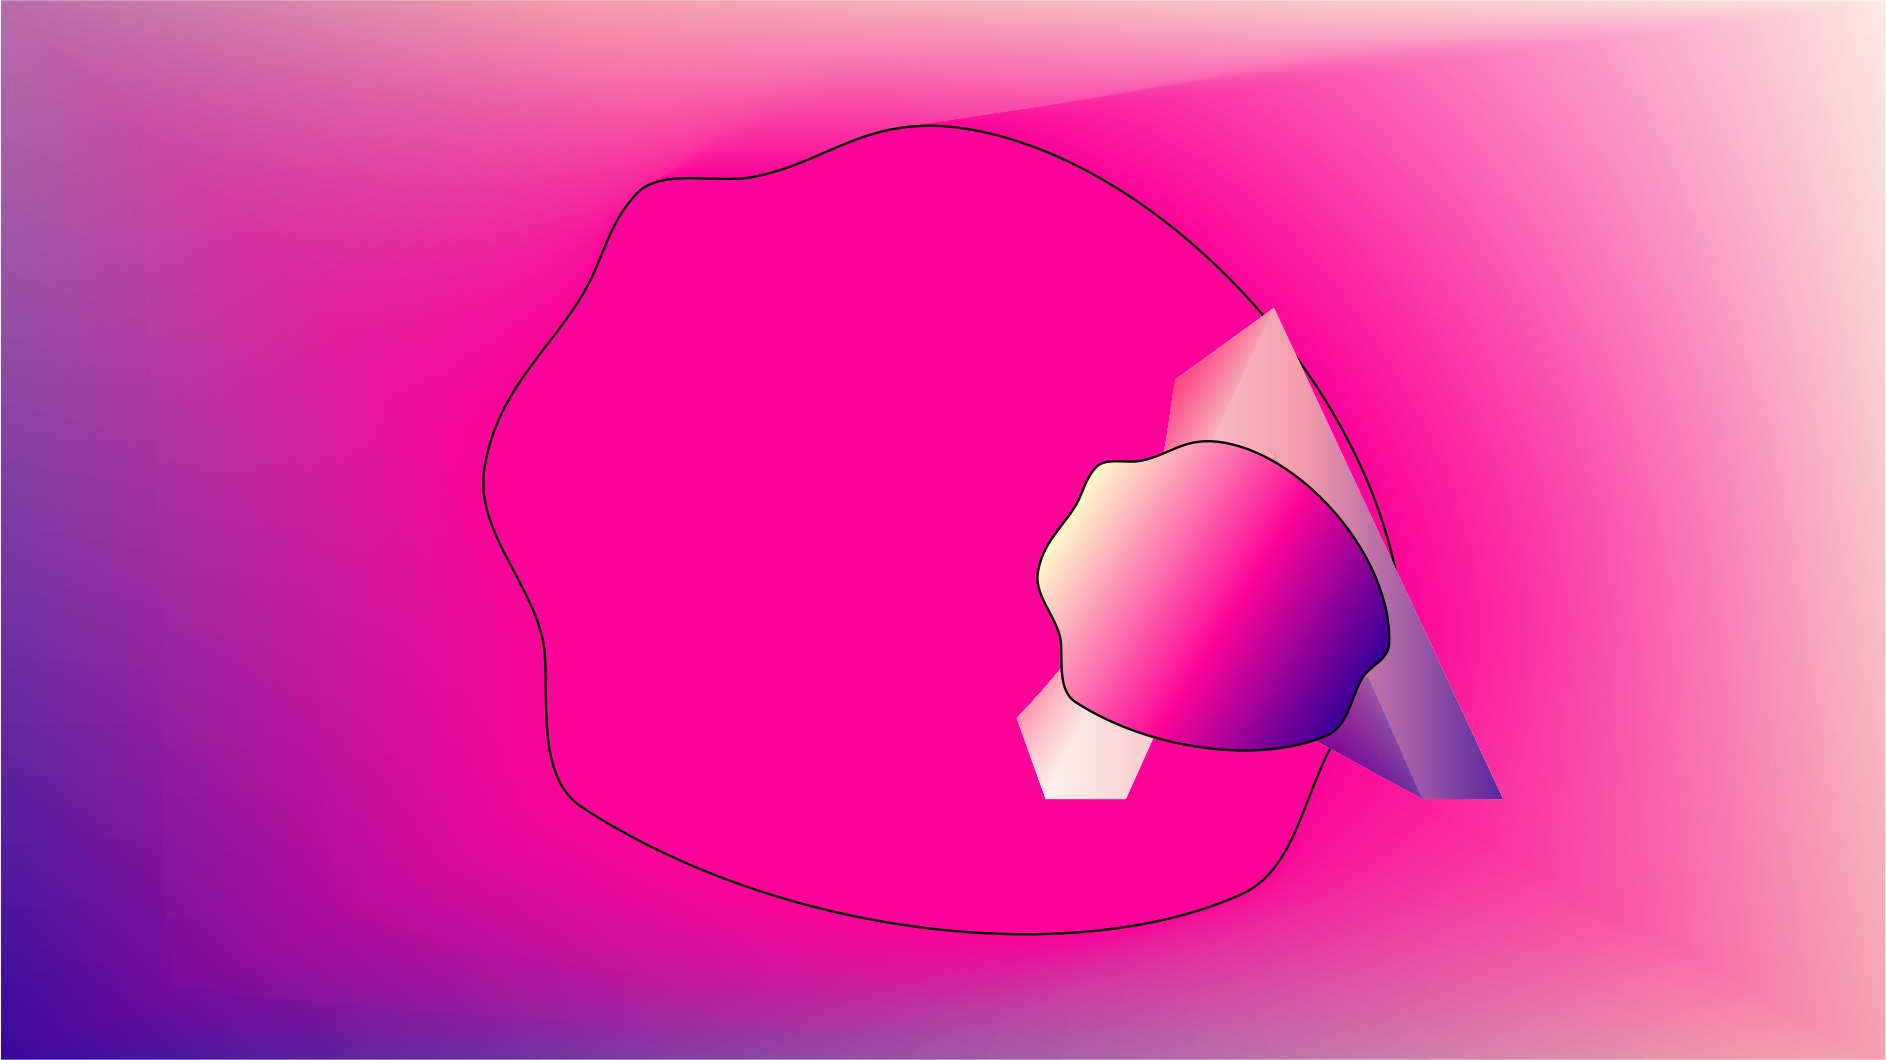
first create magenta shape and gradient background :