Why is Illustrator adding white space when saving as pdf. We designed a 8.5x11 size postcard with bleeds but when we save as PDF it changes the size and adds white space around the edges. Is it the clipping masks causing this? Appreciate any tips.
Do you have bleed and crop marks? The crop marks normally need somewhere to go. Otherwise they would be cut off.
Are you using “fit to page”?
That will give you the clear borders that your local deskjet printer would want.
1 Like
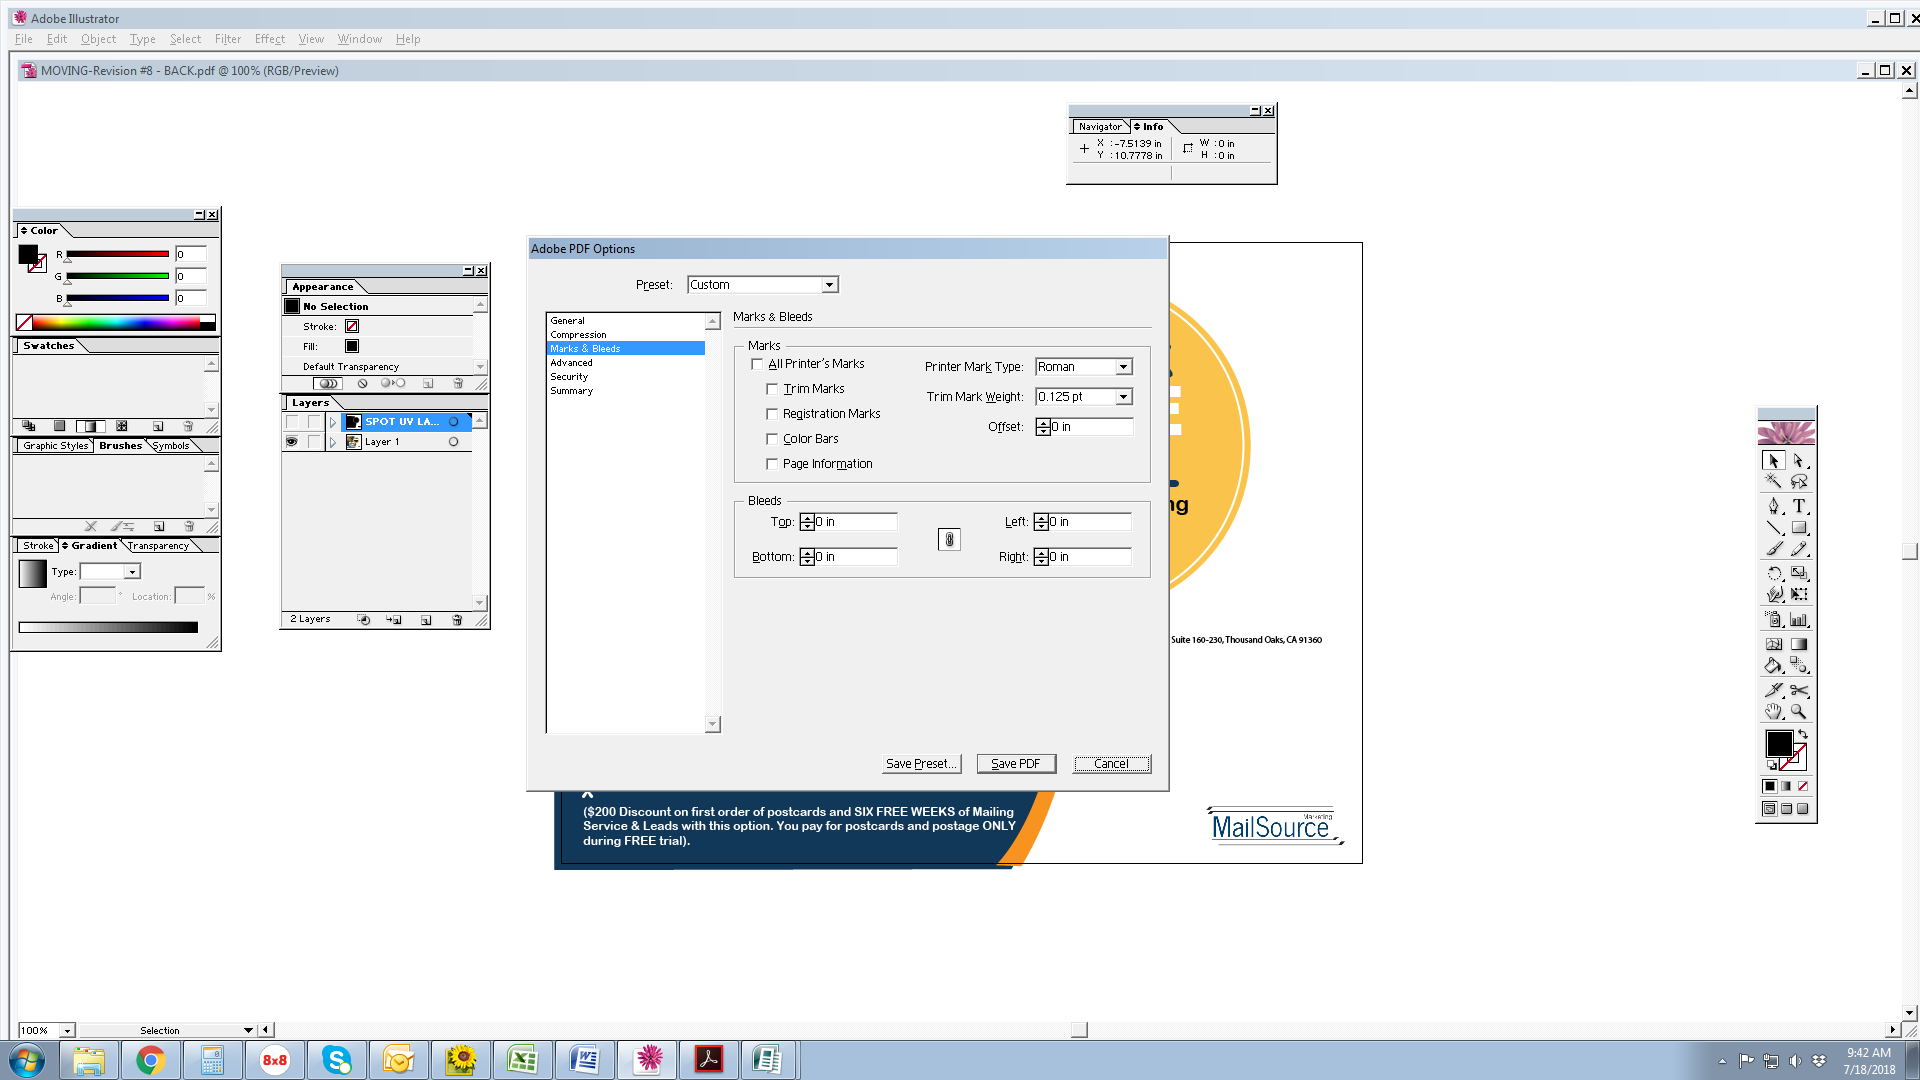
Double check the artboard size and confirm it’s 8.5x11. While exporting ensure you’re exporting with document bleed settings. Adding crop marks will increase the document area further than the bleed extends, if you uncheck “trim/crop marks” you should get a document size equal to your document size + Plus Bleed. Which should be 8.75x11.25.
1 Like
Thanks for your reply. We are sending this artwork for digital offset trade printing house. We have added a .125" bleed on all four side margins in the Marks and Bleeds. When we view the PDF after exporting, it has a white border all around the postcard and the final size that pops us is 11.25"x8.75" What should options should we select to make the white border disappear and the artwork to be flush on all edges and still have final size to be 11.5x8.75 inches? The bleed should be on the artwork not the white border.
Not sure whether you believe you got a different result at some point, but what you’re describing is the expected behavior. Saving as PDF is essentially saving “a print,” and the reason you add bleed is to print it, (then trim).
Here’s a 2" x 2" artboard set up with .125 bleed on all sides and some bleeding stuff added:
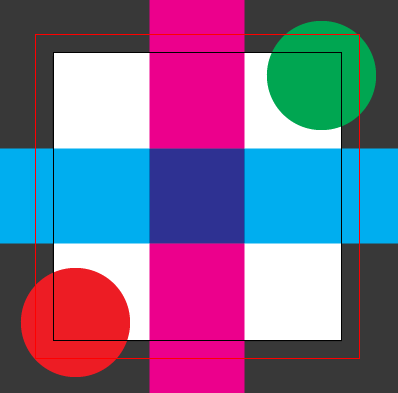
Here it is saved as PDF, displayed in Acrobat with Art/Trim/Bleed boxes turned on:
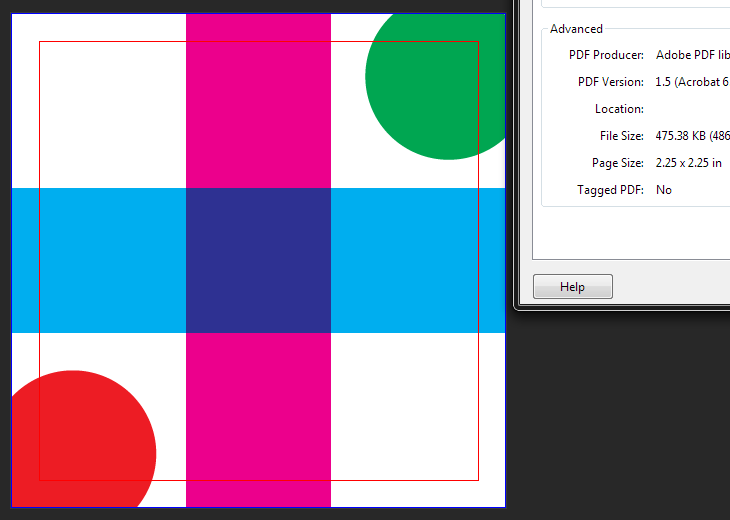
The red guide is the trim box (2" x 2"), and the Page size is the Artboard + bleed. All normal and correct.
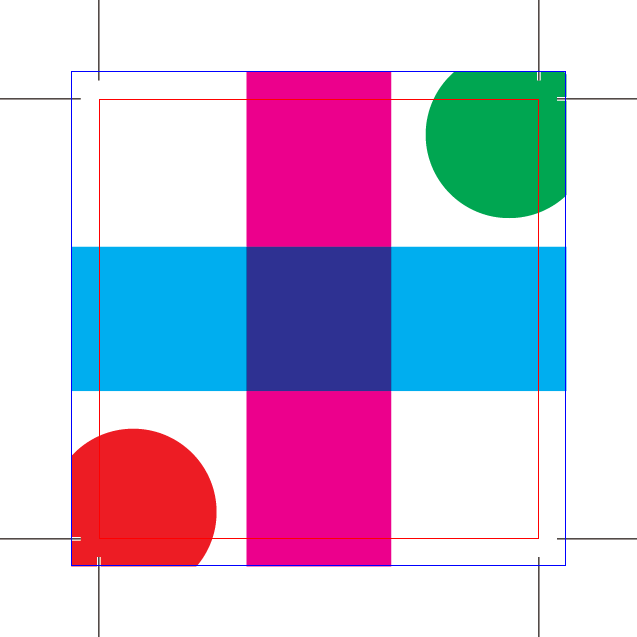
Here it is saved again with Trim Marks. This is how it should go to your printer. The bleed must have paper under it to be of any use. By the way, the page size grows to 2.92" x 2.92" to accommodate the trim marks. 2" x 2" (or in your case 8.5 x 11) isn’t the paper size, it’s the trim size.
It sounds like you’ve turned on bleed on export, but your artwork itself was not setup to bleed off the edge. That’s something you need to do. The export does not “extend” the art to bleed off the edges. That’s something you have to manually do to the artwork in your file prior to exporting it.
Biggs had it right…
Actually, Craig Could be right here also. I never considered the artist actually not designing the piece to bleed. Simply turning on the bleed or selecting ‘export with bleed’ wont actually create a bleed for you. Make sure your artwork extends past the cut line and meets or exceeds the red bleed line.
True, and a good point of course.
But the OP seemed to be questioning the addition of the bleed to the PDF page size, which happens whether there is art there or not.
Thanks for your replies guys. So what I did is changed my artwork to 8.625 x 11.125 in the Document Setup. So when I do Save as PDF (Our Illustrator version doesn’t have Export option for PDF only Save As option), I
have the following in Marks and Bleeds: All Marks are unchecked; Trim Mark Weight = .125. In the Bleeds all margins are 0. My final size showing up in PDF is 11.22x8.82. What am I missing out on to not get 11.25x8.75 as my final size?
Why? I don’t get it.
I’m not sure I understand the question the way you phrased it, but I thought the page size growing to 11.25 x 8.75 was the original perceived problem…(?) Maybe I’m the one missing something. You would (did?) get 11.25 x 8.75 as your final (PDF) page size if you left your artboard at 11 x 8.5 and set the proper 0.125" bleed on all 4 sides.
The trim mark weight is meaningless if you’re not printing the trim marks.
1 Like