You’re not doing anything wrong – other than trying way too hard to get the proverbial round peg to fit into a square hole. The aspect ratio of the file you’re trying to fit does not match the aspect ratio of the page. There is going to be a white area on the top, bottom or both when you print this. Seriously, I think you are way overthinking this.
2 Likes
oh okay…then I guess will print it as it is..
Thank you guys very much.
This is just the sort of basic problem I have.
Your image is wider than it is tall - that’s what ‘aspect ratio’ is. A4 is taller than it is wide (providing it’s portrait format, not landscape). So if you print it in portrait format you’re always going to have spare paper.
I approach this by thinking - anything I’m printing only needs to be at 300 dots per inch. How wide is the page? A4 is 8.3 inches wide (portrait). The image only needs to be 300 x 8.3 = 2,490 dots wide. For dots read pixels. Sounds as though you can easily resize your image down to 2,490. Anything bigger is a waste of space on the hard drive.
Print it out and, as I say, you’ll have space spare but it will fill the width. You just have to accept that not all images are the same aspect ratio as A4 (1.41) so you’ll always have spare paper.
Everyone else will now correct me!
David
1 Like
I think I can use 2 images and stick it one below other then use free transform tool in Photoshop to fit them on A4 paper using free transform and move tool.
What do you think about that?
Guys,please help,what am I doing wrong and why is this message displaying?
I moved each of the images below the edges of the A4 paper (white background dimensions) I created but I get this annoying message each time I select print command:

“The Image is larger than the Printable Area: some clipping will occur”
Your printer does not print up to the edge of the paper, there are margins where the print head does not reach. If your image goes into these margins it will be ‘clipped’. The margin is commonly 4-5mm so make sure you leave at least that amount clear at the edges of the paper.
Seriously?
2 Likes
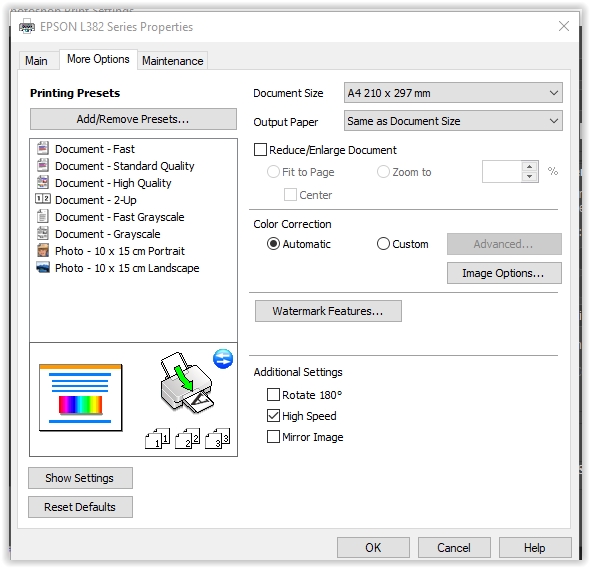
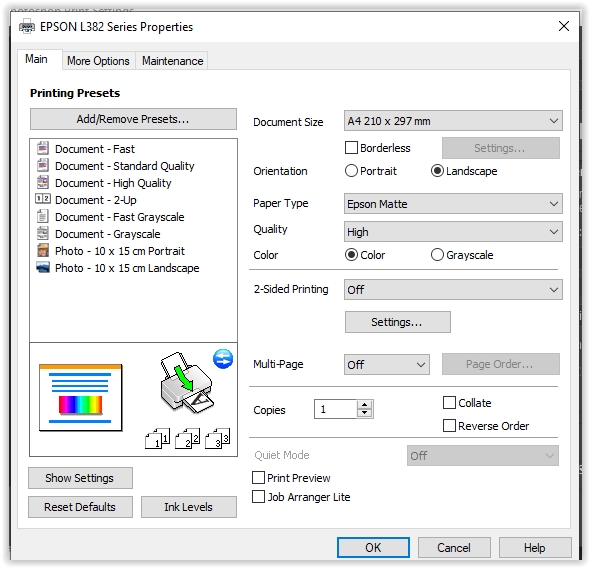
Looks like the ‘Borderless’ option is a problem. Use the setting for ‘Fill Sheet’ or ‘Printable Area’, the wording will vary depending on your software.
no such,only to tickle Borderless ON/OFF
So either turn Borderless off or set the print size to 95% or whatever makes it fit.
Do you have a budget for this project? If so, I’d recommend you hire a qualified designer to help you out. This table could be recreated in a format that would maximize the size of an A4 – or whatever it was you were printing to – and save you the two week’s worth of headache this has been for you.
1 Like
nope no budget…
“If at first you don’t succeed, try, try, try again. Then quit. No point being a damn fool about it.”
– W.C. Fields via Thomas H. Palmer
Once you have this table printed, will it help generate revenue? Is it integral to a sales process? Have you missed out on sales or selling opportunities while you’ve been trying to figure this out yourself? If you had a high quality, scalable version of this table, would it help you generate revenue? Is it at all possible that this table will change or need to be updated down the road? If you answered yes to any of those questions, hire a designer. I get it. Times are suddenly tough. If hiring a designer means you can’t put food on the table, keep working on this yourself. But the phrase “penny wise, pound foolish” may be applicable in this situation.
This thing has entered the realm of being a Twilight Zone episode.
If I am understanding this … you need to click reduce/enlarge.
If boarderless isn’t working you need to either check fit to page or reduce it to 95% or whatever percentage fits it all on your page.