I have a question that might be really dumb. When I setup trim lines on my document, and I cut them, the last side that needs to be cut no longer has 2 trim marks to align because they were cut off. What do you guys do in this case? Draw a trim line by hand? I keep messing up my printings.
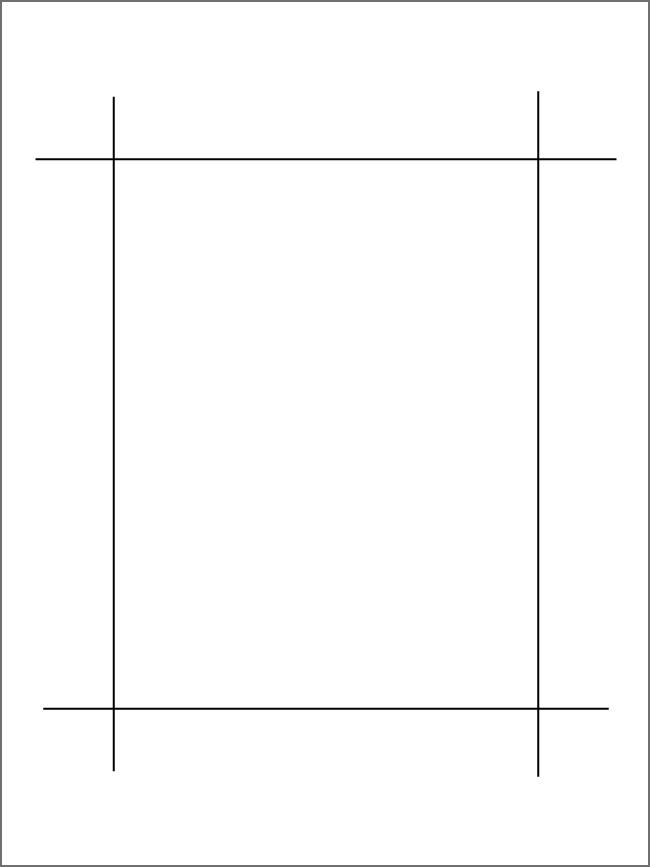
Don’t cut all the way to the edges of the paper. So, like my basic example above, the black lines in teh middle are the cust you make. As long as you don’t cut all the way to the edges of your paper, you’re good to go.
When I add trim marks on Illustrator it is only in the corners. Is a full line called something different? I will say I never look at all the options lol.
They’re only at the corners (outside the bleed area) because if they extend all the way down and across the image, pieces of them would end up being cropped into the image. You’d never have crop marks extend all the way down and across, so given that it never happens, there’s no name for such a thing.
I guess i’m not explaining my question correctly. When you are trimming your document, at the end you will have 1 side left to cut without any trim marks left because you cut off all the other trim marks. How will you know where to cut the last side?
You’re asking about trimming something yourself, by hand, with an X-Acto knife, right? Or are you referring to when the printer trims the document?
If you’re doing the X-Acto knife thing, that’s already been explained above — don’t make the cut all the way to the edge. That way, the piece of paper stays in one piece until you’ve cut out the middle. If you’re using a paper cutter to do it, don’t. A typical paper cutter will slice off the entire edge, leaving you with the problem you described.
As for what printers do, they have carefully calibrated guillotine cutters that do this.
In this situation i’m talking about doing it myself with an X-Acto knife. It’s just for a school project, but for example I’m working on a business card that cannot have that extra white space to show the trim markings. It needs to be trimmed to the edge.
Well, I suppose you could put little tic marks with a pencil where the cuts should go, then erase them after you’ve cut them out. You could also print them out on a larger sheet of cover stock where you could use actual trim marks. Or you could print fewer of them on the piece of stock.
Student projects are sort of make-it-up-as-you go while improvising solutions to problems you’ll never run into in professional life.
The simple answer is the final cuts are done via measurement.
It’s the only way to guarantee proper size in the end. Otherwise you’re trimming your piece short, or if it has a bleed, over trimming.
So get your ruler, I know you have it somewhere, and use it accordingly
If I’m cutting something like this with a ruler and a scalpel, I just don’t remove the pieces until I’ve cut out all the parts. That way, you won’t be removing your all trim marks before you’ve had a chance to cut.
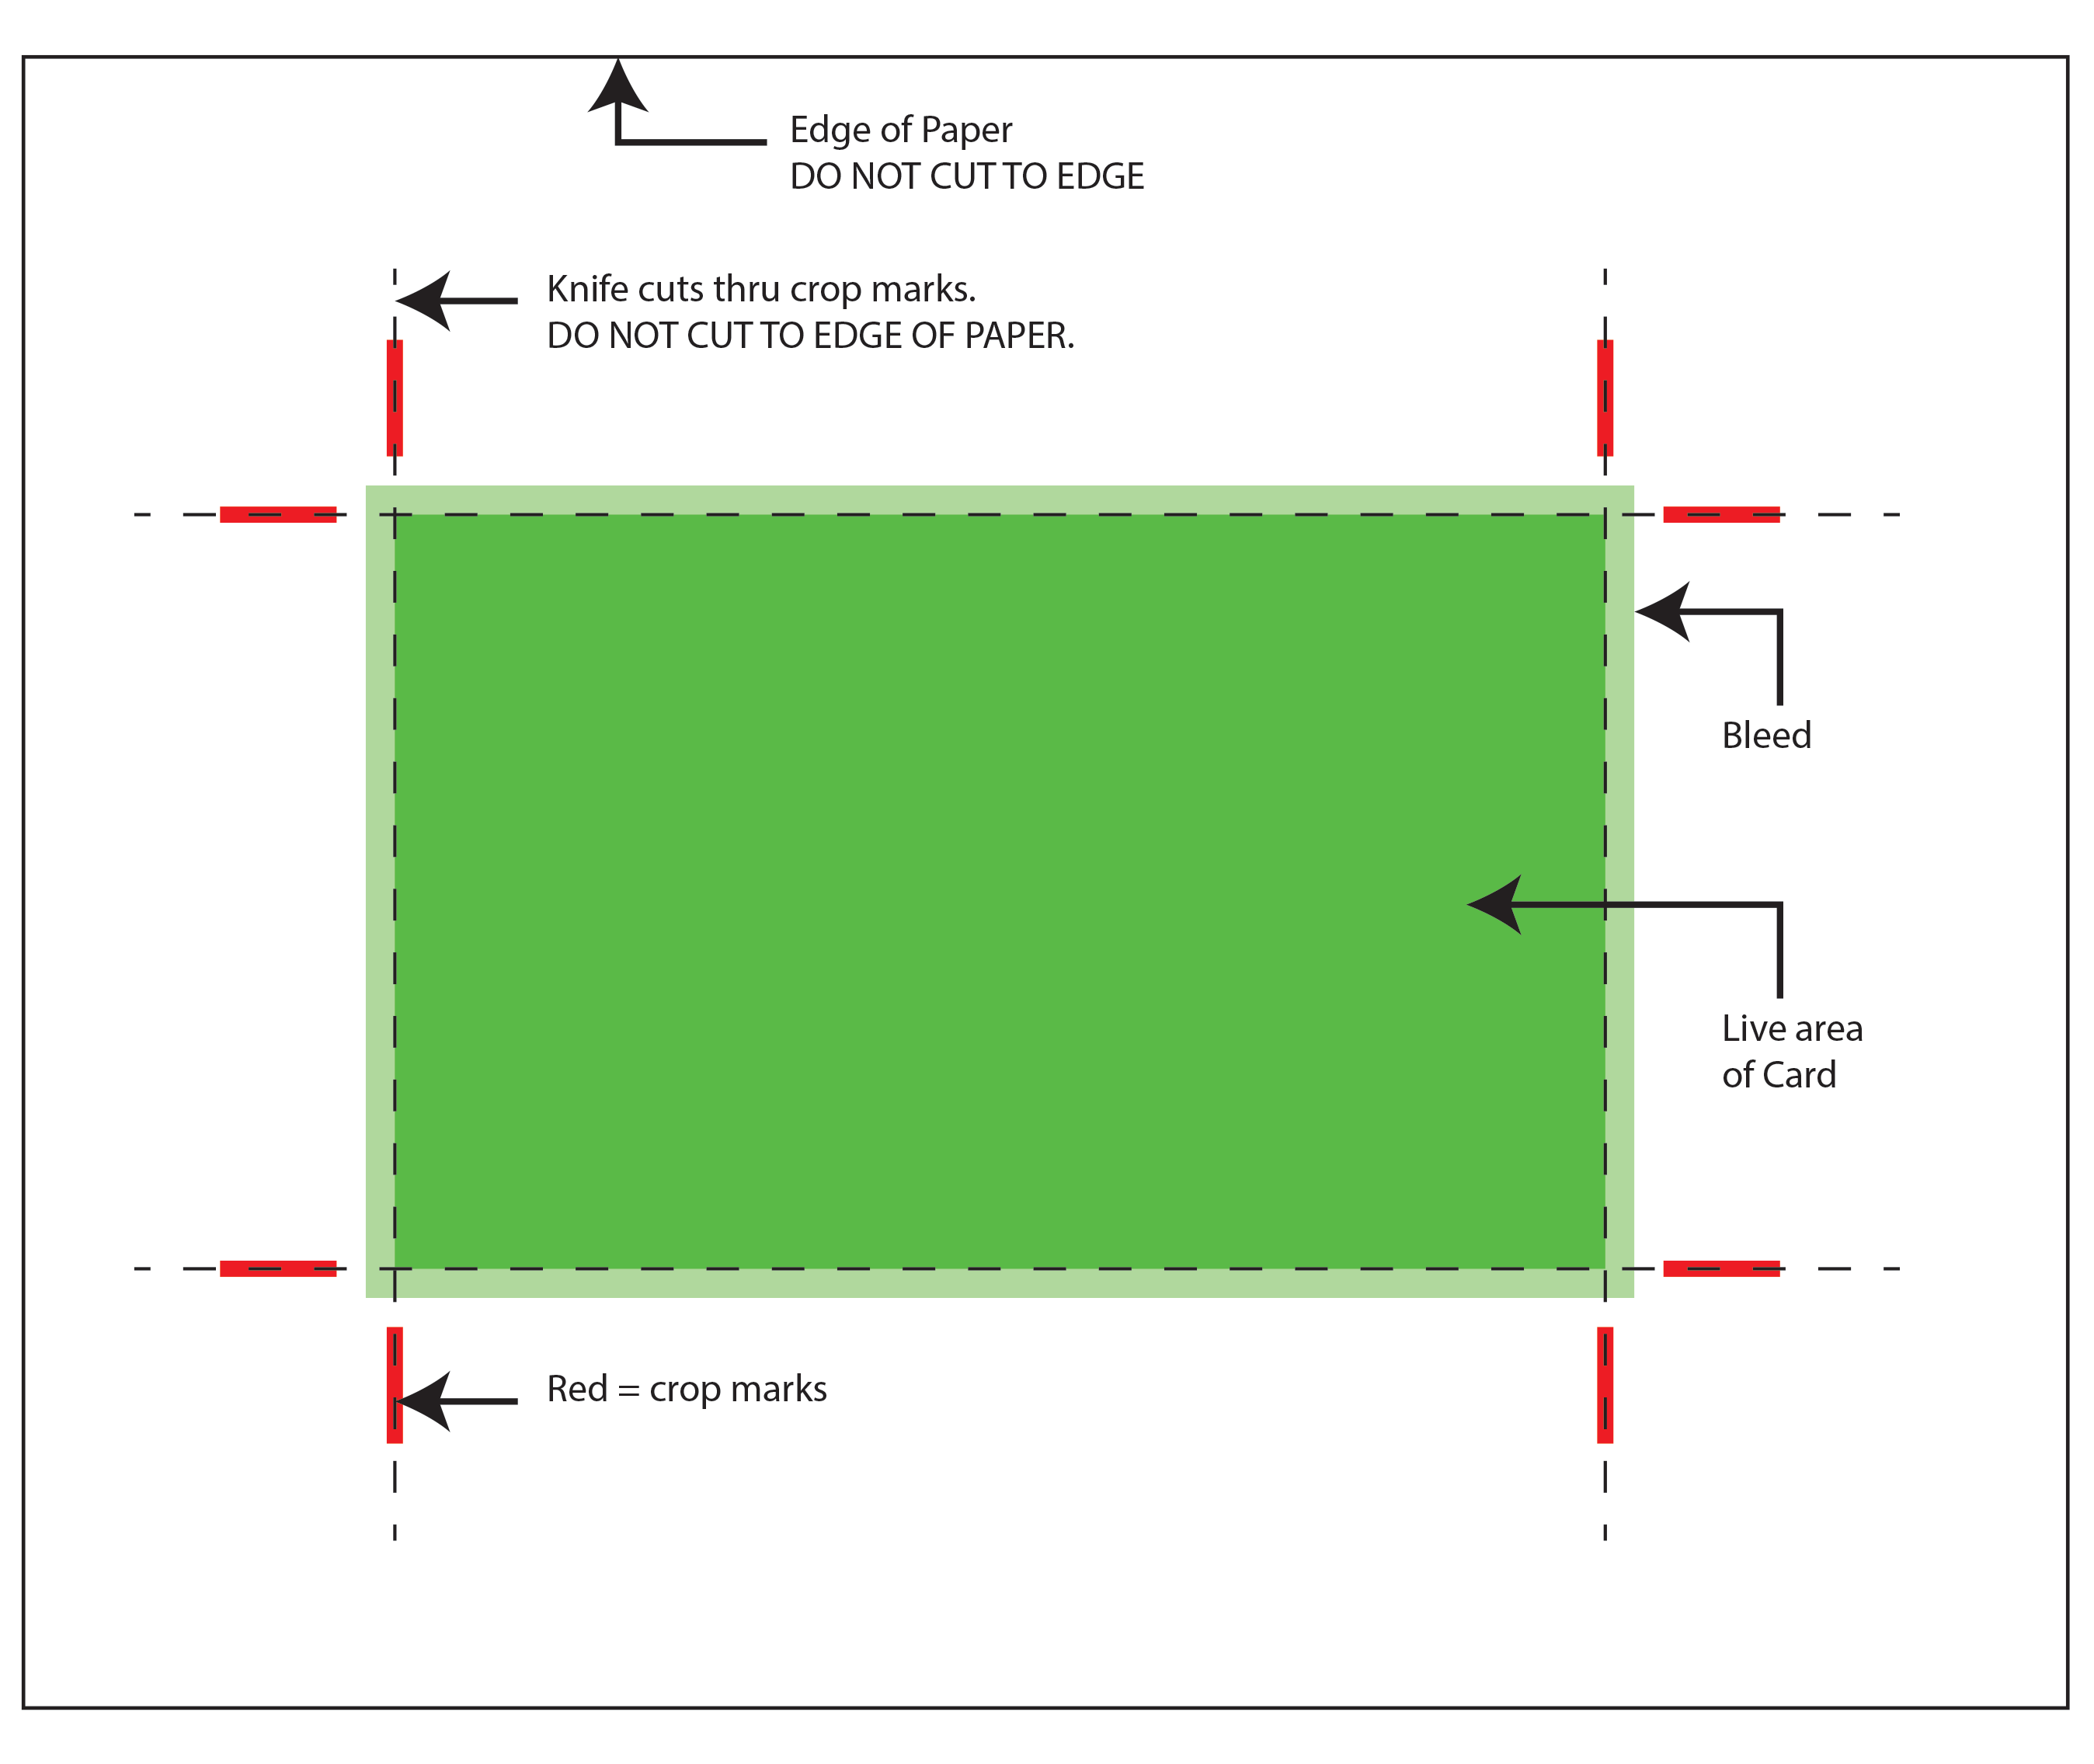
Yes, it’s called the Dieline. That is where the actual cut will be.
Versus “clear space” or safe print area" which is 1/18" inside the Dieline on digital and 1/8" Flexographic.
Bleed area is the extension of the background to make up for the shift on industrial machines. It is 1/16" larger than the DIE(line) for digital and 1/8" for flexographic.
Well, not exactly — at least not in any jargon I’m familiar with. It’s only called a dieline if a die needs to be made/used to make the cut. In those instances, the dieline, as you already know, is typically placed on a non-printing layer and serves to determine both where the cut will take place and the shape of the cut itself so the die can be made and positioned. In a straight-forward trim, like this one, no die is involved, so even if a non-printing line is drawn in, it’s not really a dieline.