I feel like there should be several obvious ways that I can recreate this! Have tried a couple but am no getting quite right. Any help would be much appreciated.

Read through the following thread about a similar problem.
Also check out this post:
That picture / illustrations… I have to look away. It does something weird to my mind. I am not joking…
Appearance Palette in Illustrator is your friend. I have a lot of posts here on GDF explaining it. Here is what I did.
Step 1: draw two circles. Select them both and got o Blend/Make. Afterwards select the object and choose Blend/Blend Options and set to specific steps. In this case I chose 9.
Step 2: select the spline of the blend, and using the Anchor Point tool adjust each end of the spline (you can see the handles after I adjusted them in my screenshot.)
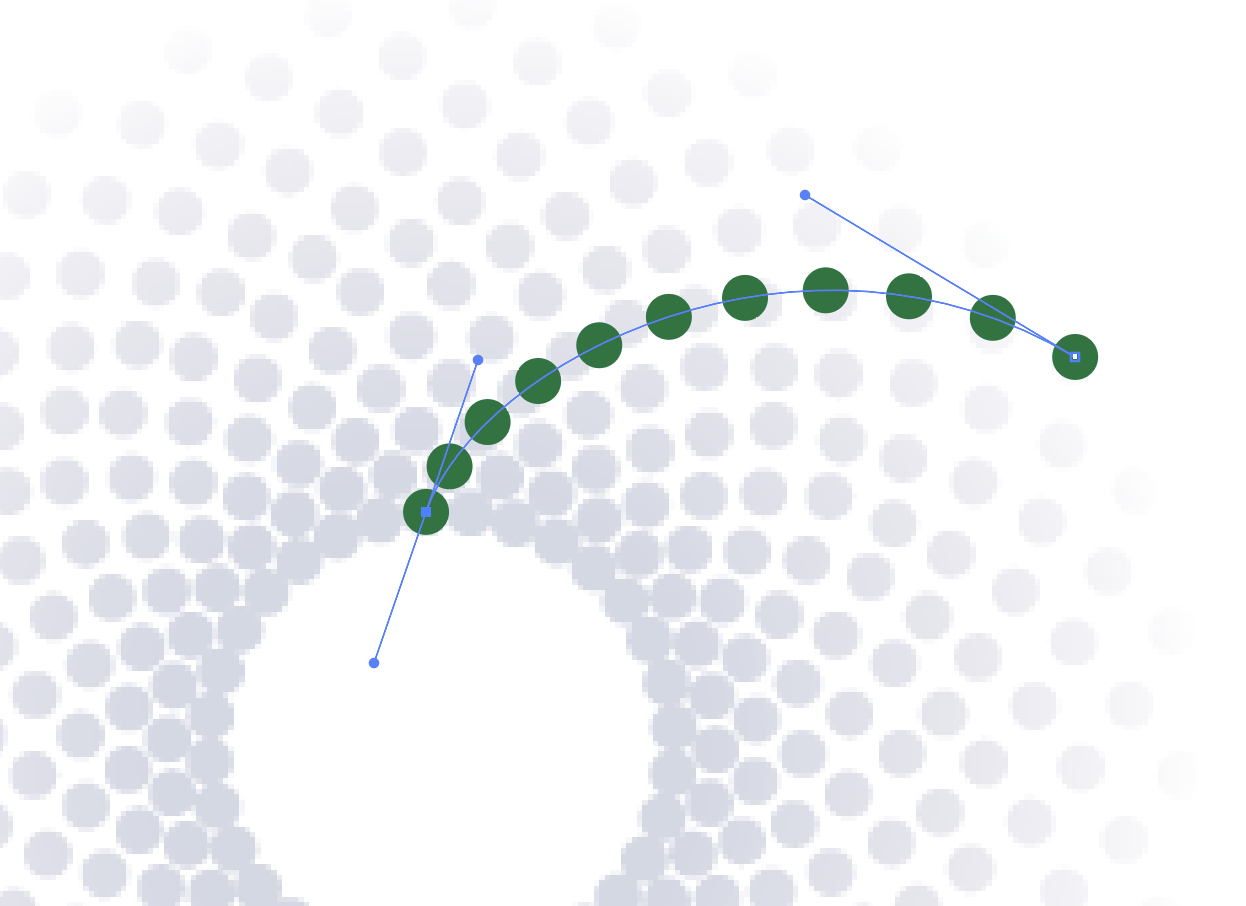
Step 3: Double click into the blended group and select the right hand circle, change it’s color swatch to a lighter color to mimic the fade.

Step 4: I drew a circle to find roughly the center point of the hollow middle, and drew guides to pinpoint it.
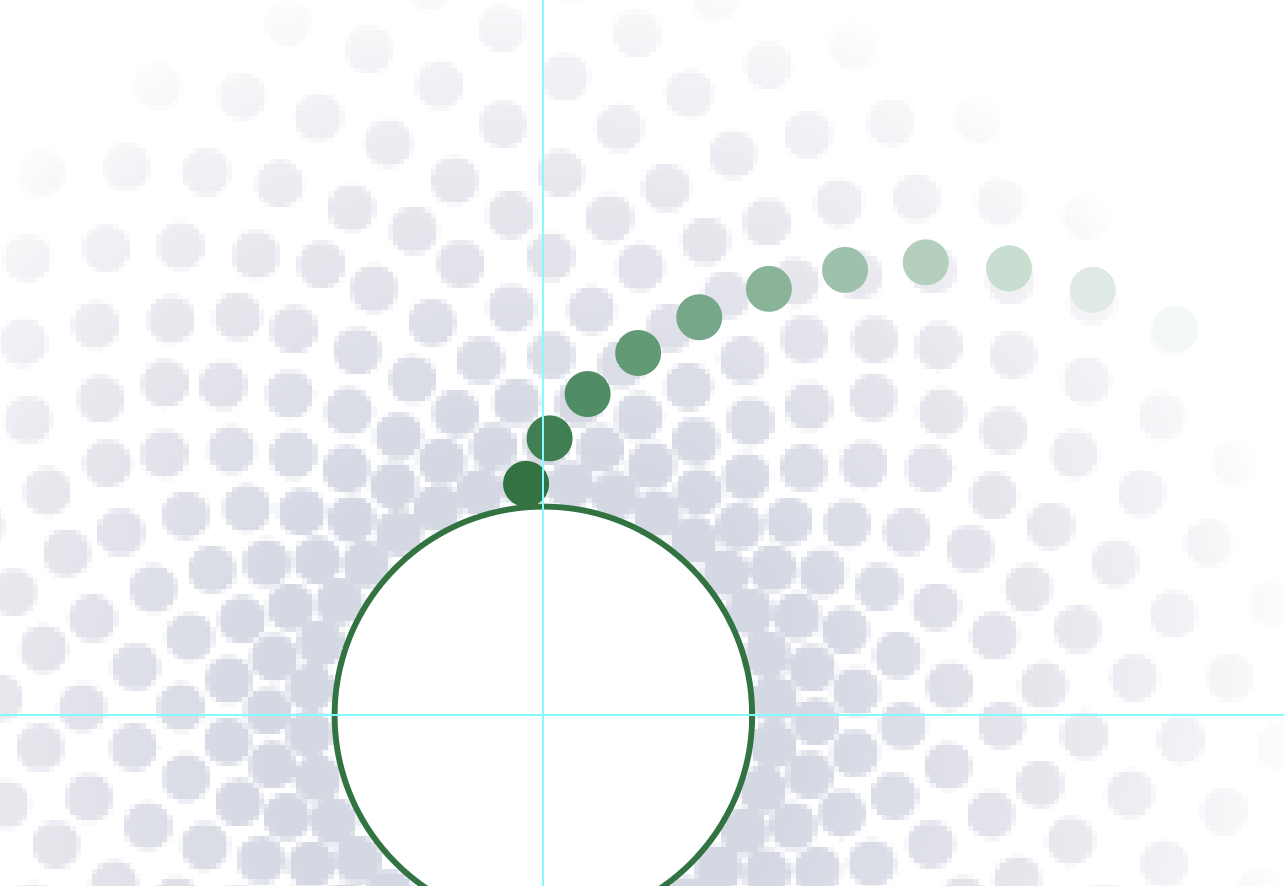
Step 5: Draw a single point using the pen tool at the center of the two guides. I also realized I needed my blended circles to be above and to the right for my next step to work easier, so I moved them.
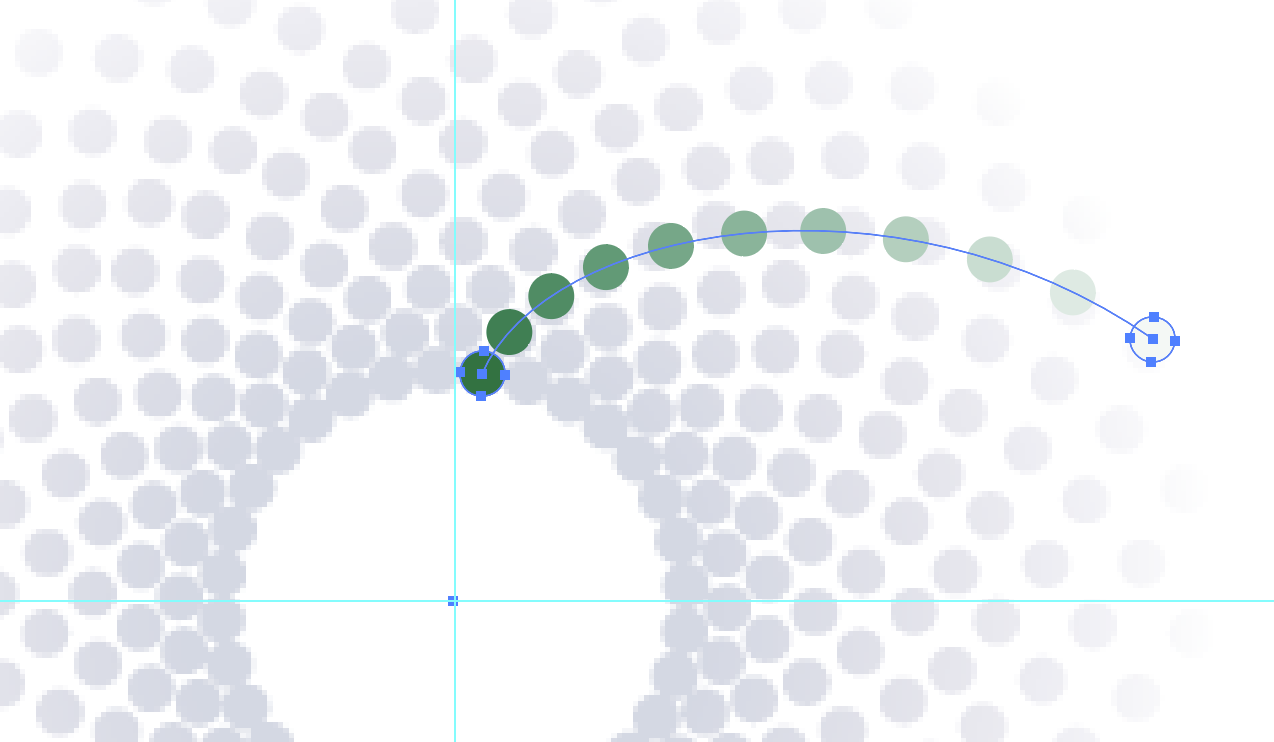
Step 6: Group the dot and blended circles. Then, In the Appearance Palette select Distort and Transform/Transform from the “fx” dialog (bottom of the appearance palette.)
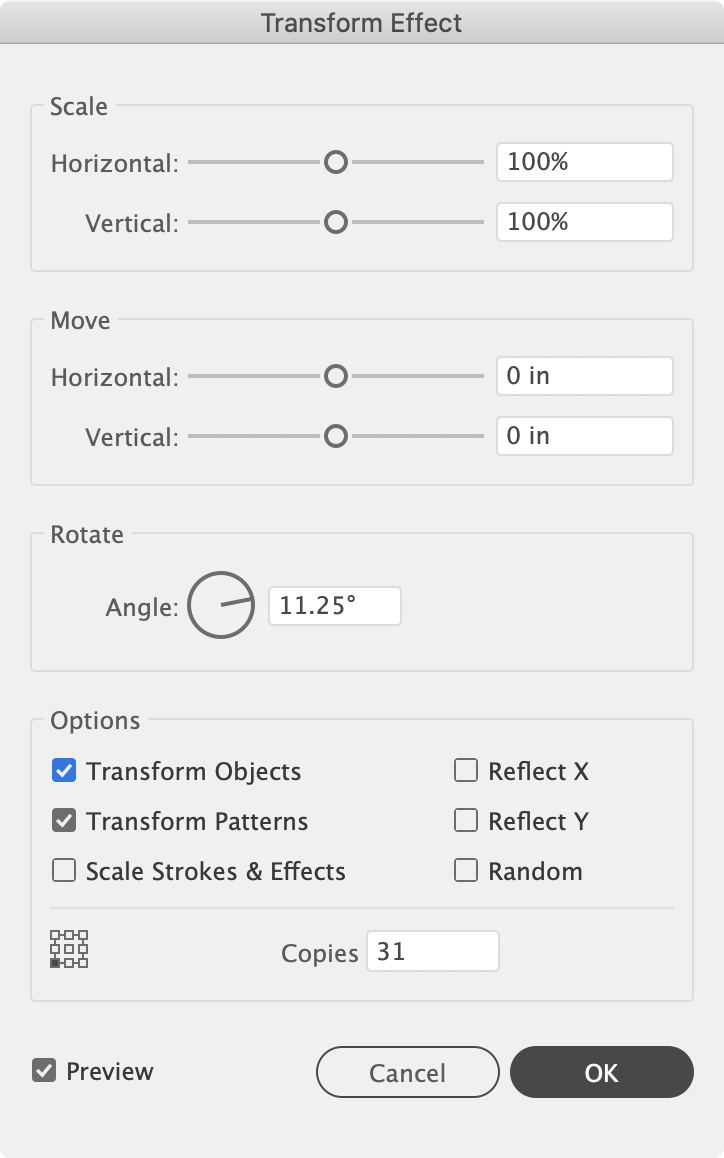
Step 7: Here is where a little match comes in. Because I was trying to copy your example more closely, I counted the number of circles around the inside edge of the white opening and saw it was 32 circles. Using that info, within the transform effect dialog I put in 31 for the copies (31 plus the original to make 32) and in the angle I typed 360/32 and let Illustrator do the math for me to get 11.25 degrees. Since a circle is 360 degrees. And lastly, this is where the dot is important. I made sure to select the bottom left point for the object to transform around which was the dot we created at the center of the white opening. That ensures it circles around the “opening” so to speak.
Step 8: The final result after I hid the screened back screenshot of the source image you uploaded.

2 Likes
Oh, and last bit of advice. Once you’re happy with it, select everything and expand the shape to ensure it prints properly if you are printing it. And remove the 32 dots in the center (since you copied it around that original dot, it copied 31 dots on top of the original. You no longer need that dot once expanded.
2 Likes
@CraigB is the appearance palette man!
1 Like
Thank you so much! I really appreciate you taking the time to do this, it’s helped me out massively. Thank you thank you thank you!!!
Not a problem.